
VirtualDub: Splitting AVI files
Ok, it happens often that you need to split AVI into smaller files -- maybe you want to fit your DVD rip into 2 CDs or something. Anyway, this process is extremely easy to do.
Requirements
You really don't need much for this process. First of all, you need to have free space on your HDD -- at least the same amount free that your AVI currently takes. Then, only tool you need for this process is VirtualDub. After you've got these, you're good to go.
Open the original AVI
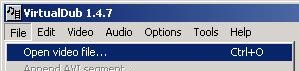 First, open VirtualDub and then from File menu select Open video file.... Now locate your original AVI and click Open.
Adjust audio and video settings
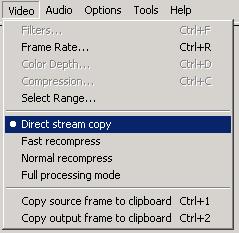 Basically only thing in VirtualDub's video settings that we need to deal with in this guide is the video processing mode.
Go to Video menu and select Direct Stream Copy. This is extremely important to remember, because otherwise VirtualDub tries to re-encode the video file which takes hours and causes the image quality to drop dramatically.
Remember to check also that Direct Stream Copy is selected from Audio menu as well -- normally it should be, but check it (and change it, if it's not selected) anyway.
Check the length
 We need to know the length of the video clip in frames so we can accurately determine how to split the file -- normally people want to split files in half, so we will do it like this in this guide.
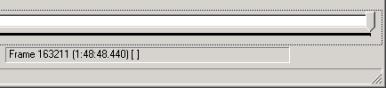
You see the sliders in the bottom of the VirtualDub window? The Frame text below the slider should say Frame 0 (0:00:00.000) [K] currently. Ok, move the slider in the end of the clip (as far right as you can) and now you should see the number last frame in the bottom of the window -- it's the integer, not the time counter. Now just divide this by two using calculator or your brain.
Select the first part
 Ok, move the slider back to the beginning (so that the frame counter shows 0) and click Home button from your keyboard.
Then, press Shift button on your keyboard and keep it pressed and start moving the slider with your mouse. Move the slider near the value that you got by dividing the total frame numver by two. NOTE! Holding the Shift makes VirtualDub to jump between keyframes, not frame by frame. This is important, because we need to have keyframes in beginning and end of the clip!
Once you've found the correct place (don't get too paranoid about this -- anything nearby should be ok :-), release the Shift key and press End button from your keyboard. Now you should see that half of the timeline (the thingy with the sliders) is blue. That means that we've selected first part of the movie.
Save the first part
 Now go to File menu and select Save as AVI... and select a drive that has enough free space and name your clip something like The Movie - Part 1 of 2.avi and click Save.
After this VirtualDub starts processing the first file. This shouldn't take too long, it's basically up to your HDD how quickly it can write data.
Select the second part
 Ok, now your slider is already in end of the first clip. Just press Home button from your keyboard to set this point as a beginning for the next clip. Blue section disappears from the timeline.
Then drag the slider in the end of the timeline -- make sure it is really in the end. And then simply click End key from your keyboard.
Save the second part
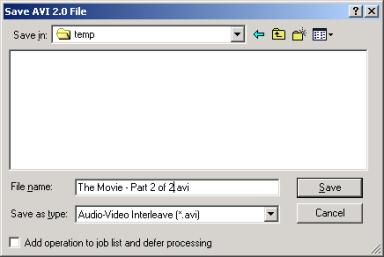 Ok, you know this one already. Go to File menu and select Save as AVI... and select a drive/folder with enough free space and name your clip as The Movie - Part 2 of 2.avi and hit Save and the process begins.
Final words
Older DivX4 codecs, such as DivX v4.02, have had major problems in splitting DivX3 encoded movies, so we recommend that you upgrade your DivX4 codecs to new ones. But other than that, I can't think of any problems that you can achieve by following this guide. Audio synch problems relate normally to the fact that some peopl split files by using regular frames as their cutpoints, not keyframes.
Anyway, in case you actually do have problems with this or any other of our guides, please feel free to post your comments and questions to our discussion forums.
Written by: Petteri Pyyny
