Burn AAC/M4A files as audio CD with freeware
 Thanks to the growth of legal music download stores on the Internet since 2004, the Advanced Audio Coding (AAC) compression format has become one of the most used for digital audio. Generally speaking, AAC audio comes in an MP4 container, which would generally be a file with a .M4A extension. However, both .AAC and .MP4 are also used just to house audio content. This guide will show you how to burn these files to a blank CD with freeware software.
Follow the Guide Author on Twitter: jamesdela@twitter
Introduction & Requirements
| Software you must download and install | |
| Burrrn | |
| Required: The tool we use to do the audio burning in this guide is Burrrn. You need to download and install this software from AfterDawn.com to burn your music. Download! |
You need to download and installed Burrrn for this guide. That is technically the only software that you will need. You also will need a blank CD capable of writing 74 or 80 minutes of audio depending on what you buy. A CD-R is recommended for maximum compatibility, though these days most new CD players support CD-RW (re-writable) discs too.
AAC Information
 Advanced Audio Coding (AAC) is a lossy audio compression format. Compared to FLAC and Monkey's Audio, it produces lower quality (yet still generally higher than MP3) recordings of audio. Since it is a lossy compression format, some information is lost permanently from the source audio, but that also brings the filesize down to around "MP3 or under" levels.
AAC audio is generally housed in the MP4 container format, and the files either come with the extensions .AAC, .M4A or .MP4.
Burrrn Introduction
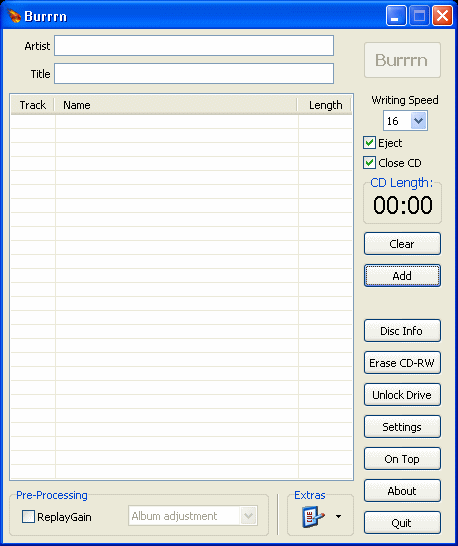
Above is the Interface for Burrrn, which we will look at in a bit more details shortly. Burrrn is a freeware tool capable of burning many popular audio formats to CD, including MP3, MPC (musepack), APE (Monkey's Audio), MP4/AAC, OGG, FLAC and more. It also supports playlist formats, such as M3U and also supports burning CD-Text.
Burrrn First Run - Select Drive
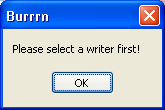
The above alert is what you will be faced with when you first run Burrrn. In order for Burrrn to do it's job, it needs to be familiar with your hardware. Click OK and the settings for the program should load.
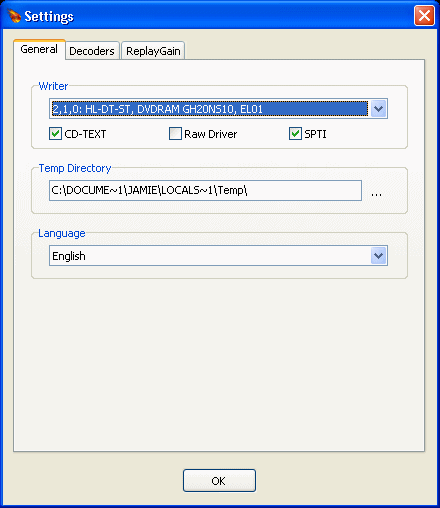
From the Settings window that pops up, select the writer that you will be using. You can also change the Language here if that is helpful for you. When you are done, click OK.
Burrrn Interface

The Burrrn interface is very simple. The main feature on the program is the track list, empty to begin with. On the right are all the controls you need for the program to do its job.
Having Eject selected simply means that the program will eject the CD automatically once burning is finished. Close CD means that you cannot burn any further information to the disc that you are using (this does not effect your ability to erase a CD-RW of course) after this burn. The rest of the options we will see as we go on. For now however, you need to load some tracks into the program.
Add Tracks to Burrrn
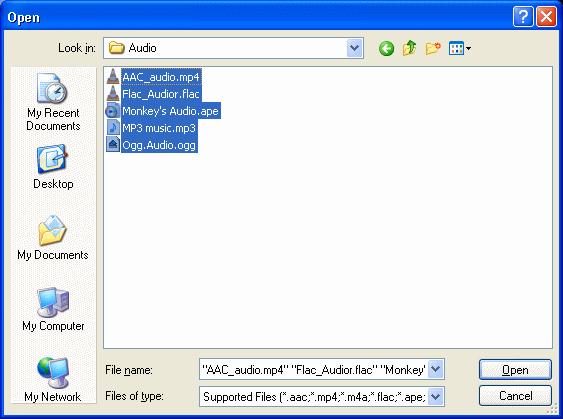
Click the Add button on the Burrrn interface and navigate to the folder that contains your music tracks on your hard drive, using the explorer window that pops up (this window will vary in different versions of Windows, the window shown above is Windows XP). You can select multiple files like in the image above by holding the CTRL key and clicking whatever you want to load into the program. When you have selected all the songs you want, click Open.
Burrrn - Loaded Tracks
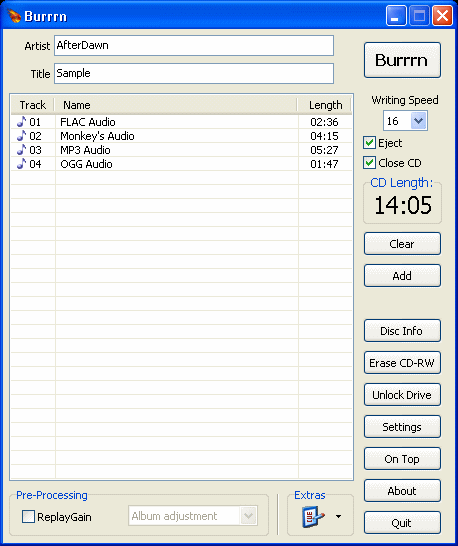
You will now see the track list populated with the songs that you have selected to burn. Under "Name", you may or may not see the title of your track, depending on whether Burrrn could read the information from the tracks. You can edit this later anyway. Make sure to keep an eye on the CD Length which will be displayed on the right of the program (go to Disc Info part later on to see how to find out how many minute of audio you can store on your disc).
Burrrn - Editing track title
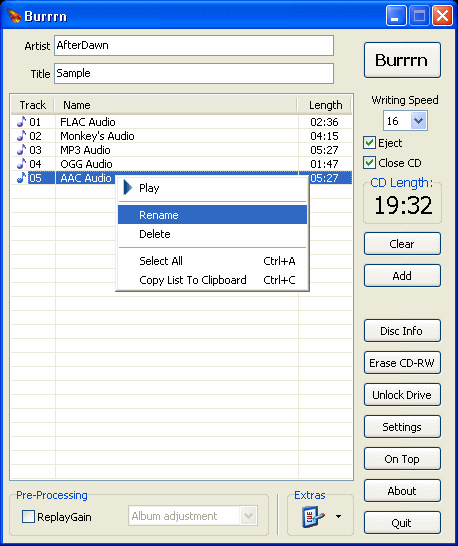
If you need to change the track name (which may be displayed depending on whether your CD player supports it), all you need to do is right click on that particular track as shown above, and click Rename. You will now be able to type in whatever you want. When you are done, it would be a good idea to find out what the maximum burn speed for your disc is. This "might" be possible with Burrrn based on whether your DVD Drive firmware recognizes the ID on the disc. Otherwise it should be printed somewhere on the disc or the packaging.
Burrrn Disc Info
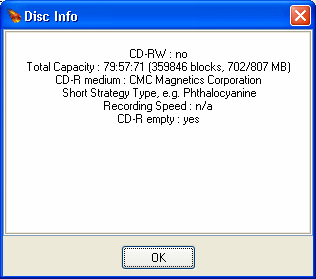
Click Disc Info when you have your blank CD inserted into your drive and Burrrn will attempt to find as much information as it possibly can on your disc. Some of this you can use. Looking at the picture above, you can see that my disc can write almost 80 minutes to audio (or 700MB of data). It also shows that CMC manufactured my disc (read from MID on disc).
It will inform you on whether the disc is empty if its a CD-R. The Recording Speed might be available here depending on the firmware of your DVD Drive; if not, then check the packaging and the disc itself for this information (although most CDs on the market these days can hit 52X - but your drive may not be capable of this).
Burrrn - Select Write Speed
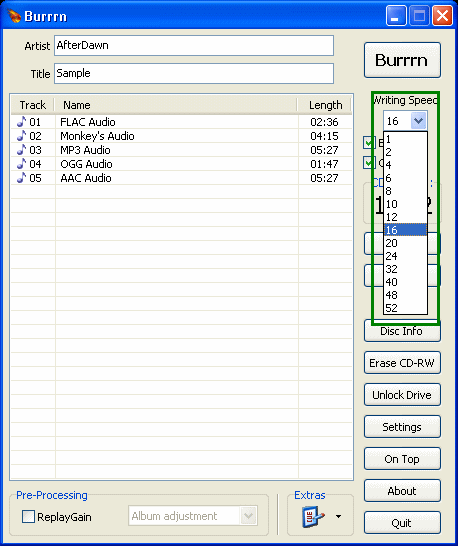
When you have found the maximum burn speed for your media you can now use it as your Writing Speed in Burrrn. I would advise against burning at 48X or 52X however and stick to around 24X as a max speed. This might help to avoid any burning problems you might encounter at a high speed.
Burn Disc
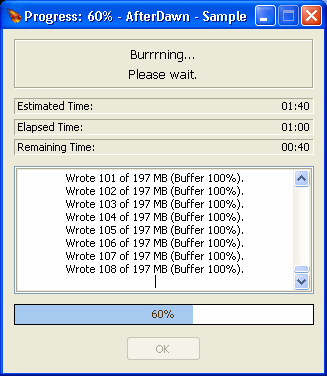
When you are done with all of your tracks and all of your settings, you can go ahead and click the Burrrn button at the top of the program to start the process. It will take a minute or so for Burrrn to be ready to write your audio to CD.
Complete?
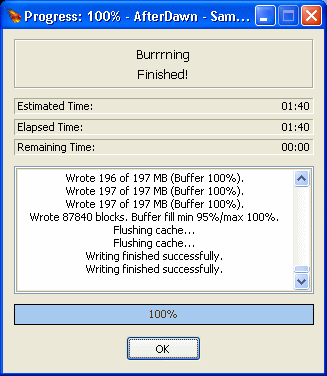
Once Burrrn has completed its task it will give a log message of "Writing finished successfully", as shown above. Click OK when this is done. Depending on your settings your CD drive may automatically eject the disc. If however, you cannot get the CD drive to eject at all, or the burning failed, then read below.
Burrrn - Unlock Drive (if needed)
If you cannot eject your CD Drive, or if Burrrn crashed for any reason then you may need to use the Unlock Drive option in Burrrn. I'm not sure how often this happens, but the button is there for a reason. If Burrrn is not responding, then try hitting "CTRL, ALT and DEL" on your keyboard (and open the task manager if given the option like in Vista and Win 7) and find the Burrn.exe process and end it. Then restart the program and click Unlock Drive. If this still doesn't work, you will need to restart. Hopefully this won't be an issue for you at all.
Finally
Hopefully you will have been able to burn your AAC/M4A audio as an audio CD with this freeware tool successfully. If you have any questions or problems, then please visit our Discussion Forums and ask for help there.
Written by: James Delahunty

