
Burn audio CDs from music files with ImgBurn
NOTE: This guide is for burning CD-Audio, which means about 80 minutes per blank CD, and suitable for a CD player. If your intention instead is to burn MP3 files to a disc for playback in a device which actually supports MP3 files, then just burn a normal data CD.
Introduction & Requirements
For this guide, the only software you need to install is ImgBurn.
- Download ImgBurn for Windows: ImgBurn for Windows
ImgBurn can burn many times of audio files to CD, though you will need to have the decompresser for your audio installed on your computer too. It supports CD-TEXT if you need it also.
Remember the limit to a blank CD is 80 minutes, so you can only burn a selection that long to a single disc. I ripped an album from my collection especially for this guide, just to basic MP3, so I know it can't possibly be longer than 80 minutes.
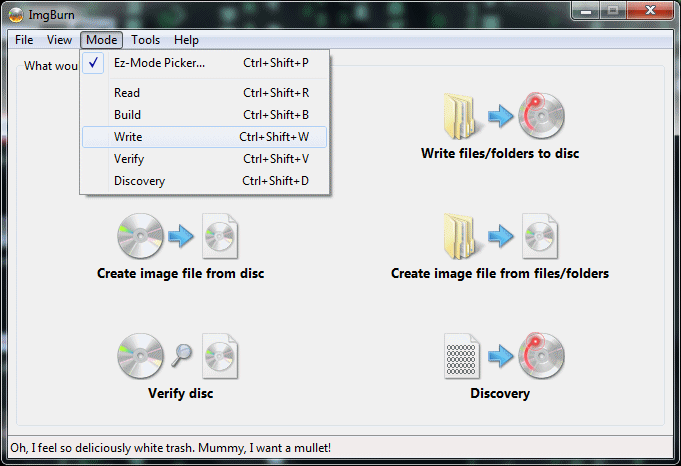
Fire up ImgBurn and change it to Write mode by clicking Mode -> Write as shown in the above picture.
Write Mode
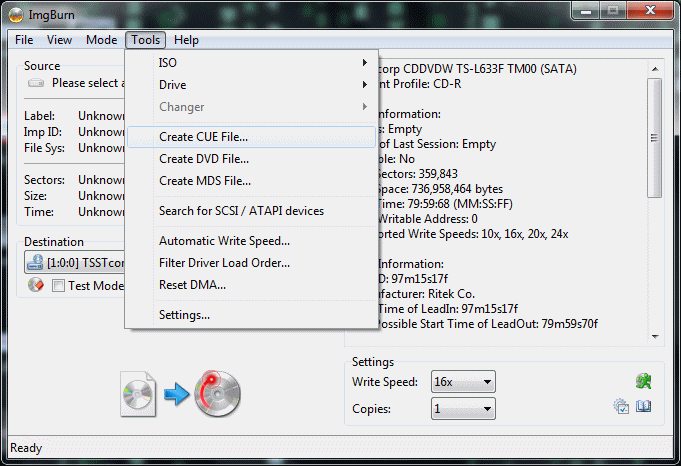
In order to burn audio CDs from files with ImgBurn, you need to create a CUE file. A CUE file has all the information that burning software, such as ImgBurn, needs about the files it is burning to disc.
Luckily ImgBurn provides a very decent graphical interface for creating a CUE file for your music CD.
In Write Mode, click Tools -> Create CUE File.
Creating CUE File
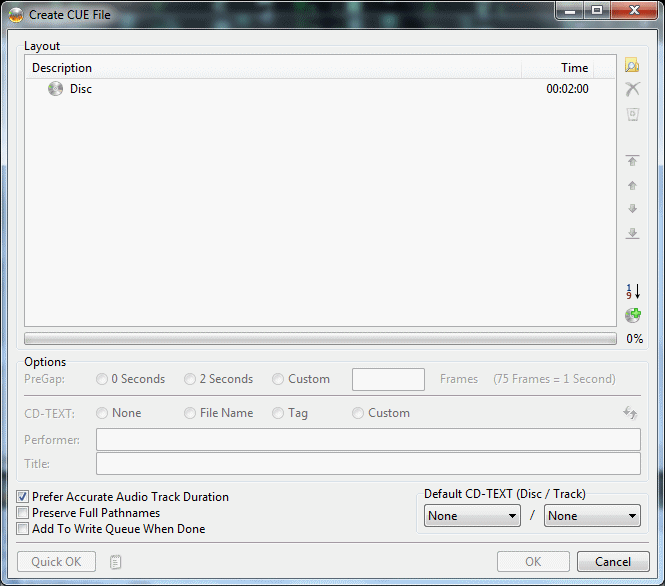
The CUE Creation window will now open up. To briefly explain, this window can define what MP3 files are to be burned as X track number on the audio CD. It also defines the delay before each track plays and any CD-TEXT that you might include.
Not all players support CD-TEXT so it's not that important but still is good to have supported here.
The first thing you need to do is find the music files you want to burn as tracks to an audio CD.
Click the Open button (top right corner, folder with magnifying glass over it) and an explorer window will pop up.
Open Audio Files

Navigate to the folder that contains your MP3 files. Select multiple files by holding down the CTRL key on your keyboard as you click, or if you need to select all the files, simply click CTRL + A and all the files in the folder will be selected. This is particularly useful if you are burning an album.
ImgBurn supports almost any audio file, though you made need a decompresser/codec for some audio (such as Monkey's Audio - APE) installed on your computer for it to be supported properly.
Select all the tracks you want (not more than 80 minutes) and click Open.
Analyzing Audio Files

No, ImgBurn didn't just get stuck. The program now attempts to analyse all of your audio files. You can see it if you look at the end of the CUE creation window.
The amount of time this takes really depends on your computer and the type of audio you have imported, but it shouldn't take too long before you get a list of tracks.
PreGap and CD-Text Settings
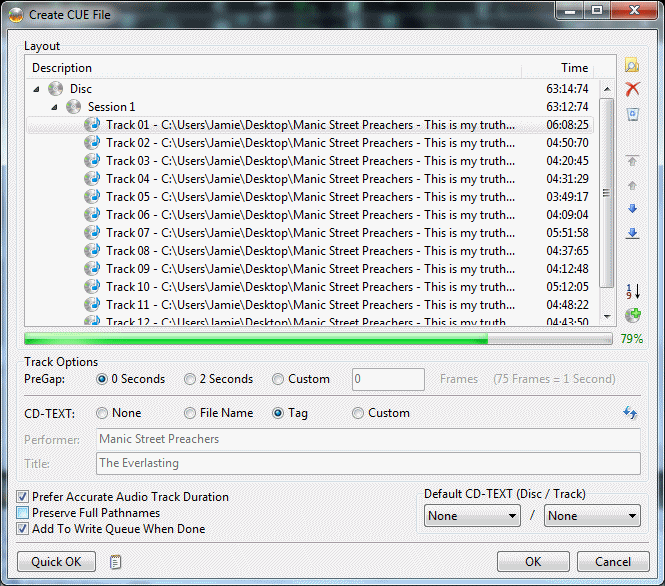
Now that you have a list of songs, make sure that the are in the right order that you want them to be on the CD. You can do this by using the blue direction keys to the right of the file list.
NOTE: You may need to scroll to the right to see the actual filenames, and might need to expand the Description category just above the file list so you can see the file path properly.
Now, if you have MP3 files that have tags (album, song, producer etc. information) already embedded, then you can change CD TEXT to Tag and it will retrieve them automatically. If you choose File Name, then ImgBurn will fill in information based on the file name.
If you don't have tags and the filenames aren't specific enough, then you can select Custom. Now you just select a track above in the list and you can fill in information on the artist and song name. If you click "Disc" at the top of the file list, then you can fill in the Artist as "Performer" and the name of the album as "Title."
CD TEXT is not necessary and won't affect audio playback at all.
One last thing you can set here is the PreGap of each track. A PreGap is a short seconds-long delay before a track starts to play. This is here only for your own convenience. Do not set a PreGap if your songs are support to run seamlessly into each other, as is the case with many Dance or Hip Hop albums.
Make sure to select "Add to Write queue when Done." Then click OK. You will not be prompted where to save the CUE file. Save into the same folder as your music files.
CUE creation success?
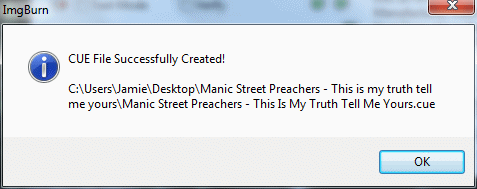
Within a second or two, you should get a message that the CUE file was created. It should not take long because ImgBurn is just writing plaintext to a file which will be given a .CUE extension.
Once it has been created and you close the message that pops up, ImgBurn will not automatically load the CUE file into the program.
Set write speed
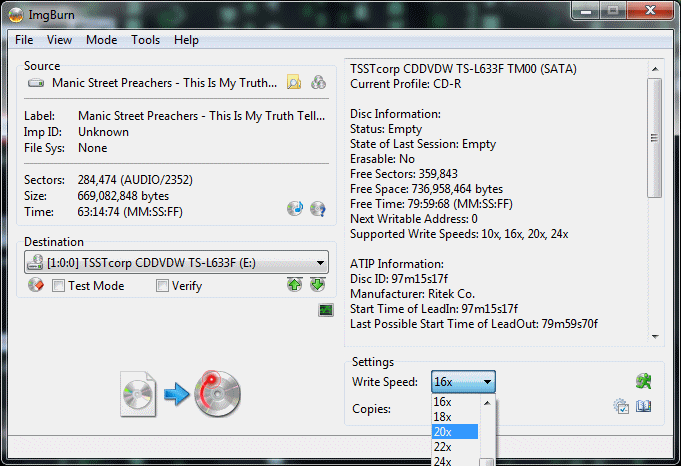
As a general rule throughout the evolution of blank optical media burners, the slower the burn the less problems you will run into. Whether that's still relevent information is unclear. You will see in the information that ImgBurn provides what you can set the Write Speed to, based on your CD burner's firmware and the ID of the black disc you have inserted.
Select a Write Speed (faster takes less time, obviously) and then click the Burn button (that would be the big button where there's a File with a giant arrow pointing to a CD... if you hadn't figured that out.)
Burning Process
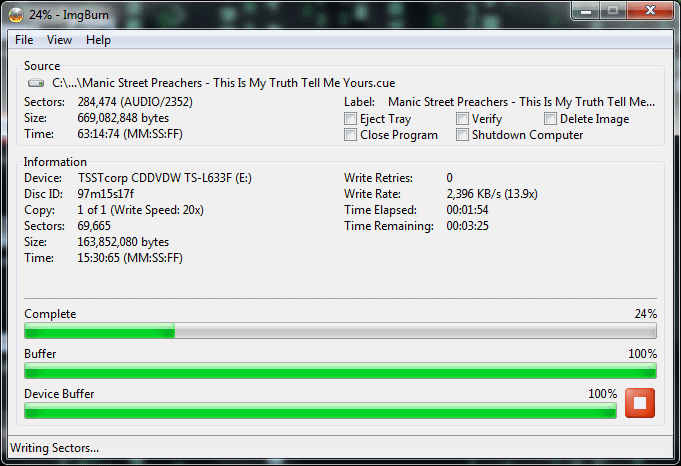
The burning process will take about a minute to get going properly on a lot of systems, but once it gets going it shouldn't take long to complete on a modern system, if you didn't set the Write Speed too low.
Success?
If your ear drums hurt, it was probably successful (ImgBurn by default plays a god-awful sound every time it completes a successful burn.) A message will pop up telling you the burn was successful.
Now pop the disc out of the drive and give it a go in your player.
Finished
Hopefully this guide will have helped you with what you were looking to achieve. If you need any help with ImgBurn or audio, then please visit our Discussion Forums for help, or ask a question at our Tech Support.
Written by: James Delahunty
