How to burn AVCHD with Nero Burning ROM
 This brief article shows you how to burn an AVCHD compilation that has already been authored to a blank DVD disc using Nero Burning ROM (7). AVCHD discs work with the PlayStation 3 (PS3) console and most Blu-ray Disc hardware.
Introduction & Requirements
| Software you must download and install | |
| Nero Burning ROM | |
| Required: You need to download and install Nero Burning ROM on your computer. Download! |
If you don't already have Nero installed on your computer, use the download link above to download it and install it. Remember however that Nero is not free software so you will only have a time-limited trial unless you purchase a key. It is worth checking out though. When you are ready, run Nero Burning ROM (not Nero Express, go to the Start Menu --> All Programs --> Nero --> Data --> Nero Burning ROM). When the New Compilation dialog opens, we can begin. Insert a blank DVD and let's get going.
Create DVD-ROM (UDF) Project
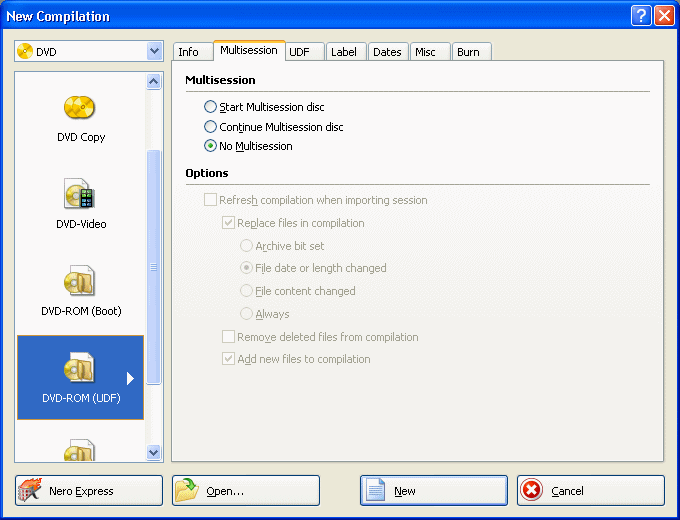
Open Nero Burning ROM (not Nero Express, fine Nero Burning ROM in the Nero folder of your Start Menu. Look inside the Data subfolder and open Nero Burning ROM) and you will immediately see the New Compilation window.
If you do not see this window, then click File --> New or hit CTRL + N. You will now see your burning options (make sure DVD is selected, not CD). Scroll down the list on the left until you find the option for "DVD-ROM (UDF)". Select it as shown in the picture (click to enlarge).
Change to UDF 2.50 file system
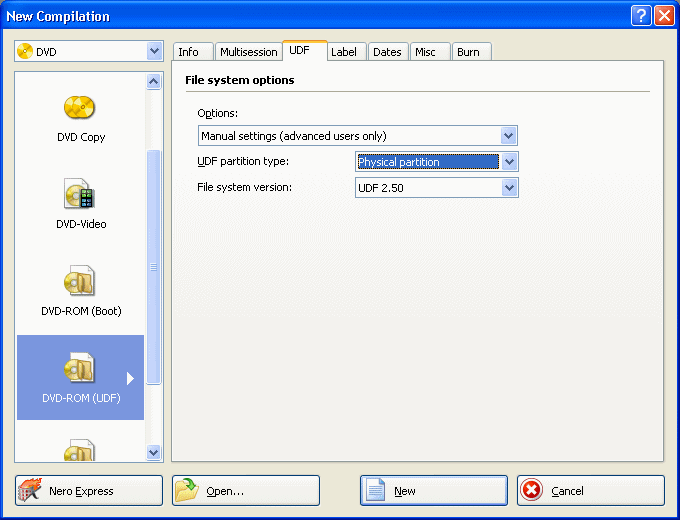
You must now set the file system to UDF 2.50 or else the AVCHD disc won't be standard and probably won't work. Click the UDF tab as shown in the picture (click to enlarge). Under options, change to "Manual Settings (advanced users only)". Change UDF partition type to Physical Partition and change the File-system version setting to UDF 2.50. Once you have done that, click the big New button at the end of the program.
Edit compilation
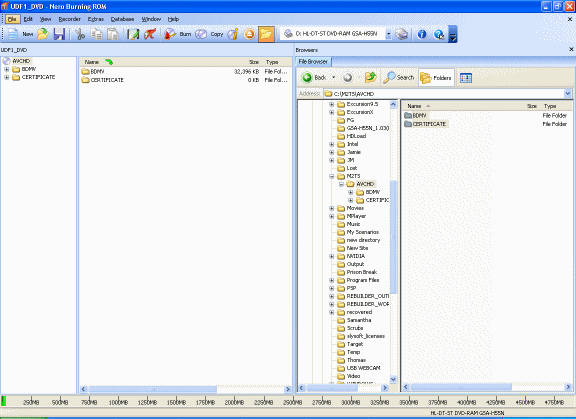
You now must add your AVCHD folders to your compilation once the program has loaded correctly (sometimes can take up to a minute). On the left is the compilation (what you want on the disc) and on the right is a file browser. Use the file browser on the right to locate the BDMV and CERTIFICATE folders.
When you find them, you can either add them to the compilation list on the left by right-clicking and selecting that option, or you can simple click the folders and drag them across the program, then release them into the AVCHD compilation. Make sure the BDMV and CERTIFICATE folders are at the root of the disc (they aren't inside any other folder on the disc). Once you have them added, you are ready to burn.
Ready to Burn?
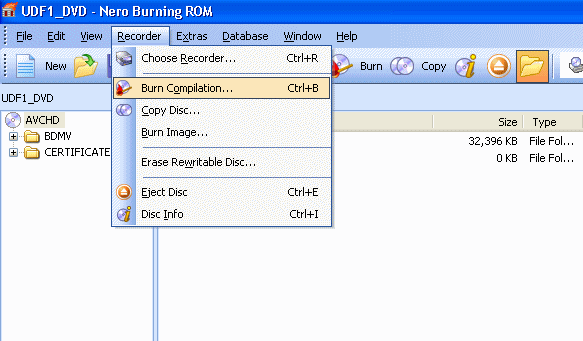
Click the Recorder menu and click Burn Compilation, or hit CTRL + B.
Select Write Speed
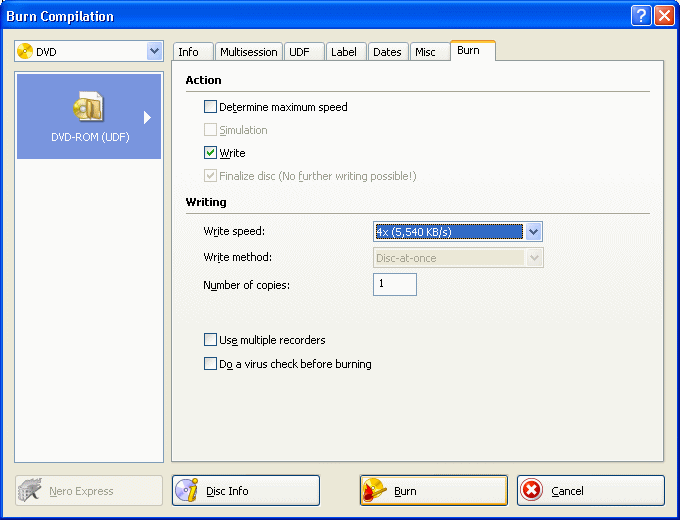
A new window will now pop-up that will give you a last chance to change any compilation settings you want, including the write speed. Whenever you are ready now, click the large Burn button to begin the process... and you will immediately get a warning (in Nero 7).
UDF 2.50 Warning?
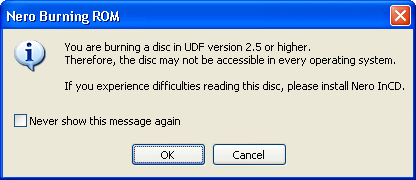
You will now get a warning informing you that the UDF 2.50 file system may in fact cause you some compatibility problems. This may be true of a regular DVD-ROM compilation, but what we are creating here is AVCHD and it must be UDF 2.50. Click the OK button to begin the burning process (for real this time).
The Burning Process
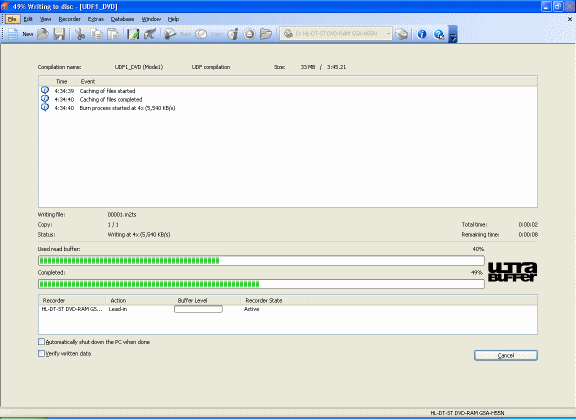
The amount of time the burning process will take depends entirely on the amount of data being burned and the speed of the burning process.
Success?

If the burning process was a success (which is should have been) you will now be prompted with a message telling you so. Now run along and try it out.
Finally
This article set out to show you how to burn an AVCHD disc with Nero Burning ROM and hopefully it achieved that objective. If you have any problems with Nero or playback, please check our Discussion Forums and ask for assistance from our members. Try the Blu-ray, Nero or PlayStation 3 (PS3) forums
Written by: James Delahunty

