
| Convert DVD to AVC with StaxRip | You are viewing Page 2 of 3 -- Go to page 1 , 2 , 3 |
Loading Your DVD Source
You'll start by loading the DVD (VOB) files containing your movie. Since StaxRip doesn't include any tool for identifying the contents of each set of VOBS you have 2 basic options. Typically the VTS where the main movie is located is also the one with the largest number of VOBs. For example, the DVD used for our screenshots has the movie in VTS_04, which has 4 VOB files.
 |
1. Select Your DVD Files
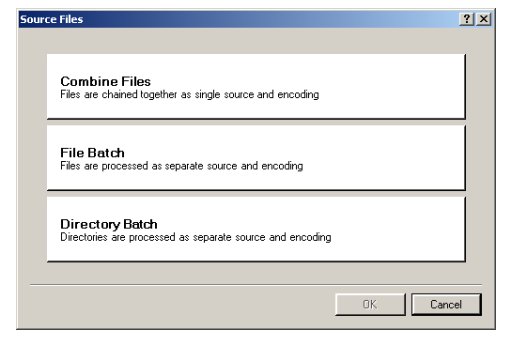
Make sure the DVD you wish to use for a source is copied to your hard drive. Although it's possible to encode directly from the original disc, it's not recommended since it's can significantly reduce the life of your DVD-ROM drive. Select the Source menu link to bring up the Source Files dialog. There are three different options for loading files to be converted. Select the top one, Combine Files.
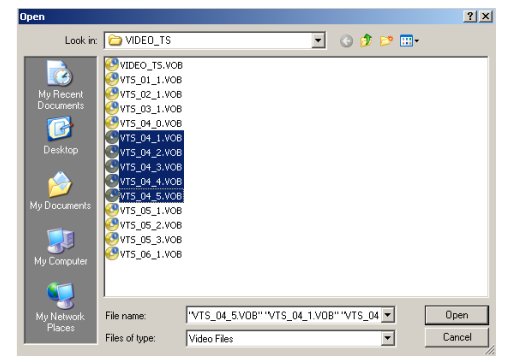
The Open Dialog
In the Open dialog you'll need to highlight all the VOB files that contain your movie. Typically this means finding the titleset (VTS) with the most files. To select multiple VOB files you can either hold down the CTRL key while clicking each one or hold down the SHIFT key while clicking the first and last one. When you have all the required VOB files highlighted click the Open button.
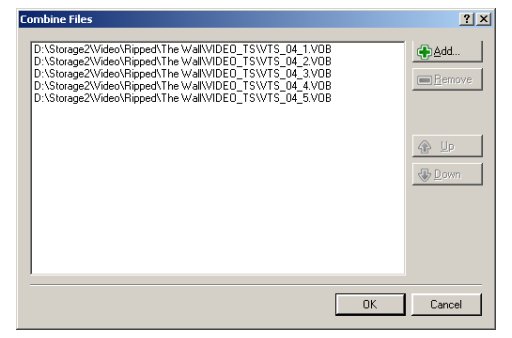
Combine Files
The Combine Files dialog will show you all the VOB files you selected for your source. If any are missing or in the wrong order you can use the buttons on the right to make changes or add more VOB files.
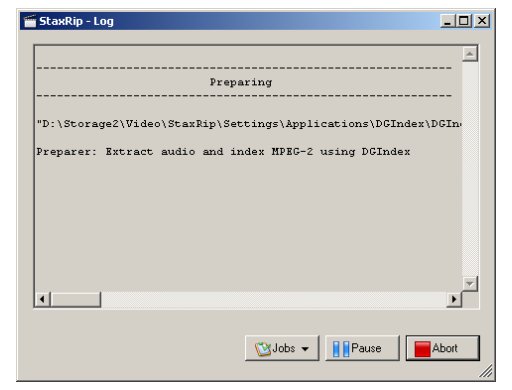
Indexing
StaxRip will start by analyzing the VOB files and creating an index (D2V project) with DGIndex.

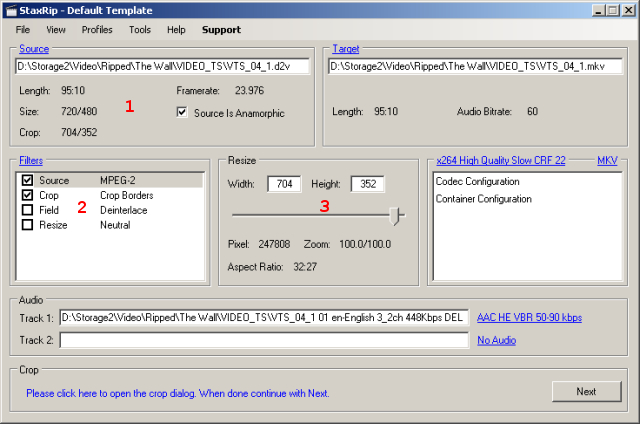
Finally you'll be presented with information about your source, including the resolution both before and after removing black borders (Size and Crop) Framerate, Length, and whether it's fullscreen or widescreen (Anamorphic). Depending on decisions you make later in the process you may need to refer back to this information.
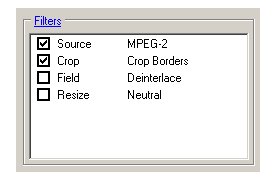
2. Filters
The Filters shown represent operations to be performed in AviSynth. At the very least a Source filter will be used. Others are optional. Assuming you want to remove extra black borders used to pad the frame to reach the proper resolution you'll also want to leave Crop checked.
Checking the box next to a filter will enable it, while right-clicking on it will show you options you may need to select from. For the Source and Crop filters you shouldn't need to change anything.
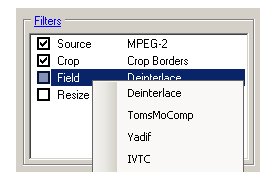
Deinterlacing
The Deinterlace option can be used to create progressive video from interlaced. The primary key to interlacing is knowing the original source for your DVD. If it's from a film source, such as a standard movie DVD, and the framerate is 29.97, you should check Deinterlace and right-click to select IVTC.
If your DVD is from a video source, typically meaning videotape or broadcast television, you may still want to deinterlace for quality reasons. This is accomplished by right-clicking and selecting one of the top three options. Deinterlace is faster than TomsMoComp, but will result in lower quality. Likewise Yadif is slower than TomsMoComp, but results in even higher quality. For maximum encoding speed skip deinterlacing altogether.
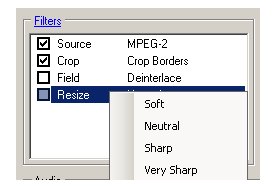
Resizing
The Resize filter reduces the resolution of your video. This is typically used for playback from a computer, but may also be appropriate if you're playing your output using a DVD player with AVC support. Like deinterlacing, Resize has a number of options you can choose from with a right-click. Starting from Sharp, each option will result in more distinct edges than the one above it. The price for this sharpness can be artifacts around the edges of objects and generally lower quality at some output sizes. You should experiment with this setting to determine what looks best to you.
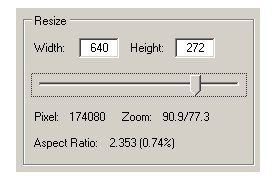
3. Setting the New Resolution
If you decide to resize you can use the slider in the center of StaxRip to adjust the resolution. You can also manually enter the desired height and width, but unless you know what you're doing this should be avoided as it can result in distortion of the image.
Continued On Page 3In the final section we'll consider settings for both video and audio and then move on to encoding. Page 3 - Encoding | |
| Convert DVD to AVC with StaxRip | You are viewing Page 1 of 3 -- Go to page 1 , 2 , 3 |
Written by: Rich Fiscus
