
| DVD to AVC with MeGUI Part 2 | You are viewing Page 2 of 4 -- Go to page 1 , 2 , 3 , 4 |
Using the AviSynth Script Creator
The AviSynth Script Creator both opens your DVD source and edits it as necessary to change the resolution, deinterlace, resize, and any number of other options you can add manually. Although advanced AviSynth scripting can certainly require a significant investment in time and energy learning about various filters MeGUI handles the basics very well with very little user input. In some cases, particularly for deinterlacing low quality animated sources, you may find that you get better results by customizing script settings, but if you don't experience any quality issues there's no reason you have to do that.
Starting The Script Creator
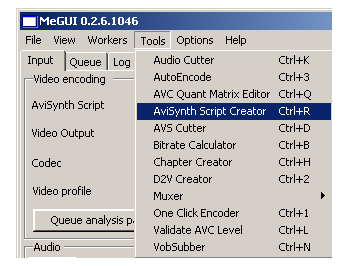
Open the AviSynth Script Creator by selecting it from the Tools menu.
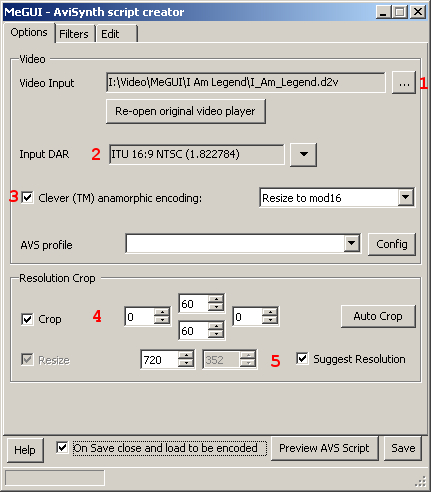 |
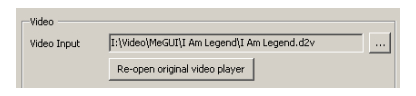
1. Open Your D2V Project
AviSynth will use the D2V file you created in the previous guide to read the video. After you select the video a preview window will appear where you can view the video. This preview window is also used for automation, like the AutoCrop tool, so you should leave it open. Bring the AviSynth Script Creator back to the front to set additional options.
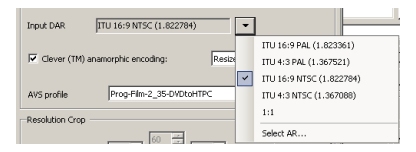
2. DVD DAR
The Input DAR will tell you whether the video is a PAL or NTSC source, as well as whether it's fullscreen (4:3) or widescreen (16:9). You may notice that the decimal notation for the aspect ratio doesn't match either fullscreen or widescreen (such as 1.822784 for NTSC 16:9 instead of 1.78). This reflects the area of the frame that's visible on your TV, with the extra left and right borders cropped to match the ITU-Rec.601 standard.
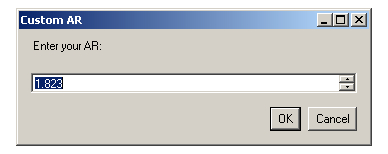
If you prefer to set the AR to exactly 16:9 or 4:3 you can do that by using the Select AR... option, which will open the Custom AR dialog so you can set the value manually. For an AR of 4:3 use 1.333. For 16:9 it would be 1.778 instead.
About Aspect RatiosAlthough MeGUI's AR figures reflect the correct calculations using the official ITU recommendation DVDs are all supposed to follow, there's no guarantee that this will be the case. In fact all the widescreen (NTSC) DVD's I've encoded needed this set to a custom AR of 1.778 in order to achieve the correct AR (as listed on the DVD case) after cropping. Fullscreen DVDs, such as TV shows, seem to be less consistent, with some strictly following the same ITU figures MeGUI does and others assuming the entire frame to be part of the 4:3 image. In the final section of the guide on The Edit Tab we'll look at how to doublecheck the output AR. |
3. Anamorphic Encoding
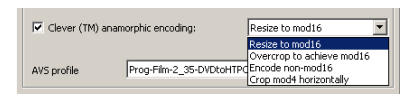
Just like the MPEG-2 video used for DVD, MPEG-4 AVC is capable of encoding video so that the player will know to stretch or compress it to ensure the correct dimensions on playback. This is what enables widescreen DVDs to use the same standard resolution used for fullscreen. It also allows us to do the same for our AVC video. If you prefer to resize to square pixels make sure to disable Clever (TM) Anamorphic Encoding. If you leave it enabled you must select whether you want to require the video to have a resolution that's an exact multiple of 16 in both directions (Mod16). Resize to mod16 will resize your video to a Mod16 resolution if it isn't already (after cropping). Overcrop to achieve mod16 forces you to crop to a Mod16 resolution and disables Resize completely. Encode non-mod16 allows you to use any Mod2 resolution, which is the minimum possible in the YV12 color format used for DVD, AVC, and even AviSynth itself. This may result in a higher bitrate to maintain quality.
5. Cropping
While DVDs often have black borders on the top and bottom, and sometimes on the sides as well. While this is necessary to satisfy DVD's fixed resolutions of 720x480 for NTSC or 720x576 for PAL, these borders aren't necessarily required for proper AVC playback. Most software players and some hardware will automatically add whatever borders are necessary to maintain the video's aspect ratio. Others will use a fixed AR, requiring you to leave at least the top and bottom borders.
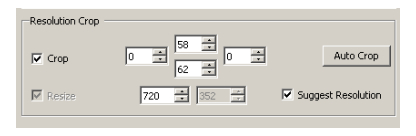
AutoCrop
The AutoCrop button allows MeGUI to automatically crop all black borders. For anamorphic encoding with Overcrop to mod16 selected the actual values may be different in the actual script. See the final section on The Edit Tab for more details.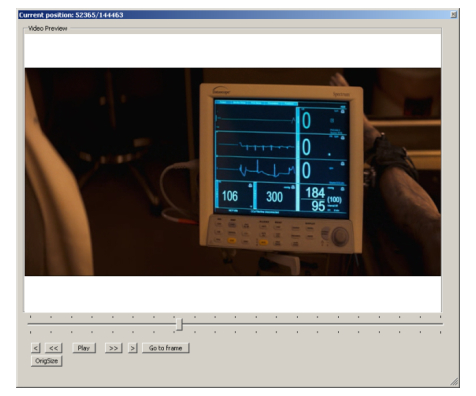
Manual Cropping
If you prefer to set the borders to be cropped manually you can use the arrow buttons for each side or enter the numbers directly. The preview window MeGUI opened when you selected your D2V file will show the cropped lines in white as you change them so you can visually inspect the results immediately.

6. Resizing
After cropping you may need (or want) to resize. If you're encoding anamorphically the specific resolutions available here may be limited. Even if you're encoding to square pixels it's best to try to use a Mod16 resolution.
Continued On Page 3On the next page we'll take a look at some essential settings that tell AviSynth how to handle deinterlacing, resizing, and if necessary cleaning up your video. Page 3 - Deinterlacing and Other Options | |
| DVD to AVC with MeGUI Part 2 | You are viewing Page 2 of 4 -- Go to page 1 , 2 , 3 , 4 |
Written by: Rich Fiscus
