
| Encoding From DVD to AVC with AutoMKV | You are viewing Page 2 of 5 -- Go to page 1 , 2 , 3 , 4 , 5 |
Basic Source and Output Settings
There are a number of decisions you'll need to make, and corresponding options in AutoMKV. You'll have to decide whether you want to create a MP4 or MKV file, whether to encode for a particular quality, size, or bitrate, whether to change the resolution, and what audio and subtitles to keep. You can set all the required options on the Basic Settings tab. If you prefer to keep things as simple as possible, select a profile, set a few options, and tell AutoMKV to give you an output file.
Most DVD sources are well enough transferred, encoded, and authored for AutoMKV to automate nearly everything. If you find that it produces lower quality than you expected you can adjust many settings manually, which will be discussed on the next few pages.
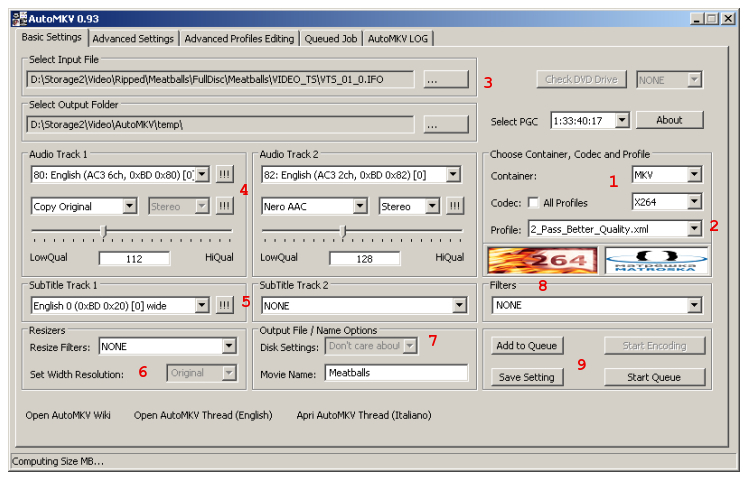 |
Step 1 - Select Your Container
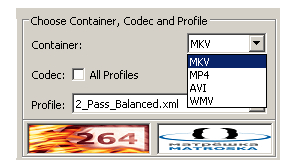
AutoMKV can output AVC video in either the MKV or MP4 container. If your output file is intended for playback on a computer you can use either one, although your choice of audio may require using MKV. While MP4 is the official MPEG-4 container format, support for audio other than AAC (MPEG-4's Advanced Audio Coding) is limited to only a few players, compared to Matroska's support for just about every audio format under the sun. For hardware players, such as mobile phones, portable media players, or even standalone DVD players with MPEG-4 support you'll want to stick with MP4.
Make sure you also select x264 for the Codec.
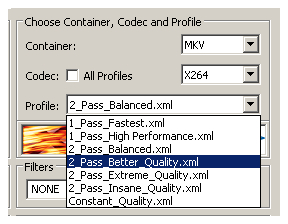
Step 2 - Pick a Profile
There are seven profiles that are listed by default in AutoMKV. If you want to see the entire list of x264 profiles check the All Profiles checkbox. In addition to the full list of profiles included with AutoMKV this expanded list will also include any profiles you've added to the C:\Program Files\AutoMKV\profiles\x264-profiles folder.
Encoding Modes
Although profiles can be categorized by hardware compatibility settings, such as Xbox or iPod profiles, a more basic distinction between them is the choice of encoding mode. Generally there are only two modes you should consider - Single Pass CRF (Constant Rate Factor) and 2 Pass ABR (Average Bitrate). Most of the hardware-specific profiles are setup for 2 Pass encoding.
While you can also select Single Pass ABR or Constant Quantizer encoding, these options will tend to produce either lower quality or higher bitrate files than Multipass ABR or Single Pass CRF.

Step 3 - Open Your DVD Source
Click the button to browse for your DVD files. With AutoMKV's default settings the largest title will be automatically selected if you open any of the IFO files. If you have an episodic disc, such as episodes from a TV show, you may need to visit the Advanced Settings tab in order to select the correct titleset. With the appropriate option (Process This IFO) selected you can choose an IFO file (VTS_xx_0.IFO) to open the titles in.
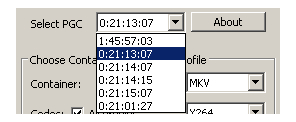
Selecting A PGC
After you open your DVD title set you may find that there are multiple titles to choose from. Use the Select PGC list to select the title you want to encode.
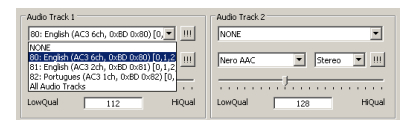
Step 4 - Select Audio Tracks and Encoding
AutoMKV allows you to keep up to two audio streams from your movie. For each stream you'll have the option to use the original audio from the DVD with no re-encoding or select from a list of audio compressors. For MP4 file output you'll need to encode to AAC.
If you choose to re-encode the audio to save space (or for the MP4 container) you may also want to adjust the bitrate.
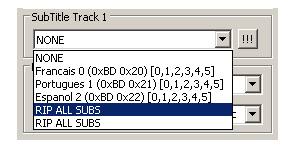
Step 5 - Select Subtitles
Unlike the audio, you have the option to keep all subtitles. You can also select two individual subtitles or none.
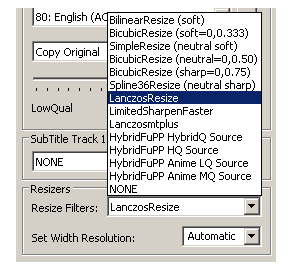
Step 6 - Set Resize Options
If you wish to keep your video's original resolution you should select Original from the Set Width Resolution list. Otherwise you can select your desired output width and let AutoMKV determine the correct height to use.
AutoResize
If you set the width to Automatic AutoMKV will attempt to determine the maximum resolution where your selected output size will produce acceptable quality.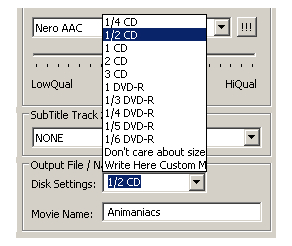
Step 7 - Set Additional Output File Properties
For Multipass ABR encoding you'll need to either specify an output size here or a bitrate on the Advanced Settings tab. For Constant Quality (CRF) encoding you'll need to visit the Advanced Settings tab to set the desired quality. This is discussed in more detail on the last page of the guide.
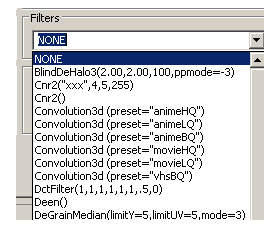
Step 8 - Add AviSynth Filtering
Since AviSynth is already used to provide the input for x264, you might find it desirable to do some filtering to remove imperfections in the source. You may have a film source with visible damage (scratches, dirt, etc,...) or video that's been edited or encoded poorly somewhere along the way. There are a number of AviSynth plugins included with AutoMKV that make cleanup of some of these problems possible. You should always be aware that filtering to fix one problem may do as much damage as good by causing various types of artifacts.
Step 9 - Start Encoding
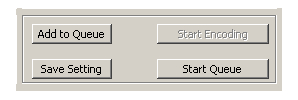
Once you've set all the necessary options you can either continue to the Advanced Options tab or encode with the defaults (or currently loaded options). In order to allow you to configure several jobs to run as a batch AutoMKV uses a job queue. First you must create a job using the Add to Queue button. When you're ready to start the queue you can use the Start Queue button. If you wish you can add more jobs to be run sequentially.
Monitoring AutoMKV's Progress
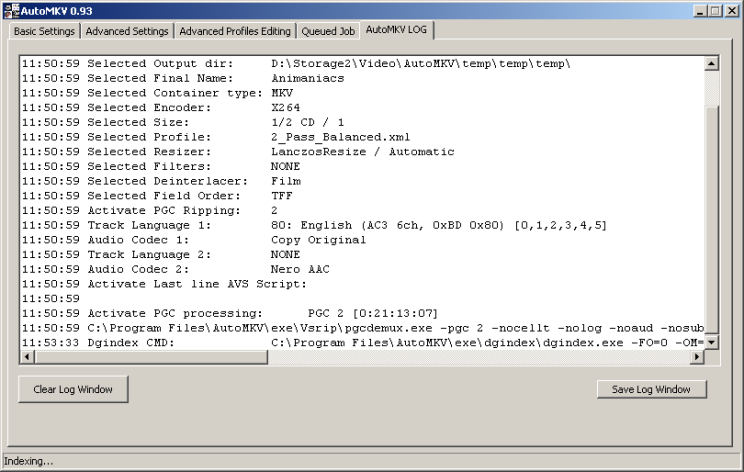 |
As AutoMKV performs the various steps required for encoding your video and muxing it into a MKV or MP4 file, a detailed log will be generated and displayed on the AutoMKV Log tab. You can clear the log window or save it at any time using the buttons at the bottom.
Continued On Page 3Next we'll discuss the available options for deinterlacing. Since most video is encoded progressive, but may be from an interlaced source, you may find that giving AutoMKV some additional information about the frame structure of your original video and how (or whether) it should be deinterlaced. Page 3 - Deinterlacing | |
| Encoding From DVD to AVC with AutoMKV | You are viewing Page 2 of 5 -- Go to page 1 , 2 , 3 , 4 , 5 |
or Stop and EncodeIf you prefer to keep things as simple as possible you can tell AutoMKV to encode now. If you'd prefer to consider some additional options continue to the next page of the guide. |
Written by: Rich Fiscus
