
Changing Booktype with ImgBurn
Download and install the ImgBurn tool. Once you have it installed, run the program.
ImgBurn Interface
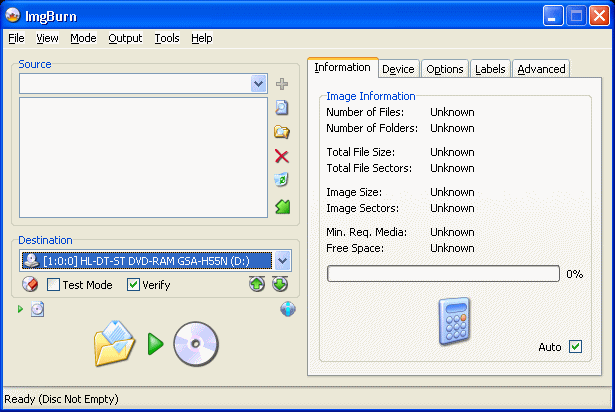 On your first run of ImgBurn you will probably think that it is somewhat complicated. In fact, it is very easy. The program can be in one of four modes; Read, Build, Write, Verify, and Discovery. They all have their own purposes. For this guide you will need to set it to Build Mode, as shown in the picture beside this text.
To set to Build Mode, click Mode and move the mouse to Build and click. Otherwise, just hold down CTRL, ALT and B and the program will go into Build Mode. Now you will notice five tabs you can click; Information, Device, Options, Labels and Advanced.
Click the Device tab.
ImgBurn Device Tab
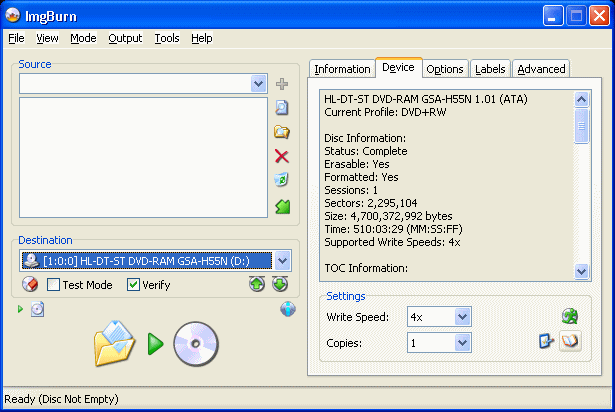 Under the Device tab, ImgBurn will provide you with details on the DVD burner hardware that is present, as well as any disc that is inserted into the drive itself. However, we don't need any of this information right now.
All you have to do is click the small Book icon that looks like this -->
When you click that a new window will open.
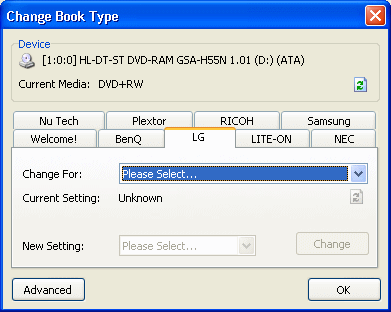
ImgBurn Booktype Options
 A new window should now be open that looks exactly like the picture that accompanies this text (click to enlarge). One thing that might be different however is that ImgBurn reports my inserted media as DVD+RW, this might be different for you or you might not have a disc in yet (don't worry, it is not necessary at this point).
Now, you have a choice of manufacturers to click here. Remember, some drives may not have these brand names, but the drive itself may have been made by one of these companies. For that you would need the Advanced tab and more help than this guide really provides.
Click the manufacturer of your drive. In my case it is LG.
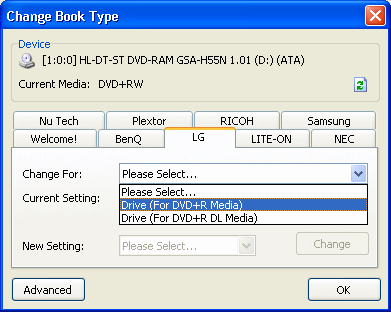
How it works
 When you click the manufacturer's name, you will see how this process works. The idea is to identify what the media inserted in your drive is, check the current setting and choose a New Setting. You can use ImgBurn to attempt to change the setting at this point.
So the first thing we need to change is the "Change For" field.
ImgBurn 'Change For'
 When you click the Change For drop-down list, you will be given options on what type of media you want to change the Booktype for. Depending on your drive model, you may be allowed to change for DVD+R, DVD+R DL and/or DVD+RW. However, as stated, this does vary from model to model.
So to make sure you get this right, check your blank disc. If it is DVD+R, DVD+R DL or DVD+RW DL then make the appropriate "Change For" setting. You do not need to have your blank disc in the drive right now. Once you have made your setting, ImgBurn will read from your drive and tell you what the Booktype is set to for that type of disc.
ImgBurn 'Current Setting' and 'New Setting'
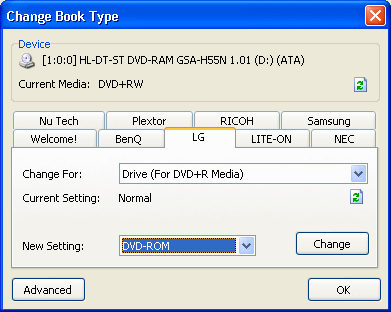 Once you have decided the "Change For" field, ImgBurn will tell you what the drive automatically has the Booktype set for for that particular media. In the case on the picture shown (click to enlarge), the DVD+RW Booktype shows me "Normal", so basically a DVD+RW disc will have a bitsetting of DVD+RW; hardly surprising.
Now, it is time to edit the New Setting field. Click the Drop Down box and depending on your drive you will have multiple options. For optimal improvements (and the reason for this article), select the DVD-ROM setting.
ImgBurn, Change Booktype
Success?
 If all went OK, then you should receive a Success! message like the one shown in the picture accompanying this text. If not, then please look to our Discussion Forums for help, particularly the DVD burning forums.
Does it only work with ImgBurn?
 No! If you have successfully changed the drives settings that dictate the Booktype for your DVD+R(W) media, it will work with pretty much all compatible software. For example, using Nero Burning ROM, the program will detect and automatically set the Booktype to DVD-ROM, like shown in the accompanying image (click to enlarge and read).
How to confirm?
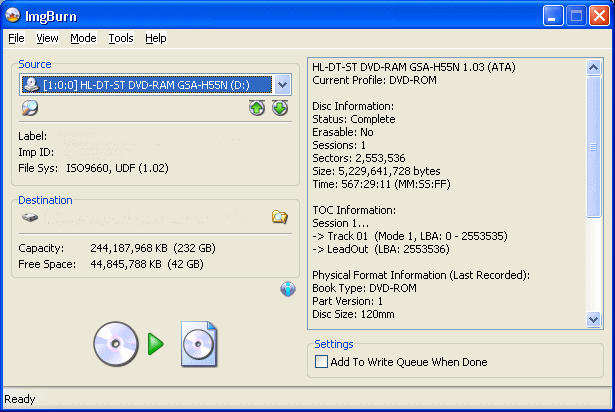 To confirm, try burning a disc and then re-insert the disc into the drive. Open ImgBurn and change to Read Mode. To do this, click Mode --> Read or hold CTRL, ALT and R. Now look at the information on the disc. If ImgBurn reports it as DVD-ROM, then all went well, go try it with your other hardware.
Changing Booktype with Nero software
In Nero's suite of products there are several ways to change Booktype. We will explore these on the next page, as Nero's software is distributed with many drives that can change Booktype.
Written by: James Delahunty
