
Video Encoding
Since our destination video format will be AVC, which is a MPEG-4 specification, we'll use the MP4 container (output file) format, which we'll be able to mux to a MKV file later. Since there are no universal settings that work well with all sources, we'll be looking at a single example encode, and discussing the variables you'll need to consider. Along the way, SUPER should give us all the necessary information to make informed decisions.
Step 1 - Determine Source Information
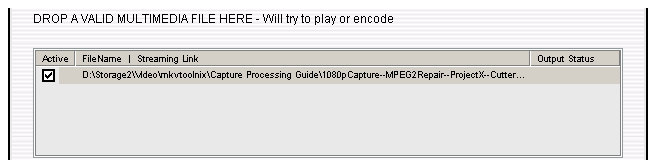
Once you have your source file added to SUPER's file list you can double-click on it to see some properties. SUPER will spend a few moments analyzing the file and tell you the video's Bitrate, Width, Height, Display Aspect Ratio (DAR), and Framerate. While you may want to change the Height and Width (resolution) with SUPER, it's best to match the source file when encoding.
Audio Information
If you intend to compress the audio as well, instead of keeping the Dolby Digital audio from the original capture, you'll want to make a note of the sampling frequency and number of channels. While you may want to encode 5 channel audio to 2 channels to save space, you shold almost always keep the samplerate the same (48kHz in most cases).
Step 2. Select Container and Codecs
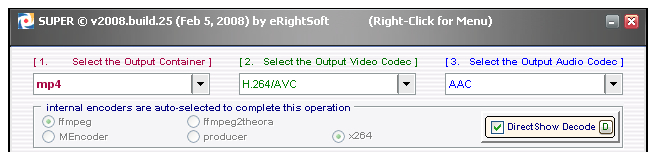
Since we're encoding the video to AVC (MPEG-4) we'll be using the MP4 container and selecting H.264/AVC for a video codec. Although MP4 gives us the most flexibility in terms of settings, it limits the choice of audio codec. If you intend to mux your AVC video to a MKV file later to keep the AC-3 audio you don't need to worry about the codec. If you plan to keep the MP4 container you'll need to make sure AAC is selected. If you want to use ffdshow or another DirectShow decoder for reading the source file make sure the appropriate checkbox is checked.
Step 3. Video Settings
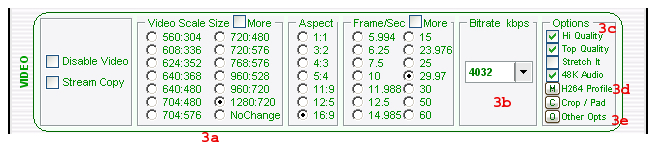
Obviously these settings may vary widely, depending on both the source and destination (playback device). Aspect and Frame/Sec should match the DAR and Framerate of your source video respectively. Since I have standard widescreen HD video I've set it to 16:9.
3a. Video Scale Size
This is the output resolution. If you want to match a standard TV resolution you'll want to pick 720x480 for NTSC (SD), 720x576 for PAL (SD), 1280x720 for 720p, or 1920x1080 for 1080i. Other commonly used resolutions for TV viewing are 640x480 for NTSC and 1440x1080 for 1080i. Although these don't conform to any broadcast standard they're sometimes used to reduce bitrate requirements. My source is 1920x1080, but since I'm encoding for playback on a 720p HDTV I'll be setting the output to 1280x720.
3b. Bitrate
There's no magic formula that can tell you what bitrate will be required to get an output file as close to the original as possible. Since my MPEG-2 file is very high quality I'll start by reducing MPEG-4 bitrate to 1/3 of the original. The source is encoded at 24Mbps (24 million bits per second) so I'll start with 8Mbps. Since the 1080p original consists of 2,073,600 pixels per frame, compared to 921,600 for the 720p version, I'll cut that bitrate in half, resulting in 4Mbps or 4,000kbps1. Since SUPER requires you to select your target bitrate from a list, I'll use 4032.
3c. General Options
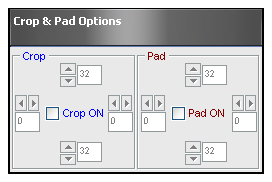
Check the High Quality, Top Quality, and 48K Audio options. I don't do any cropping or padding with SUPER, simply because there's no built in preview to see what I'm doing. If you want to use the Crop and Pad options you'll need to find another program to find the correct values. If you don't know what values to use you're better off ignoring these options.
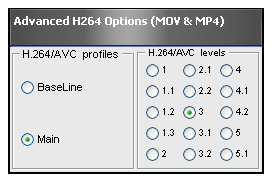
3d. AVC Profile
The Profile and Level combination used for encoding will determine what bitrate, resolution, and framerate are available. The H264 Profile button will open a dialog where you can specify the Profile and Level for video encoding. The Profile should be set to Main. For Level you should select at least 3 for standard definition captures, while 720p will require at least Level 3.2. For most HD video Level 4 is recommended.
3e. Other Options
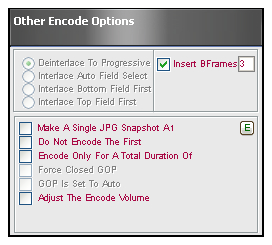
You'll want to make sure B frames are used, particularly for lower bitrates. The Other Opts button will activate a dialog where you can check the box next to Insert B Frames. Either 2 or 3 B frames are recommended. If you're encoding the audio and you'd like to adjust the volume you can also do that here using the Adjust The Encode Volume option and slider.
Step 4. Audio Settings

If you're keeping the source audio you can simply select Disable Audio. Although Stream Copy is available, SUPER can't mux MP4 files with AC-3 audio. When you get to the final step, creating a MKV (Matroska) file, you'll use the audio from your source file with the newly encoded AVC video. If you're encoding to AAC you'll want to match the sampling frequency (most likely 48kHz). You can either keep the same number of channels as the source, or select a smaller number to downmix.
4a. Bitrate
There are no strict rules about what bitrate you should use for 1, 2, or 5 channel audio, in general you should use between 48kbps and 64kbps per channel. That means 48, 56, or 64 for 1 channel, 96, 112, or 128 for 2 channel, and 256 for 5 channel2.
4b. Stream Selection
If you're using DirectShow to decode with you can't select which audio stream to encode as SUPER doesn't have that kind of control over DirectShow. If your source has more than one audio track and you want to make sure you're getting the right one you can use the built-in player feature to find out which one will be used. If you need to pick another audio track you can uncheck DirectShow decoding above.
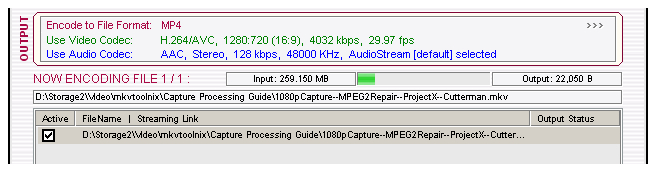
Step 5. Settings Review

Before you start encoding you can review your settings to make sure they're set correctly. In the Output section of SUPER there's a list of output settings.
Step 6. Encoding
Click the Encode (Active Files) button to begin the encoding process. When it completes you'll have a MP4 file containing your AVC video, as well as AAC audio if you decided to encode it. If this is your intended format you're done. Test it in the media player of your choice and burn to DVD if necessary.
Muxing To MKV
If you need to create a MKV file with your newly encoded video and the original AC-3 audio you can find instructions in our MKV muxing guide3.1Video BitrateAlthough it's certainly possible to get acceptable, or even good quality with lower bitrates, consider that 4,000kbps is already small enough to fit most movies on a single layer recordable DVD (DVD+/-R), while 8,000kbps movies fit nicely on dual layer discs. With the relatively low cost of media and hard drive space it's generally recommended to err on the side of quality, rather than size.(Return) 2AAC BitrateAlthough many people feel AAC requires significantly fewer bits than MP3 for equivalient quality, it really varies by the audio content. Unless you're really hard up for space it's better to use a slightly higher bitrate (like 128kbps instead of 96kbbps for stereo) to ensure quality.(Return) 3Re-Muxing to MKVIf you want to create a file with AVC video and the original AC-3 audio you can create a new MKV file using mkvtoolnix. Refer to the instructions in our guide on Creating MKV files with mkvtoolnix. Load the AVC video from the MP4 file created by SUPER and your original source file for the audio.(Return) Where to go from hereHow to play MP4 files
How to play MKV files
|
Version History
v1.0 Original version by Rich "vurbal" Fiscus
previousIntroduction
Written by: Rich Fiscus
