
The Filters Window Explained
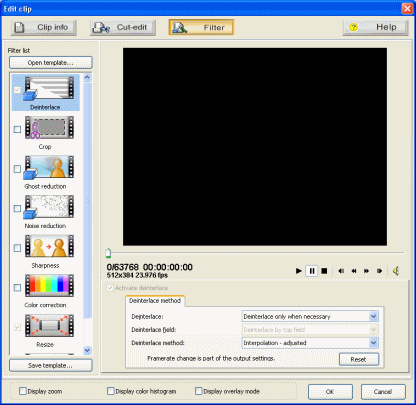 You have the option of using several filters during the encoding process. The Filters window is very easy to understand, you have the Filter list, the preview screen and the filter settings. The filters available are Deinterlace, Crop, Ghost Reduction, Noise Reduction, Sharpness, Color Correction, Resize and Audio Correction. Each of these filters are very useful and should be taken advantage of when the need arises. In order to take full advantage of them however, you have to understand them individually so I will explain each of the filters now.
TMPGEnc XPress Filters - DeInterlace
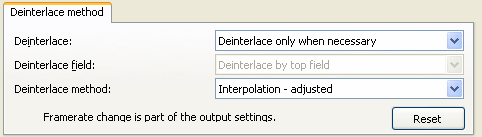 The first filter you can use is the deinterlace filter. If you are unsure what Deinterlacing is please visit the AfterDawn Glossary Section. Newbie's should also note that there are some complicated technical details here. The settings have to be adjusted a small bit here. Under the main Deinterlace options you have Keep Interlaced, Deinterlace only when necessary, Deinterlace, Deinterlace (Double Framerate), 24fps (Interlace prior) and 24fps (Motion Prior). Keep Interlaced will not deinterlace at all and if your source video is interlaced and you plan to output as progressive, you may get some strange results on playback. Deinterlace only when necessary automatically deinterlace's according to your output settings. Deinterlace will deinterlace the video no matter what your output settings are. Deinterlace (Double Framerate) will double the video framerate while deinterlacing. 24fps (Interlace Prior) reduces the framerate from 50fps or 29.97fps to 25fps or 23.97fps using a method that prioritizes the interlace stripes removing and 24fps (Motion Prior) reduces the framerate from 50fps or 29.97fps to 25fps or 23.97fps using a method that prioritizes the clip motion. The Deinterlace field options give you only two settings, Deinterlace by top field and Deinterlace by bottom field. If top is selected it will use the top field as base and if bottom is selected it will use the bottom field as base. Now you have to select a Deinterlace method. Your options are Interpolation - Simple, Replication - Simple, Interpolation - Adjusted, Interpolation - Animation, Interpolation - Animation 2, Replication - Animation, Inverse pulldown and Weave. Interpolation - Simple displays the average value of the top and bottom field. Replication - Simple displays a shade off of the top and bottom field, but this method will also result in blurry playback and motion scenes will be haunted by an afterimage. Interpolation - Adjusted interpolates the interlaces stripes by referring to the previous and following frames of the clip. Interpolation - Animation interpolates the interlaces stripes by referring to the previous and following frames of the clip and then also searches for the parts where interlace appears. Interpolation - Animation 2 does the same as Interpolation - Animation but searches more thoroughly for parts where Interlace appears. Replication - Animation researches the interlace stripes and duplicates referring to the previous and following frames. Inverse pulldown refers to the previous and following images and choose the one without interlace stripe. Weave uses the same method that TV uses where an image is synthesize with an odd and even field. These are the options for the De-interlace filter.
TMPGEnc XPress Filters - Crop
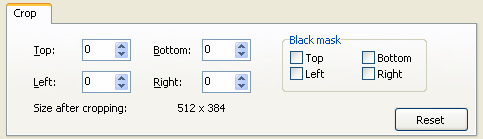 The second filter you can use is the Crop filter. The crop filter allows you to place a black mask (like black bars on a widescreen movie) on either the top, bottom or the sides of a video. You have to select where you want black bars first under black mask and then change the value in the corresponding number field. This is good for cropping out things that may have gotten in the way while you were making digital recordings with a DVCam.
TMPGEnc XPress Filters - Ghost Reduction
Ghost Reduction is the third Filter you can choose from. Ghost reduction reduces the ghost images you may have gotten on a recording from an analog ariel or cable tv network. There are three types to choose from, Edge, Luminance and Vertical Line Ghost.
TMPGEnc XPress Filters - Ghost Reduction - Edge
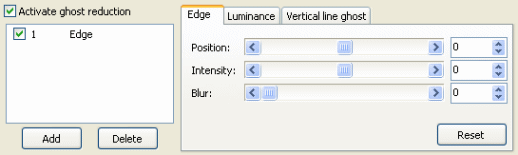 The Edge filter will create a counter ghost image that is based on the content edges of the original image. Position, Intensity and Blur are your three options here. Position sets in pixels the horizontal position of the ghost counter image. Negative values place the image on the left relative to the center of the image and positive values place the image to the right. Intensity sets the strength of the counter image. Blur sets the blurring level of counter image, the higher the value the more diluted it will appear. Reset will reset all settings.
TMPGEnc XPress Filters - Ghost Reduction - Luminance
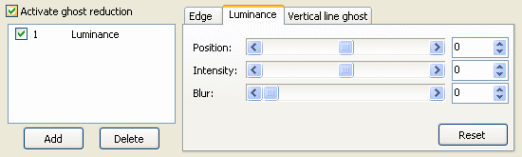 The Luminance filter creates a counter ghost image based on the color luminance of the original image. Position, Intensity and Blur are your three options here. Position sets in pixels the horizontal position of the ghost counter image. Negative values place the image on the left relative to the center of the image and positive values place the image to the right. Intensity sets the strength of the counter image. Blur sets the blurring level of counter image, the higher the value the more diluted it will appear. Reset will reset all settings.
TMPGEnc XPress Filters - Ghost Reduction - Vertical line ghost
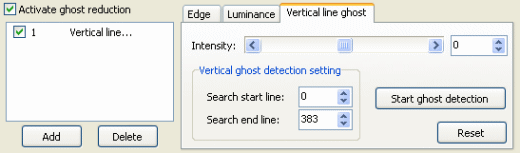 The Vertical line ghost filter creates a counter ghost pattern based on the extraction of a certain luminosity variation repeated on all or part of the frames. Intensity sets the strength of the counter image pattern. The vertical ghost detection setting allows you to set the horizontal lines range analyzed to find the pattern. The search start line and search end line fields allow you to select this range. The start ghost detection button will start the vertical ghost analyzing. The Reset button will reset all settings.
TMPGEnc XPress Filters - Noise Reduction
This filter will allow you to filter out the noise that may have been added to your picture while recording from an analog source. There are two different options, Special NR setting and Temporal NR setting.
TMPGEnc XPress Filters - Noise Reduction - Special NR setting
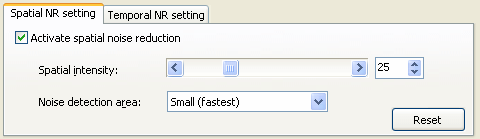 This filter analyzes the Noise by comparing the pixel color status on two separate frames. Firstly you will need to tick the Activate spatial noise reduction to make sure the filter is properly activated. The Spatial intensity sets the color difference reduction level between adjacent pixels and the higher the value the more pixel color difference is reduced. Be warned that a value too high may result in loss of sharpness. Noise detection area sets the size of the analyzed surface, the larger the size the slower the filter but the higher the precision. The Reset button resets all settings.
TMPGEnc XPress Filters - Noise Reduction - Temporal NR setting
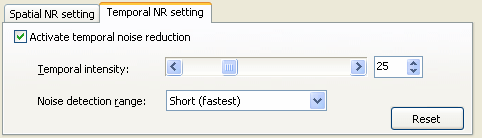 This filter analyzes the Noise by comparing the pixel color status on several separate frames and takes into account the evolution of pixel colors. This makes it more efficient than the Spacial filter but also makes it much slower. Make sure you tick the Activate temporal noise reduction setting to make sure the filter is activated. The Temporal Intensity sets the color difference reduction level between adjacent pixels and the higher the value the more pixel color difference is reduced. Noise detection area sets the size of the analyzed surface, the larger the size the slower the filter but the higher the precision. The Reset button resets all settings.
TMPGEnc XPress Filters - Sharpness
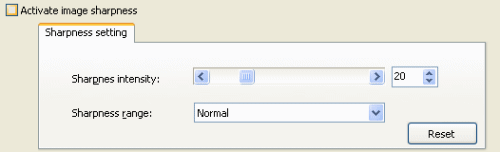 The sharpness filter attempts to make your picture appear more sharp by detecting the color variations and amplifying them, reducing color gradation and making details appear. Make sure you tick the Activate image sharpness box to turn the filter on. The Sharpness Intensity sets the color change level. The higher you set the value the more strong the color difference is. Sharpness range sets the size of the range to be analyzed. The bigger the range the more effective the filter will be but the bigger it is, the the longer it will take also. The Reset button will Reset all settings.
TMPGEnc XPress Filters - Color Correction
TMPGEnc XPress has some color correction filters you can use. The options they give you are Simple setting, RGB, YUV, CMYK and HSV. RGB codes the color by the three primary colors, the same as a computer monitor. YUV cods the color in luminance, blue level and red level. This is used by the MPEG standard. CMYK stands for Cyan, Yellow, Magenta and Black. This is used in the printing industry. HSV uses Hue, Saturation and luminance. This is often used by artists in colour sampling. You can add as many filters as you wish using the Add button, you can also deactivate them using the tick box beside them.
TMPGEnc XPress Filters - Color Correction - Simple Setting
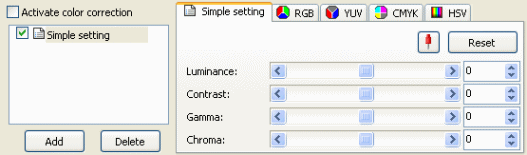 The first option of Color Correction is Simple Setting, Luminance sets the overall luminosity of the image, Contrast sets the overall contrast of the image, Gamma sets the overall Gamma level of the image and Chroma set the overall colour level of the image.
TMPGEnc XPress Filters - Color Correction - RGB
 The second Color Correction option you have is RGB. You have several choices for Type includingLuminance, Contrast, Gamma, Shade Level, Contrast (Black base), Contrast (White base) and Contrast (Tone Curve). You can also use the R, G and B fields to set the level of the Red, Green and Blue colour channels. The Reset button will rest all settings.
TMPGEnc XPress Filters - Color Correction - YUV
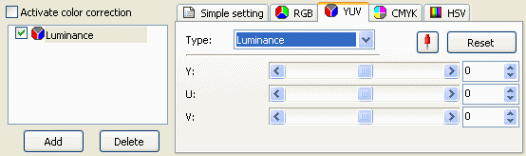 The third Color Correction option you have is YUV. You have several choices for Type including Luminance, Contrast, Chroma, Hue, Gamma, Shade Level, Contrast (Black base), Contrast (White base), Contrast (Tone Curve), CCIR601 expansion and YUV expansion. The Y field allows you to set the level of luminance colour channel, The U field sets the blue-yellow colour channel level and V sets the Red-Green colour channel level. If you selected Chroma or YUV expansion type you will have to set the Chroma setting. If you selected the Hue type you will have to set the colour channel hue. If you selected CCIR601 expansion type you will have to set brightness and colour levels. If you selected the YUV expansion type you will have to set the Image maximum brightness level. The Reset button will reset everything to normal.
TMPGEnc XPress Filters - Color Correction - CMYK
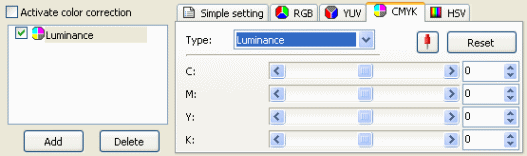 The fourth Color Correction option you have is CMYK. You have several choices for Type includingLuminance, Contrast, Gamma, Shade Level, Contrast (Black base), Contrast (White base) and Contrast (Tone Curve). The C field allows you to set the Cyan colour channel level, the M field lets you set the Magenta colour channel level, the Y sets the yellow colour channel level and K lets you set the black colour channel level. The Reset button would reset all the settings to normal.
TMPGEnc XPress Filters - Color Correction - HSV
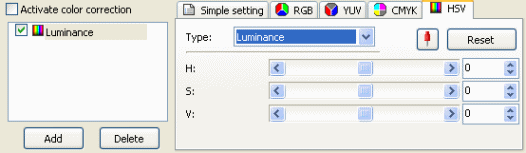 The fifth and final Color Correction option is HSV. You have several choices for Type including Luminance, Contrast, Chroma, Hue, Gamma, Shade Level, Contrast (Black base), Contrast (White base) and Contrast (Tone Curve). The H lets you set the color channel tint, the S sets the color saturation level and the V lets you set the luminance channel level. If you selected the Chroma channel type then you have to set the colour level. If you selected the Hue type you have to set the Hue channel level. The Reset button will reset everything to normal.
TMPGEnc XPress Filters - Resize
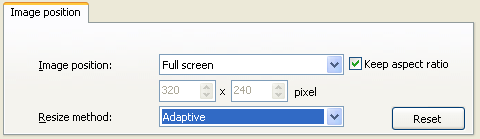 The Resize filter allows you to resize the picture of the video. The Image position choices you have are Center, Center (custom size), Full Screen and Full Screen (no margin). You can also choose to keep your Aspect Ratio. You have several different Resize methods too. Adaptive automatically selects the best method according to the size transformation. It uses the Triangle method for Image size reduction and the Bilinear method for Image enlargement. NearestNeighbour uses the Nearest Neighbour method, which produces bad quality but is fast. BiLinear resizes the clip image based on linear interpolation. The Triangle method is best suited for size reduction and it may blur the image. Lanczos-3 is an improved version of the Lanczos method and is efficient in both enlargement and reduction.
TMPGEnc XPress Filters - Audio correction
TMPGEnc XPress gives a few different filters for Audio correction that are very useful. The first is the Noise Gate. Basically the Noise Gate will cut the audio in parts where the audio level is lower than a given level, this can help to remove any sounds that might have been put on the recording during analog recording when there should have been no sound at all. Time tone reduction removes to a certain extent the time synchronization tonale signal sometimes founds at the beginning of a clip. The Volume change tab lets you change the overall volume of the audio. Fade in/out tab lets you change the audio volume level from 0%-100% at the beginning of a clip and from 100% to 0% at the end of the clip. The BiLingual audio tab allows you to choose between audio in the case of BiLingual audio on one audio track.
TMPGEnc XPress Filters - Audio correction - Noise gate
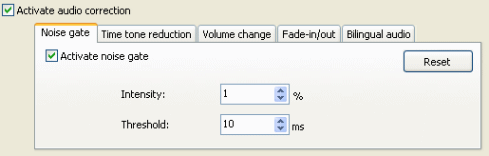 If you click the Activate Noise Gate box then you will activate this filter. The percentage you set intensity at will be the percentage which will mark the Noise gate. For example, if you set it to 15% and the audio falls below 15% of the audio range, it will not get through the gate. The threshold will be the amount of time the audio can be played lower than the set percentage before the gate kicks in. The Reset button will rest all settings.
TMPGEnc XPress Filters - Audio correction - Time Tone Reduction
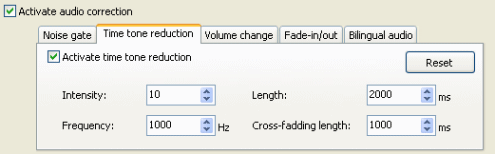 Time tone reduction removes to a certain extent the time synchronization tonale signal sometimes founds at the beginning of a clip. You have to tick the Activation tick box in order to use this filter. The Intensity is the percentage of the tone reduction level, the higher the percentage the higher the reduction will be. The Frequency is in hertz and sets the tone reduction frequency. The Length is in milliseconds and it is the length of the filter activity from the beginning of the audio track. The cross fading length sets the length of the cross-fading between filtered and unfiltered parts of the audio track in milliseconds. The Reset button will reset everything to the original way it was.
TMPGEnc XPress Filters - Audio correction - Volume Change
 You can change the Volume of the Audio. You have to select the Activate volume change option to use this filter. If you reduce the 100% to anything, it means that the audio volume will be reduced, if you increase the figure then the audio volume will be raised. Audio normalization can also be done and normalized at any percentage level.
TMPGEnc XPress Filters - Audio correction - Fade-in/out
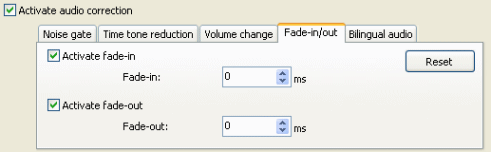 The Fade-in/out filter can be used to set a fade in and fade out on any clip. If you Activate Fade in, then at the start of the file the volume will change from 0% to 100% in the given amount of time and if you activate the Fade out filter then then audio will reduce from 100% to 0% at the end of the clip for the given amount of time. If you then click the Reset button it will remove all the settings
TMPGEnc XPress Filters - Audio correction - Bilingual audio
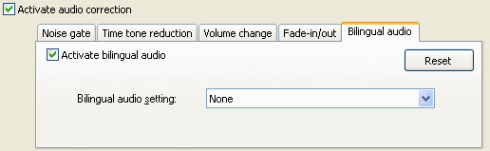 With this filter you can choose which audio you want from a bilingual audio track. You can choose between main and sub audio. The reset button will change the bilingual audio settings to none again.
Written by: James Delahunty
