
Stream multimedia files to PSP without encoding
Introduction & Requirements
PiMPStreamer - Download the latest Installer, but wait before installing. PiMPStreamer is a Windows server client that will automatically install the homebrew on your Memory Stick also.
You obviously need a wireless network in your home, the faster your router and adapter on your computer, the better. You need a USB cable to connect the PSP to your computer to install PiMPStreamer and you should also have already setup your Network connection on your PSP. The faster your PC, the better.
What is PiMPStreamer?
PiMPStreamer acts as a server on your computer that can be accessed by devices connected to the network. The PiMPStreamer installer will automatically install the homebrew files necessary to your Memory Stick. From there, you will be able to access the PiMPStreamer server from your PSP and watch your multimedia files.
PiMPStreamer encodes the files on-the-fly, so needless to say, it is a hungry process. For this reason, it is best not to have CPU-intensive tasks running at the same time you are streaming video. So now we will install PiMPStreamer, but before we do, connect your PSP via USB cable to the PC and go to Settings -> USB Connection on your PSP. Windows will probably alert you that a removable storage device has been connected.
Installing PiMPStreamer
 Run the PiMPStreamer installer. After the initial screen click Next until you get to the option of whether or not to install PSP binaries. Select this option. This means that the USB-connected PSP will be detected and the files and settings (including IP address and port of PiMPStreamer server) will automatically be stored on your Memory Stick.
If there is a PSP/GAME directory on your Memory Stick, PIMPStreamer will assume it is the PSP and copy all the files across. If not, you will have to specify which drive letter is associated with the PSP (find out in Explorer or My Computer).
 The installer will check your computer's IP address on your network and will copy the files across to the PSP/GAME folder. Here is where you "might" have a problem. If you have PSP 1.50 firmware, this is perfectly fine, but if you have customer firmware where the homebrew eboots for 1.50 are stored in a GAME150 folder instead, then you will need to use explorer to copy the folders PIMPSTREAMER201SUB and PIMPSTREAMER201SUB% from the PSP/GAME directory into the PSP/GAME150 directory (if GAME150 folder doesn't exist, create it).
 So remember, only copy the files into the GAME150 directory IF you have custom firmware and are required to do so. You don't need to do this if you have 1.50 firmware. Now the installer will be finished, close it and launch PiMPStreamer application on your PC.
PiMPStreamer Interface
 Luckily, PiMPStreamer is a very simple program to use and edit settings with. As you can see, the program automatically shares any partitions it finds. On your PSP you will be able to browse through these partitions and play multimedia files. You can remove what it selects as default if you wish and Browse to just add your multimedia directories.
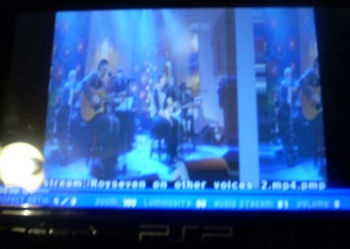
Below this is where the application will show what it is currently streaming and the progress of the PC processing (encoding) and where the PSP is during playback. For the record, you can skip into middle of files using PiMPStreamer so if a problem occurs with your WiFi and you lose the video stream, you can continue on from where you left off.
Next are the bitrate options.
 Determining a maximum resolution, video and audio bitrate, as well as whether or not you want to reduce the framerate is something that you will determine when you have used PiMPStreamer with your PSP. Sometimes the settings can be too high for your Wireless equipment so you have to alter them, or also altering them may speed up your computer's processing of the video.
You will also notice that you can RSS files for web video feeds if you want to. Now its time to test if your PSP can connect to the server and play media.
Run PiMPStreamer homebrew
 To run PiMPStreamer on your PSP, switch it on and navigate to GAME --> MEMORY STICK, and it should be there to run. If you get a "Game could not be started" message or any other error, then you either don't have homebrew-friendly firmware or you do need to copy the files to the GAME150 directory.
Below I illustrate how to use PiMPStreamer but, be warned, the images were created by me because it's next to impossible to capture the text with a camera, so it is not exactly at scale but you will get the point.
Using PiMPStreamer - select network configuration
 As you can see, the PSP interface for PiMPStreamer is not very pretty to look at. The first thing you will have to do is select your network configuration to use. If you get a message saying there are no network configurations, you need to go back to your Network Settings and set one up.
Select your configuration and press X.
Select server
 You should only have one server to possibly select. Although it is important to note that if the IP address of the PC PiMPStreamer is installed on is changed, PiMPStreamer does not automatically update it.
If this happens you will have to connect your PSP to your computer, go to your PSP/GAME or PSP/GAME150 folder and open the PIMPSTREAMER201SUB folder and open the pmp.ini file.
You will notice the server line; pimpserver_1 = 192.168.0.110:3333; - get the IP address of your computer (Start -> Run -> type CMD and hit enter-> type ipconfig and hit enter) and replace the original address (don't forget to leave the :3333 on the end, this is the port number). Save your changes then and try PiMPStreamer again.
Connection test
 Now PiMPStreamer offers you an optional connection test. Of course, you do not have to take the test but it can't hurt and should only take about 30 seconds. If it takes way longer, you might want to consider changing your WiFi channel or moving your equipment to boost signal.
Again, if the IP address of the server computer changed since PiMPStreamer installed itself, you will need to edit the pmp.ini file (look at instructions on Select server paragraph). Press X to continue.
Browsing for files
 Now you can browse through your shared directories. Use X to open directories or play video files. Pressing O on a video file will add it to a playlist. Notice that all your multimedia files in this browser have a .pmp extension. The "dir:/.." is used to exit a directory/folder you are currently in. Pressing start will reset everything.
If you look at your files, you will notice they have a timecode beside them. Using the left and right directional buttons and also using the L and R triggers you can select a certain time at which to start playing the file. This makes up for the lack of such navigation within the files. One more thing before you start playing stuff, press Select to enter server config.
Server config
 To save you from having to go back to the server every time you want to change the settings, you can do it from PiMPStreamer. The L and R triggers will change the frame divider setting, left and right directional buttons will change the video bitrate. The Up and Down directional buttons will change the audio bitrate.
Pressing Square will refresh RSS feeds. Pressing Select will bring you back to the file browser. It's pretty straight forward and when your streams are acting up, its a quick route to adjust the settings.
So press Select and return to the file browser. Play a file to learn what the controls do during playback.
Playback controls
 While playing back files it is possible to do some things, like pausing. Use square to pause and unpause. The Up and Down directional buttons will change the volume level of the audio (gets very distorted too high). The right and left direction buttons will only provide navigational options in a playlist (previous and next files), if there is no playlist, left will start the video again and right will take you back to the file browser.
The L and R triggers will change the aspect ratio. That's about it really.
Exit PiMPStreamer
To exit PiMPStreamer from the file browser, press triangle followed by circle. Any other button will bring you back to the browser.
Troubleshooting
What if PiMPStreamer crashes? I have had PiMPStreamer crash several times. To turn off your PSP, simply push up the power switch as usual, but hold it until it finally turns off. If the server crashes (happens with RSS i find), then reboot it.
Why won't my video work? The vast majority of what I have tired to play has worked, but of course, some files just "wont" work. There's really nothing much you can do about that
My videos freeze and jump constantly! If your playback is impossible to watch, you may need to lower the quality settings from the server (the bitrate, frame divider and movie resolution). Other than that, it could also be caused by simply having a slow PC. The streaming process is very intensive so make sure you close unnecessary applications when streaming. Remember CTRL + ALT + DELETE pressed together will give you a list of running processes, so end any useless processes. Of course, your WiFi equipment could also be just too slow or you could benefit from changing the channel or simply moving stuff around. Maybe you are too far away from your router?
PiMPStreamer won't connect to my computer anymore! If it was working one day and not the next, chances are that the IP address of your computer has changed on your network. If so, then read how to change the configuration in the Select server paragraph.
Version History
v1.0 - 24th of March, 2007 by Dela
Written by: James Delahunty
