How to remove copyright ads, logos, warnings etc. from DVDs
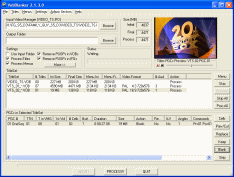 This guide is for anybody who is sick of buying their DVDs only to be bombarded with anti-piracy messages, studio logos and other forms of commercials before they get to a disc menu or main feature. Using VobBlanker, this guide lets you "blank" all the DVD-bloating video out of your DVD so you can re-burn it to DVD-R DL (or compress it again). We also look at removing any unwanted audio tracks and subtitles.
Introduction & Requirements
Download VobBlanker -- Click to download VobBlanker, which is free. The download button is located below the description.
For this you will need your DVD files on your hard drive, so rip using your preferred or seek help in this forum. VobBlanker does not support DVDs with multi-angle in PGCs (it's OK if you don't know that that means, VobBlanker will warn), so if you are stuck with those DVDs, I recommend looking up DVD ReMake to remove them.
Open VobBlanker
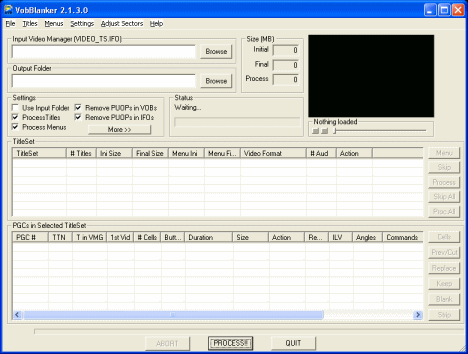 Download VobBlanker and extract the contents of the file to any folder using WinRAR. Then run vobblanker.exe. The program will now load.
The program doesn't look particularly busy or needlessly complex, you will find it very easy to use all the time after reading this guide just once.
The first thing we have to do of course now is open our DVD with VobBlanker. Click the Browse button beside the Input field. Now, navigate to the folder that contains your DVD files (VOB / IFO / BUP) and double-click the VIDEO_TS.IFO file.
It will now open.
Titlesets & PGCs
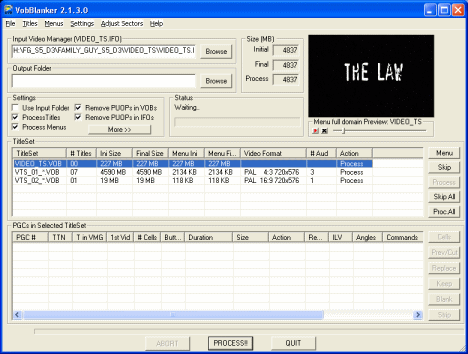 After a short while of scanning by VobBlanker, you will now see someTitlesets listed like in the picture. Notice how if you click any of the Titlesets that are listed, you may see the lower list fill up with PGCs that are in that title set, and you will most likely see a preview of the menu in the top right-hand corner.
So the first thing we want to do is seek out the anti-piracy messages that make us wait to watch the DVDs we just bought, but first and foremost, they need to be located. Mine have already been found, as you can see, in the first listed Titleset, they are part of the disc menu. I know this because I can see it in the preview.
In case you have the same thing here, I'll show you how I'm going to get rid of mine. Click the Menu button with the Titleset selected.
Dealing with Menu Content
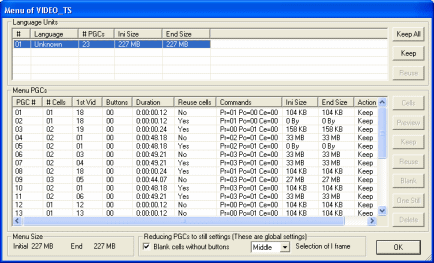 After you have clicked the Menu button, you will now get a pop-up window. In this window, you might see only one or several menus listed under "Language Units". Select any of them. You will now notice that a lot of Menu PGCs will load below as you can see in my picture (click to enlarge).
To preview these PGCs, simply select one (pay most attention to any with MBs of size) and click the Preview button.
Menu PGC Preview
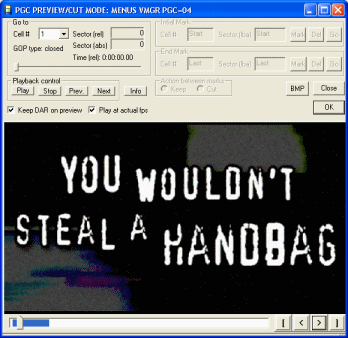 In the Menu PGC Preview now you will see a preview of the Menu as it will appear on the disc. Look around your menu for any anti-piracy messages or commercials that you have no interest in keeping. In my case, I have many anti-piracy advertisements insseveral different languages embedded into my menu. What a waste and what a sheer annoyance for me after spending my hard earned euros on the DVD.. but I digress, when you are done with preview click OK.
Preview all the Menu PGCs and anything you don't want to keep, we will now Delete.
Deleting from Menu
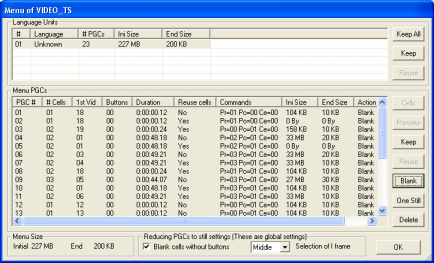 Now that you have checked all the PGCs of your menus, how do you get rid of anything you don't want from the resulting disc? It is terribly easy. Simply select any Menu PGC you don't want on the resulting disc and click either Blank or Delete (although blank may seem the safer option, either way, a dummy will replace it and disc playback will be kept intact).
That covers pretty much everything about deleting Menu PGCs. Now it is time to focus on other PGCs on the disc, as most DVDs' anti-piracy and other commercials are not in the menus (but still cannot be skipped due to PUOs on disc).
Find PGCs to Blank & Remove Unwanted Audio & Subtitles
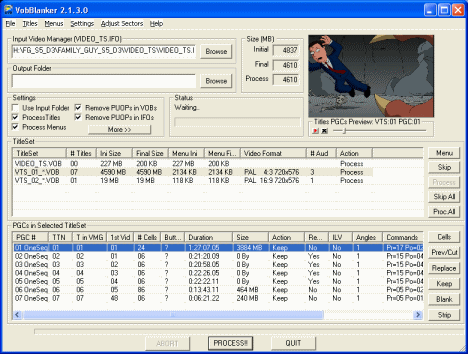 Now that we are done with Menus, this time click on any of the Titlesets and then click on the PGCs that appear below in a list, just like in the picture (click to enlarge). You will notice that the Preview works for these too, which gives you a good indication of what the video is.
You can check a preview of these PGCs just like you did with menus by clicking the Prev/Cut button. It is quite easy to locate the main feature of the disc by simply checking. If you want to remove audio and subtitles from these features, now is the time to do so.
Select anything you want to remove content from and click Strip.
Strip audio from DVD features
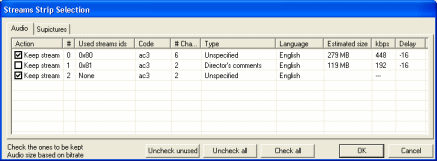 Stripping unwanted audio and subtitles can save space if you are looking to backup your DVD, and as such, results in a higher quality backup if you are compressing to DVD-R from DVD-9. When you select a PGC and click strip, you first see the audio, as you can see in the picture (click to enlarge).
As you can see there is often information on what the audio is under "type", such as Director's Commentary in my picture. Play close attention to the languages specified to. If there is anything you don't want, simply untick the box beside "Keep Stream". Now if you want to remove Subtitles, click the Subpictures tab.
Strip Subtitles from DVD Features
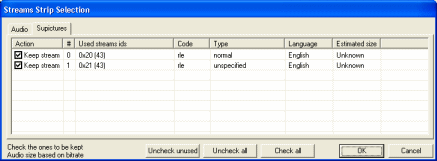 Again, like with the audio selection, you can see the Type and Languages specified. Once again, anything you don't want to keep, simply untick the box beside "Keep Stream". When you are done, click OK.
Repeat this process for as many PGCs as you wish.
Blank PGCs
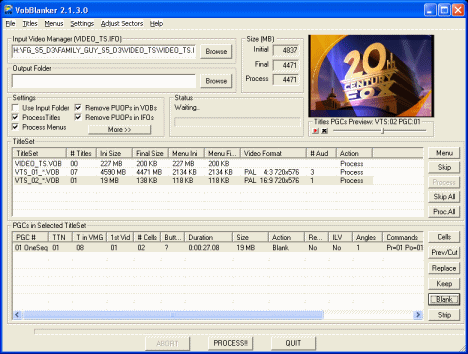 Now that we have dealt with anything nasty in our Menus and have stripped any audio and subtitles we don't want from our main features and extras, we simply need to blank any more PGCs we don't want. This is where you usually find the copyright warnings.
Simply check each Titleset, PGC by PGC, clicking and keeping an eye on the preview window. In my sample picture (click to enlarge), you will notice I have decided to blank out a movie studio logo. The reason for this is because this logo plays before I get to my main menu, and it adds 27 seconds on to the wait after the Anti-piracy advertisement and then the still picture copyright warning.
Find anything like this that you don't want and select it. Then simply click blank and this PGC wont be on your output DVD. Pay attention to the DVD Size information beside the small preview box. For everything you blank, the overall Final DVD size will fall. You can blank extras too if you want, or click Prev/Cut to cut out parts of videos and other things that you don't need.
When you are finished blanking everything out, it is time to set an output folder. Simply click the Browse button beside the Output folder field and navigate to a director in which you want to save your DVD files (make sure its an empty folder). When you have done that and you are satisfied with what you have done, click the PROCESS!! button to begin.
Processing
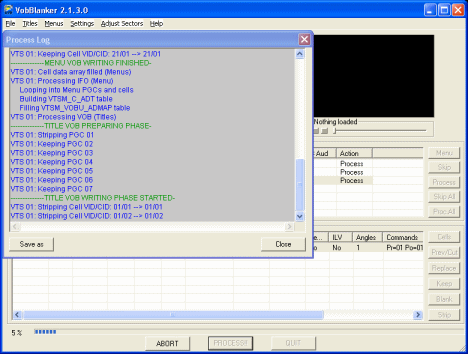 The amount of time that processing takes depends on the size of the DVD that you are outputting and the amount of blanking and stripping the program has to perform. It will play a sound when it is complete. A log will be present the entire way through, and as you can see in my picture (click to enlarge), the progress bar will be visible all the time.
Once it is finished with output, do NOT burn it immediately. Make sure to check your Output DVD files to see if it has worked out for you.
Finally
This guide set out to help you remove some nuisance content from your DVDs during a backup process. We hope that this guide was informative enough for you. If you need further help, please visit our Discussion Forums.
Version History
v1.0 -- first version published by Dela (26/03/2008)
Written by: James Delahunty

