
Burn AVCHD with Imgburn
Introduction & Requirements
| Software you must download and install | |
| ImgBurn | |
| Required: You need to download and install ImgBurn on your computer. Download! |
The ImgBurn installer is fairly straight-forward and so requires no instructions. Remember you will need blank DVD media (possibly dual-layer if your compilation is over 4.36GB). Remember, you must have a BDMV and CERTIFICATE folder for this to work properly. If you need to create AVCHD, then check our Guide section for help.
Launch ImgBurn
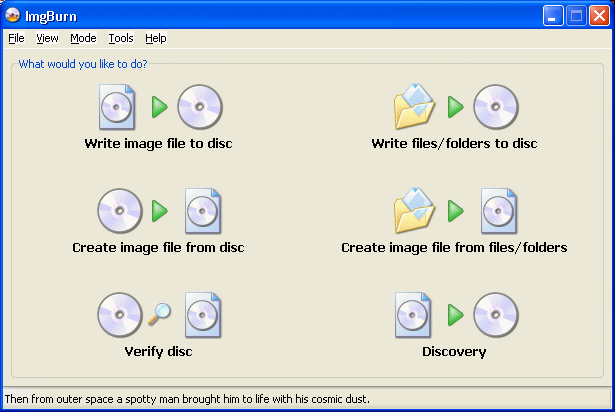
The first thing you will see when you launch ImgBurn is a start page. The including of this Welcome screen has made things much easier to understand for new users to the software. To enter Build Mode, click Write files/folders to disc.
ImgBurn Build Mode
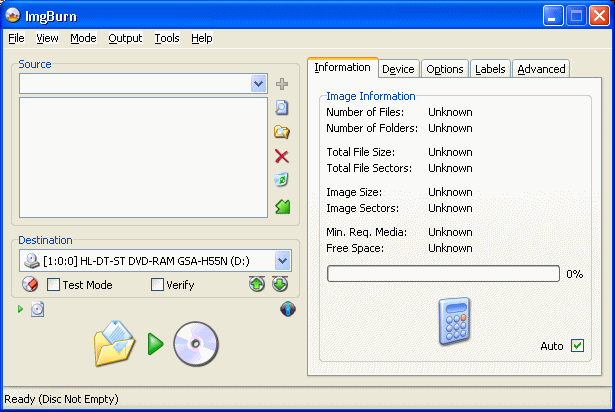
ImgBurn was originally designed for burning DVD/CD images to blank media (hence, the name). However, nowadays it has a build mode, which means you can burn files and folders to disc directly from your hard drive without having to build an image first. This saves a lot of time. Click the Open Folder button. The open folder button is one of the small six icons beside the source box. Click it and browser for the CERTIFICATE folder and import it, and do the same for the BDMV folder. Alternatively, you can drag and drop both folders right into the program.
ImgBurn - UDF 2.50 file system
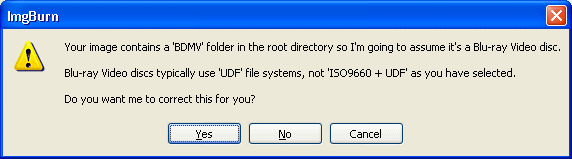
ImgBurn is pretty smart. As soon as you add a BDMV folder to it, it is going to assume you are writing Blu-ray or AVCHD media. If it has to, it will alert you that you have the wrong file system selected. In a nutshell, AVCHD requires UDF 2.50 to be compatible with stand-alone hardware such as the PlayStation 3 (PS3) console or a Blu-ray player. If ImgBurn offers to correct the problem for you, then click Yes.
Ready to Burn?
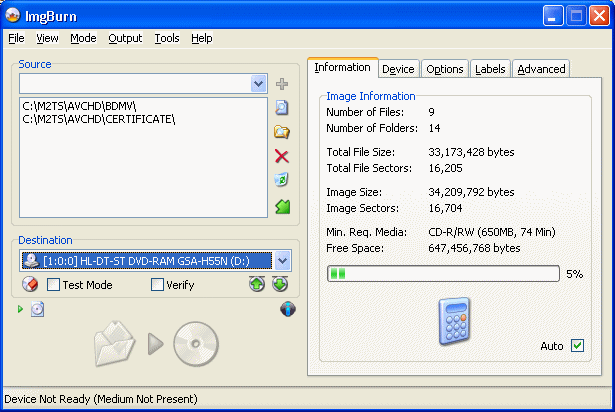
Please take a look at the picture above. You are ready to burn when you can see the BDMV directory and CERTIFICATE directory as seen above. This means they are in the root of the disc. Insert your blank media into the DVD Burner. If your media is undersized then I suggest next time you are creating AVCHD video, if you can swap DTS for AC3, then do so. Select a Write speed under the Device Tab.
When ready, click the Burn button (Folder pointing to a Disc in lower bottom-left corner).
Select a Volume Label
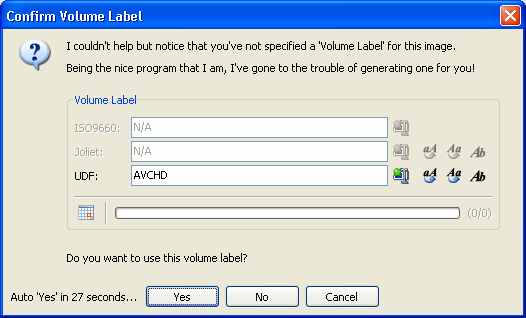
You will now be presented with the opportunity to select a Volume Label. It really does not matter what Volume label you use, anything ImgBurn suggests should be just fine. When you select a Volume Label, click Yes and after that, click OK to confirm all burning details are correct.
The Burning Process
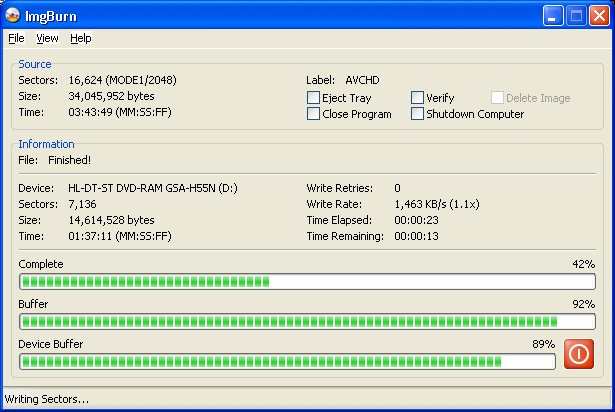
The amount of time the burning process will take up depends entirely on the speed you choose to burn the disc at. Of course, it also will be effected by the size of the AVCHD compilation. If it is an entire movie, it will probably take a while at a good burn speed.
Success?
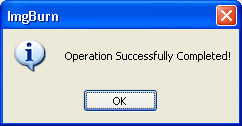
You will know all went well if you receive the "Operation Successfully Completed" alert as shown above.
Finally
Hopefully you will have learned how to create AVCHD discs from compilations you have created on your hard drive. If you run into any problems, please visit our Discussion Forums and ask for help
Written by: James Delahunty
