
| Converting DVD to AVC with Nero Recode 3 | You are viewing Page 2 of 3 -- Go to page 1 , 2 , 3 |
Video and Audio Settings
There are a number of possible options for processing video before encoding, including deinterlacing, cropping borders, and resizing. Although Recode will handle these decisions automatically if you choose to ignore them, your results will usually be better if you check them yourself. Likewise you may need to manually set audio and subtitle options.
 |
1. Video
Clicking the Video Settings button will open the Nero Digital Video Settings dialog where you can customize several important settings regarding the frame structure and resolution of your output video. Although Recode can set these options for you, it doesn't always make good decisions, particularly when it comes to resizing.
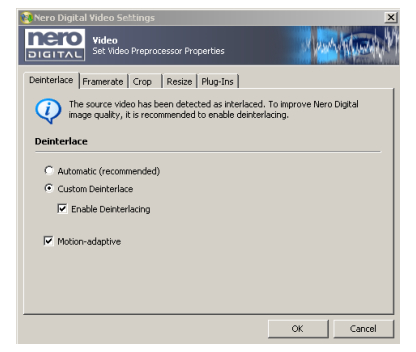
Deinterlace Tab
Most DVDs are natively progressive, meaning no deinterlacing is required. You can spot these sources easily because Enable Deinterlacing will be unavailable. If your DVD is from a film source, but the Enable Deinterlacing option is available you should go ahead and check it. If your source is interlaced video you may get better results by not deinterlacing, but unless you're going to be watching your AVC video on an old fashioned standard definition TV it's almost always better to deinterlace.
The Motion Adaptive option will slow down the conversion process, but should also result in higher quality. Unless you're using a very old computer to encode you should always check it when deinterlacing.
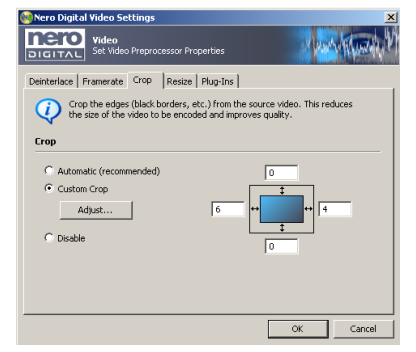
Crop Tab
Cropping is primarily used to remove black borders from the top and bottom of widescreen DVDs. Leaving these borders intact will mean a higher bitrate must be used to maintain quality, while removing them may give some standalone players problems if they assume all video is either 4:3 or 16:9 (which is true of all DVDs). If you're not sure about what aspect ratios your DVD supports you may have to do some testing by encoding with and without the extra borders cropped to find out for yourself. In addition to the top and bottom, some DVDs will have black borders on the left and right sides as well.
If you're not planning to resize you need to make sure that the combined number of pixels cropped from the top and bottom is divisible by 16 (ie 16, 32, 48, etc,...). Likewise the total pixels cropped from the left and right must be a multiple of 16. You can visually inspect the results of the crop operation using the Adjust button and drag any of the 4 borders in the Nero Digital Cropping dialog to the desired position.
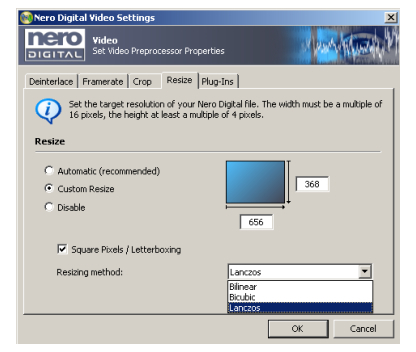
Resize Tab
Resizing can be a complex operation to say the least. As with cropping, you may need to do some testing to see how different settngs affect playback. Perhaps the most important setting in this regard is the Square Pixels/Letterboxing option. For computer playback it should almost always be checked. For standalone DVD players it varies. If you decide to check it you should also select Custom Resize because Recode doesn't do a very good job of selecting the best resolution.
The Resizing Method determines what degree of sharpening or smoothing will be performed during the resize operation. Of the 3 options, Bilinear is the smoothest and Lanczos is the sharpest. While sharper resizing may result in better visual quality, at low bitrates it may also result in more encoder artifacts. Once again selecting the best option to use may require some trial and error.
If you make multiple changes to the Custom Resize values it may stop calculating them correctly. If that happens you should uncheck Square Pixel/Letterbox, select Automatic and then switch to another tab. When you return to the Resize tab it should work properly again.
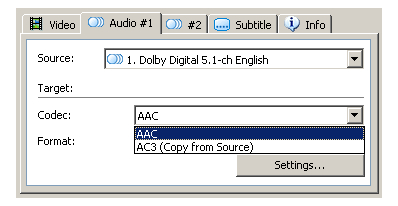
2. Audio Tracks
Once you have the basic video options set you can move on to the audio. You can add up to 2 audio tracks. You have the option to either encode the audio to AAC, or keep the original track from the DVD (only available for Dolby Digital streams). If you're not going to play the file either with Nero's Showtime player or on a Nero Digital certified standalone DVD player you should always encode to AAC.
Note: Recode can't read DTS audio. If your DVD has a DTS surround track you'll get a warning when you import your DVD telling you that the unsupported audio is being ignored.
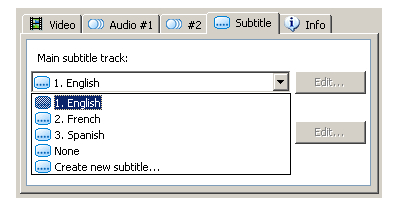
3. Subtitles
You can also keep up to 2 subtitles from the source DVD. As with audio you'll need to select them from a dropdown list. You can skip this step if you don't wish to include subtitles in your AVC file.
Continued On Page 3Next we'll look at setting final AVC settings and encoding. Page 3 - Encoding | |
| Converting DVD to AVC with Nero Recode 3 | You are viewing Page 2 of 3 -- Go to page 1 , 2 , 3 |
Written by: Rich Fiscus
