Prepare content from TS for Xbox 360
TS files are transport stream files and are found widely on the Internet. Sadly, the Xbox 360 chooses to ignore .TS files when present on a DVD-R disc or any other direct method for playback. If you have a TS file with H264/AVC video with AC3 audio (will work with MP3 also) then this page can help you to take the H264 stream and place it into the MP4 container so it will be recognized by the Xbox 360 console. This page also covers converting multichannel AC3 audio to AAC LC for Xbox 360 support. Unfortunately, a lot of TS files can contain MPEG-2 streams, which aren't supported by Xbox 360 directly (you need Windows Media Center).
Software you need
| TS Converter | Used to demux TS files into separate streams. |
| MeGUI | Used for AC3 --> AAC LC conversion. |
| Nero AAC Files | Used with MeGUI for AAC. |
| MP4Box | Command-line tool for creating MP4 files. |
| YAMB | GUI for MP4Box. |
| h264info | Tool to manipulate H264 video stream for Xbox 360 compliance if necessary. |
| WinRAR | Archive Extractor for several of the above downloads. |
Go ahead and install TS Converter, MeGUI and WinRAR. I'll cover the other tools where and when needed.
TS --> MP4 - Step 1 - Demux TS file |
TS Converter
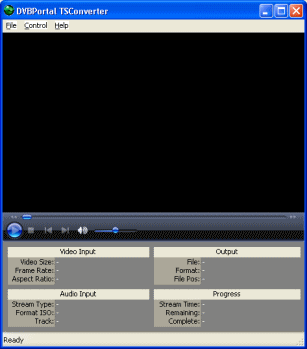 The first thing to do with our TS file is to demux the video and audio streams. This is achieved with TS Converter, so download and install this excellent tool. If you have any playback warning messages, just ignore them as we don't need to playback the files, just demux.
Click File --> Load TS and select your TS file.
TS Converter Video Information
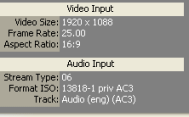 The first important thing that TS Converter does is provide us with important information on our video and audio content. Make sure to always remember the Frame Rate of a video file. Mine is 25.00 (click to enlarge). We also see that we have a multichannel (6CH) AC3 audio stream here. That has to be converted but first of all, it's time to Demux.
TS Converter Demux Settings
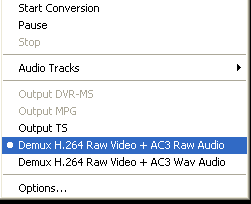 The first thing you need to do is click Control and Select the option Demux H.264 Raw Video + AC3 Raw Audio. Note that this setting may just say Demux Raw Video + Raw Audio.
When you have made your selection, click Start Conversion.
Demuxing Process
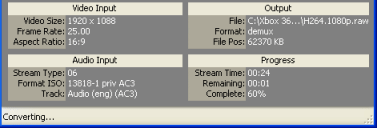 The Demuxing (Conversion) process may take a long time depending on the material you are working with and the speed of the computer you are using. Files will be output into the same directory as the original TS file. Change any .RAW extension to .h264. Also, if you have AC3 audio, change any .mpa extension to .AC3 instead.
Success?
 You should now get a message confirming that the Demuxing was successful.
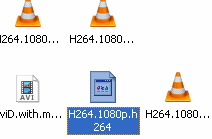 You should locate your demuxed files right away because you will be needing them very quickly. Next we will look at converting AC3 audio (or MP3) to AAC LC for compliance with Xbox 360's demands.
TS --> MP4 - Step 2 - Convert audio to AAC LC |
Get Nero AAC encoder and Setup MeGUI
 Nero AG offers a free download of its AAC encoder files that we will need for this part of the guide. You can get them from this URL. Once you have downloaded these, please install MeGUI as well, as we will use MeGUI as a frontend tool for the Nero AAC encoder.
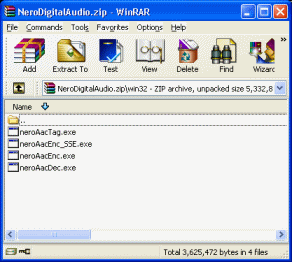 Once you have installed MeGUI onto your computer, and have downloaded the ZIP file containing the Nero AAC files, please open the Nero ZIP file (should open in WinRAR). There are four files inside the NeroDigitalAudio.ZIP, neroAacTag.exe, neroAacEnc_SSE.exe, neroAacEnc.exe and neroAacDec.exe.
The neroAacEnc_SEE.exe file is specifically for computers that have processors that support SEE2. If your Intel or AMD64 chip does support SEE2, then that's the file we are looking for. If not (or if unsure), then neroAacEnc.exe is what we are looking for.
What to do with them? The idea is to put them into the installation directory of MeGUI. Go ahead and install MeGUI, then either go to its installation directory at its default of C:\Program Files\megui or again, click Start --> All programs --> MeGui. Right click on "MeGUI modern media encoder" and click properties. Click the shortcut tab and then click the Find Target button. This will open the MeGUI installation directory.
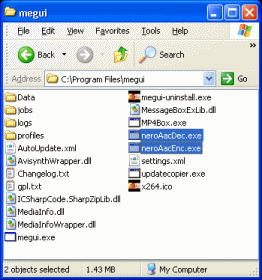 Copy over the required (or all) Nero AAC encoder files from the ZIP archive by selecting them and dragging them out into the folder with the mouse. Once this is done, you can now run MeGUI from the start menu or megui.exe in the installation directory.
If the program crashes, which is a common bug, you may try to deny it Internet access by setting up a fake proxy server in Control Panel --> Internet Options --> Connections tab --> LAN Settings. Do NOT do this if you do not need to, and don't do it if you are currently reading this in Internet Explorer (if you are, get Firefox!). For some reason, the update application with MeGUI has caused myself and some other friends issues when it runs and tries to access the Internet.
One last thing you will definitely need in order to run MeGUI properly is the .NET framework, at least v2.0. Click here to download.
Encode Audio to AAC-LC with MeGUI / Nero AAC encoder
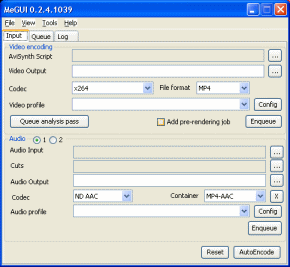 MeGUI looks a bit more complicated than any of the applications we have come up against so far. The only part of MeGUI we need to focus on right now is the Audio part. It's not that difficult. You select your audio input and Audio output, make some changes to the configuration and then click "Enqueue" to Queue the process.
Click the button beside the Audio Input field and locate the AC3, MP3 or other audio file you got from your TS file.
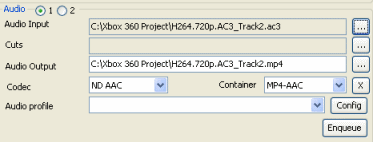 Now that you have loaded in your input file, the Audio Output field will fill in automatically and put a .MP4 extension onto the output filename. This is perfectly fine and you don't need to change anything unless you want to. Make sure to set Codec to ND AAC and container to MP4-AAC. Beside Audio Profile, click the Config button.
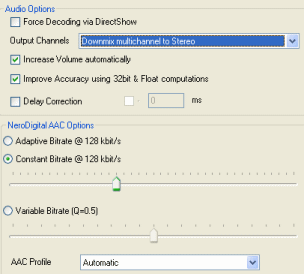 If you have an AC3 file with more channels than stereo (2 channels) based on what TS Converter told you (if it didnt specify, try playing the TS file in Media Player Classic, then going to File --> Properties. Click the Details tab and the audio info will be there), like mine is, then you need to set Output Channels to Downmix multichannel to Stereo for compatibility with Xbox 360. If the AC3 is already 2 channel Stereo audio, or it is a 2 channel standard MP3, then set it to Keep Original Channels. I would also recommend setting Constant Bitrate and using the slider to select 128 kbit/s. With AAC audio, 128 kbit/s is generally higher quality than the MP3 standard at that bitrate and should sound very good after the conversion.
AAC profile should be either set to automatic or AAC LC manually. When you have changed your settings to reflect this, click the OK button. This will take you back to MeGUI, where you should now click the Enqueue button. After you click it, click the Queue tab.
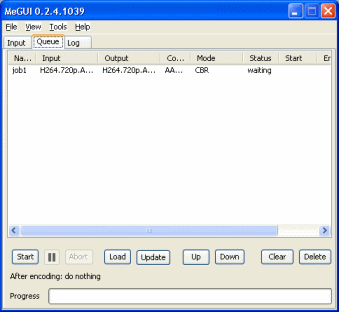 You will now see your conversion has been queued by MeGUI with a status of waiting. The queue system is very useful when you have a lot of files to convert, which is usually the case when you are creating AVC video from another source.
When you are ready, click Start to get the process going.
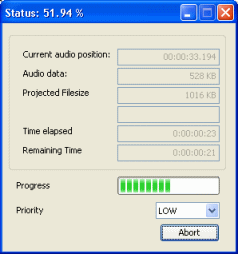 MeGUI will now use the Nero encoder files you extracted into the MeGUI program files folder to convert your AC3 or MP3 etc. audio to AAC LC audio for the Xbox 360 to play. The amount of time that this process will take depends entirely on the length and size of the input AC3 or other audio file.
Once it is completed, go to the folder that you had the original audio file in and you should now find your new MP4 file containing your AAC video stream, ready to be muxed with the original H264/AVC video you got from TSConverter into an MP4 file that should play on the Xbox 360.
Next up we have muxing and possibly a little extra work to be done on the h264 stream to make it 360-ready.
Step 3 - Mux H264/AVC video with AAC LC audio using YAMB/MP4Box |
Setup YAMB with MP4Box
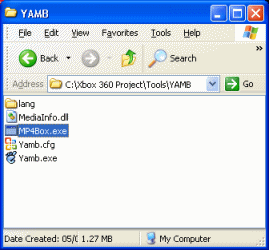 Download YAMB and MP4Box. The YAMB and MP4Box downloads are ZIP files that will open with WinRAR. Open the YAMB ZIP file first. Create a new folder anywhere on your hard disk drive and drag all the contents of the ZIP file into this new folder. When you have done that, now open the MP4Box ZIP file and drag mp4box.exe into the same folder that you placed the YAMB files into.
MP4Box is a command line tool and YAMB is a GUI that can utilize MP4Box.exe, making it a lot easier on you to make MP4 files. Now its time to open YAMB.exe.
YAMB/MP4Box
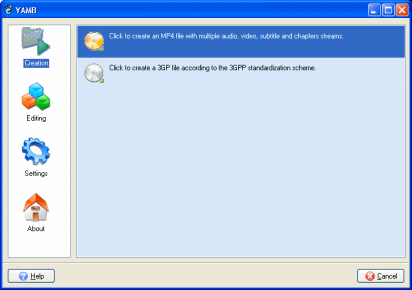 YAMB is a very useful and user-friendly GUI tool for MP4Box. It is incredibly easy to setup also. There is only one thing you need to do before you can use YAMB properly, and that is to specify where MP4Box.exe is, even though you have it in the exact same folder.
Click the Settings button on the left hand side of YAMB.
Specify location of MP4Box.exe
 Click MP4box.exe on the left side of the window (click my image to enlarge to show). Now beside the location field, click the small folder icon which will open an Explorer File Browser. Navigate to the YAMB folder that you created and double click MP4Box.exe.
When you have it selected correctly simply press back until you get to the main YAMB window again. Double click the Click to create an MP4 file with multiple audio, video, subtitles and chapters streams option.
Add Video and Audio stream
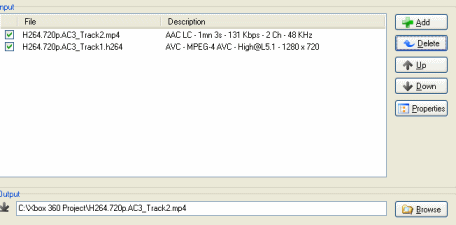 You will now be able to select the files you wish to mux into a new MP4 file for use with your Xbox 360 console. Remember the .h264 file you got from TS Converter (that you probably renamed from .RAW) and the .MP4 file you got from MeGUI containing your AAC audio? Click the Add button and Navigate to the folder they are stored in and select both.
If many chapters data is added here from the MP4 file, you can select it and click Delete as it will be useless to the Xbox 360. Now, here is where we determine whether we need to make any more changed to our H264 (video) file before muxing. Please bare with me for a second.
The Xbox 360 does indeed support the H264/AVC video standard inside the MP4 container. However, specifically the Xbox 360 supports AVC up to High Profile (HiP) Level 4.1. Unfortunately, a lot of files that don't need to be, are specified as level 5.1, as seen for example in the accompanying picture. If you try to play these streams on an Xbox 360 as of February 2008, you will get a black screen, even though in 99% of cases the Xbox is more than capable of playing this particular file. Luckily there is a fix for this problem.. or rather a workaround as editing anything like this in an already encoded file is generally not recommended.
Look at the description of my AVC stream. "AVC - MPEG-4 AVC High@L5.1 - 1280 x 720". This is a problem because of the L5.1. Note also that you wont always get level information from this and may actually get a black screen on your Xbox 360 anyway. So if you have up to L4.1, you are OK, but if you have over that, you will have to use a workaround for this problem.
If you need to set the H.264 level of your video file for compliance with the Xbox 360 console, or if you experience a black screen with just audio, then click here to go to an optional page of this guide that covers a workaround for this problem using a tool called h264info. When you are done, click the "Go back to muxing step" link on the page to come right back here.
Step 5 continued
If you just repaired your file, replace the AVC stream loaded into YAMB with the new one created for you by h264info. If not, then just continue on. You may be asked to specify the framerate of your AVC video stream at this point.
AVC Stream Properties
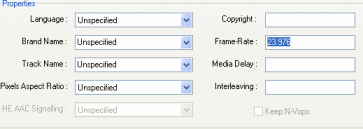 A lot of the time YAMB guesses the framerate correctly and won't need your input, but sometimes it will ask. Always remember the Framerate when you check the TS file first. If you didn't check or can't remember the framerate, try opening the file in Media Player Classic. When it opens, click Files --> Properties. Now click the Details tab and you will have info on your video. When done, click OK.
The Muxing Process
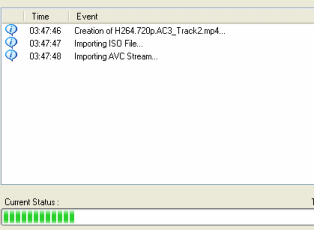 YAMB will now use MP4Box.exe to mux the video and audio stream that you used as your input streams. The amount of time this will take depends entirely on the speed of your computer and the files themselves.
When it is finished, check the resulting MP4 file with something like VideoLAN client to make sure you have perfect sync and proper playback (note that HD playback may be poor on older computers). Then burn it to a disc or stream it to your Xbox 360 and see how it plays.
That concludes the instructions for making streams from transport stream files work with the Xbox 360. If you have any questions, please visit our Discussion Forums for help.
Written by: James Delahunty

