
Embedding subtitles using AVIdemux
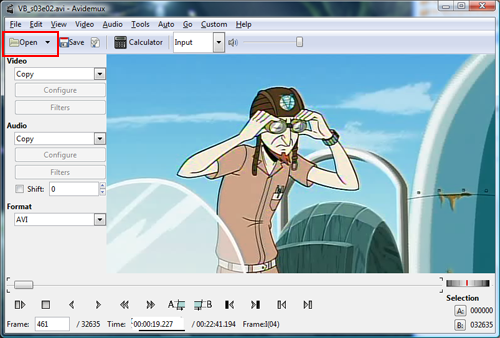
Open AVIdemux and open the video file you just used by hitting Open and navigating to where your file is saved.
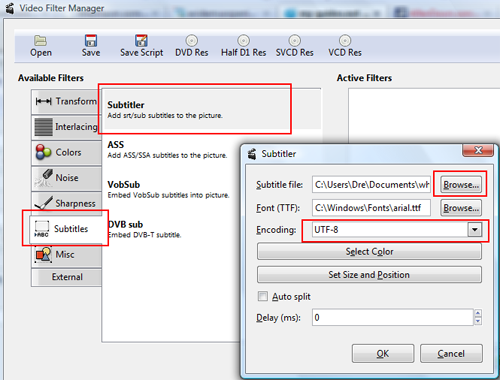
Hit Video then Filters or alternatively Ctrl+Alt+F to reach the filters menu. Go down to Subtitles, and select Subtitler (if you used SRT or SUB as your output before). Hit the Blue Cross in the bottom center and a new window will pop up. Here you can browse for your subtitle file (hopefully you remember where you saved it) as well as set the font. Make sure to set the encoding to UTF-8 to match what we encoded at before. Hit Close to save and move back to the main screen. Your subtitle file will then be loaded along side the video ready to be re-encoded.
Saving your updated video file
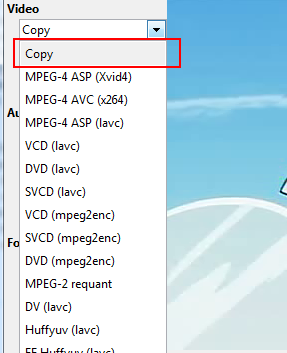
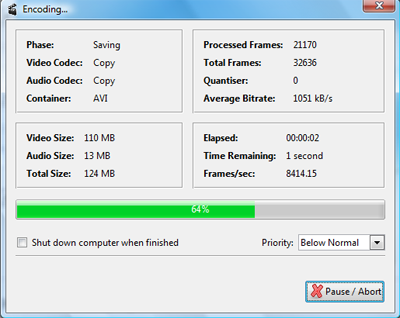
All that is left now is to save the file you have just added the subtitles to. There is however, the option to re-encode the file to one of many different video types. My input file was an AVI but avidemux gives the option to re-encode to MPEG-4, VCD, SVCD, DVD, and more. However, if you want to keep the format the same, make sure both Video and Audio are still on Copy before you hit save. Hit the Save button or alternatively press Ctrl+S and name the file whatever you want it to be called. Hit Save once more and let it run. If you have selected Copy, the process will be very quick, almost instant even, but re-encoding will take longer. When it is done, you have your video file sitting in the folder you saved it to with your own custom embedded subtitles :)
Finishing Up
I hope this guide has helped you learn how to use freeware programs to create, add and edit subtitles for your video. If you have any questions please post them in our Discussion Forums. I hope this guide has been informative. Enjoy :)
Version History
v1.0 -- First Version Published-- by DVDBack23 (29/07/2008)
Written by: Andre Yoskowitz
