
How to convert OGM files to AVI
Introduction & Requirements
WinRAR ---> WinRAR is required to extract VirtualDUBMOD, a download vital to the process (other ZIP extraction software is fine too).
VirtualDUBMOD ---> VirtualDUBMOD will be used for the entire process.
Make sure you have enough free space to save the resulting AVI file (similar size to OGM file, smaller if audio is removed).
Extract VirtualDUBMOD files
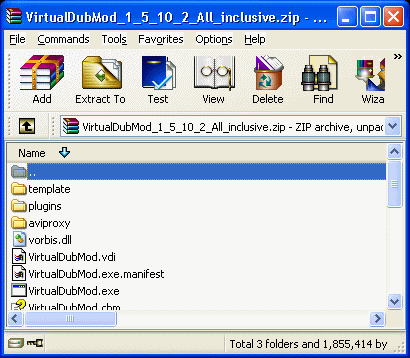 |  |
Open the VirtualDUBMOD download with WinRAR. If you have Windows XP or newer, then you can open the download in a folder which is also fine. The ZIP file contains three folders and several files. These must be placed into a folder on your Hard Drive. Create a folder called VirtualDUBMOD somewhere.
If using WinRAR, simply select all the files in the ZIP file when you open it (hold CTRL + A to select all files) and drag then across into the folder with your mouse (left click and hold your finger down, move the files on top of the new VirtualDUBMOD folder and release). WinRAR will now extract all the files as seen above.
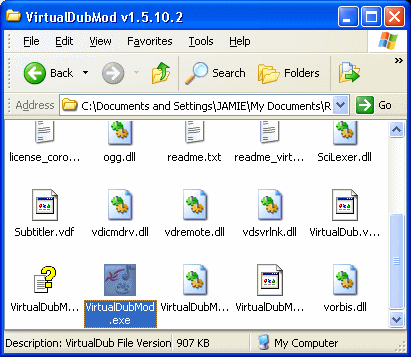
If using ZIP folders (opened ZIP file in Windows XP/Vista) then select all the files with your mouse (or select one of them and then press CTRL + A together). Copy the selected files by pressing CTRL + C together. Now open the newly created VirtualDUBMOD folder and hold CTRL + V together to paste the files into the new folder. When you are done with this, double-click VirtualDUBMOD.exe.
Open OGM File in VirtualDUBMOD
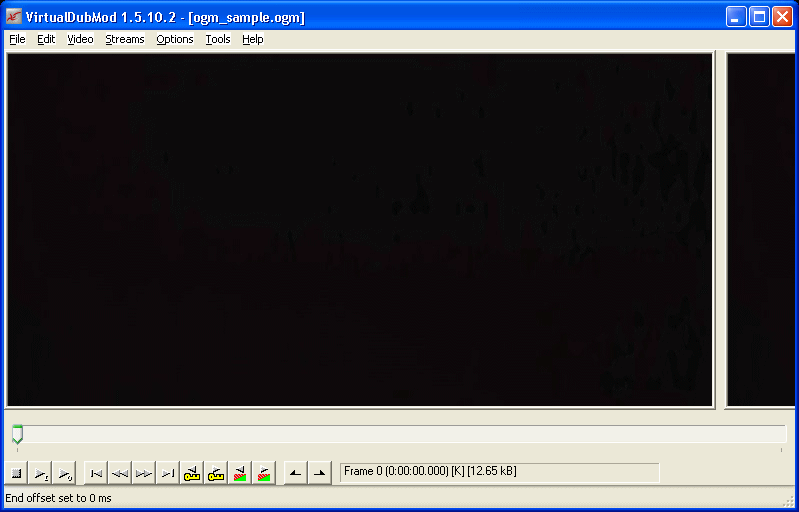
In VirtualDUBMOD, click File --> Open Video File. An explorer File Browser will now open up. Navigate to the folder where your OGM file is located and open it with VirtualDUBMOD.
When it is loaded and you can see the first video frames of the video. You can navigate through the video but VirtualDUBMOD can get quite unstable at times.
We must now take a look to see what Audio and Subtitle streams are present in the OGM file. Click Streams --> Stream List.
Dealing with Multiple Audio
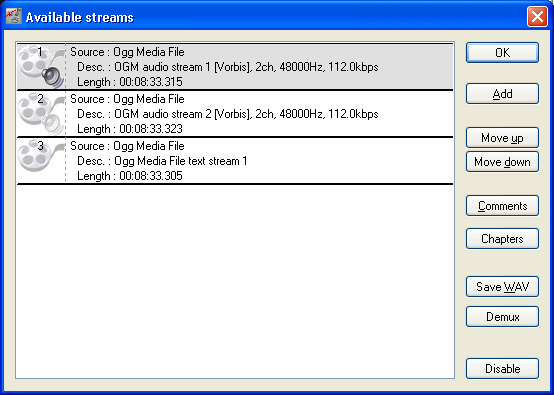
A common feature of OGM files is multiple audio streams. These are usually different languages that are selectable using playback software or add-on software like VobSub. The problem here is that if you have never tried to play an OGM file before (hint: How to play OGM files) you might have been unprepared for this. In the stream list that you should now have open, you should be able to identify by the descriptions VDub gives you how many are audio and how many are text (subtitles).
In my case above, for example, Streams 1 and 2 are OGG audio. Pay close attention to this as OGG audio is not supported by AVI so we need to fix that. Stream 3 is text, which is also not supported (officially) within the AVI container but can be saved as an external file and used with playback software. I know one of those audio streams is English and one is Japanese.
HINT: You can sometimes identify what the language of the audio is by clicking the sub stream and clicking the "Comments" button. Otherwise, you should extract them all and try to figure it out later.
You can demux/extract an audio stream by selecting it (click it) and clicking Demux if there were no helpful comments. You will save it as a .OGG file (hint: How to play OGG files) which you can play in VLC Media Player or Foobar 2000 for example, or it might be MP3 in which case you will save a lot of time later. Demuxing the stream doesn't "remove it" from the OGM file so you can delete the OGG file after you identify it as the language you want. Take note of what track number it was.
NOTE: If your audio stream is specified as OGG audio, then you need to convert it to MP3, which we will do next. If your audio is already specified as MP3 (MPEG1-L3) or AC3/Dolby, you can skip the instructions below for converting to MP3 and go right to Extracting Subtitles.
Convert OGG Audio to MP3
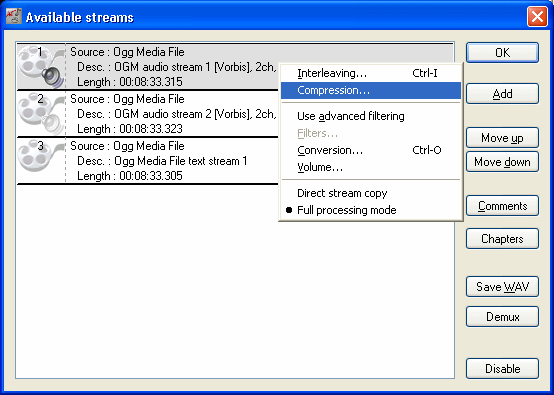
Select the audio track that you wish to keep. Right click it and select Full Processing Mode. Right click again and select Compression. This indicates to VirtualDUB that there is processing to be done on the track, and now we need to select what compression we want on our resulting AVI file, which is MP3.
Audio Compression Settings
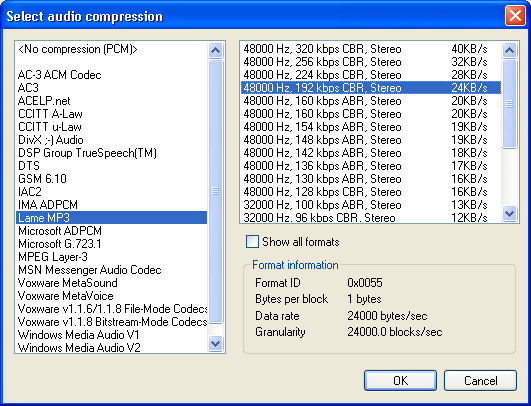
From the list on the left, select Lame MP3. On the right you can choose whatever bitrate you want, but usually 48000 Hz, 192kbps CBR, Stereo is fine. VBR audio is technically better but this CBR bitrate will be adequate when dealing with OGG source audio. Make your selection and click OK.
Demux and Save as MP3
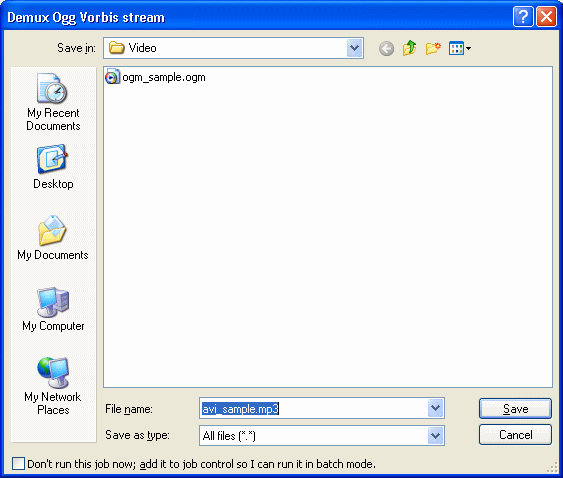
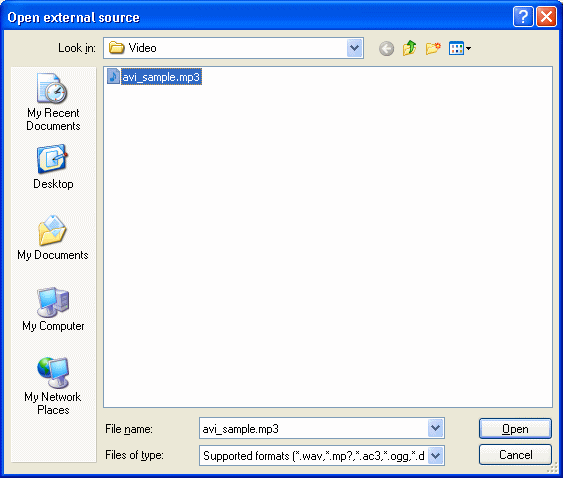
Once the stream list re-appears, select the audio track again and click Demux. A file browser (like the one in the picture above) will now pop-up and you will be asked to select a location to save the track. Save it as the same filename as the original OGM file. Make sure to set "Save as type:" to "All Files", and give your filename an extension of .MP3. For example, in the picture above, I am saving it as avi_sample.mp3.
Click Save and the process will begin.
MP3 Encoding Process
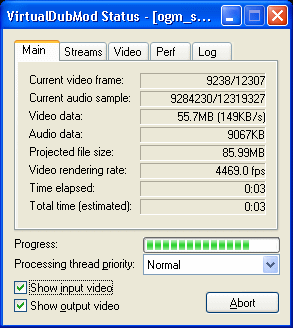
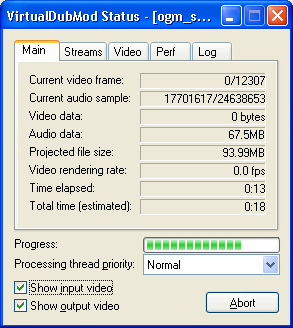 VirtualDUBMOD will now convert the OGG audio to MP3, which is saved as an external MP3 file to begin with. You will see the process in action with the "Status" window (shown in the picture to the right of this text).
Once it is done, you will be back at the stream list again. This time, click Add and find the MP3 file that you just saved.
Add new MP3 audio to Stream list
Locate the MP3 audio file that you saved just a little bit earlier and select it. Click Open and VirtualDUB will begin parsing the file for a moment. It should not give any warnings (if it gives VBR warnings, you make a mistake somewhere in the compression options) and the MP3 stream will now appear in the list with almost (or exact) the same length as the original OGG stream. You now have added the MP3 audio and are one step closer (it's all easy from here). The next thing we need to do is simple, extract Subtitles.
Extracting Subtitles
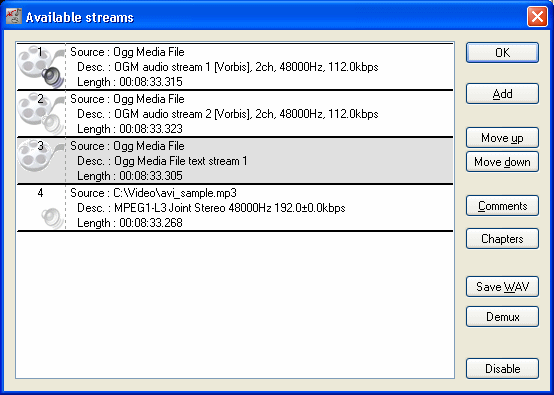
To extract subtitles, you must first identify them as such. In the example picture above, Stream 3 is a subtitle stream "Ogg Media File text stream 1". Nine times out of ten the subtitles will be easily saved as .SRT files. Simply select the subtitles and click Demux. If there are several streams, you can Demux them all.
HINT: You can sometimes identify what the language of the subtitles is by clicking the sub stream and clicking the "Comments" button. Otherwise, you should extract them all and try to figure it out later.
Save SRT files
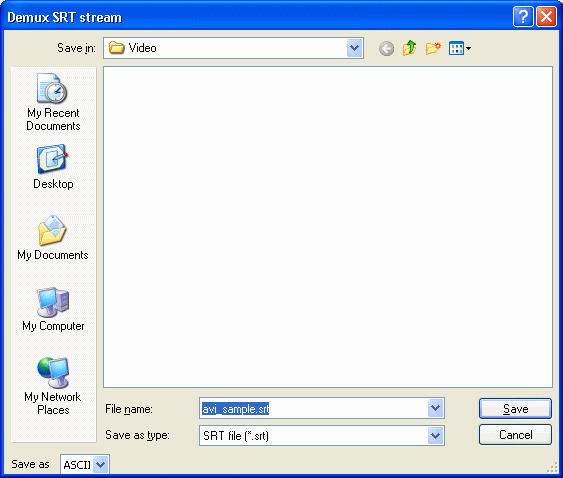
Save the subtitle streams that you want as .SRT files (unless VirtualDUBMOD suggests a different extension by itself). Please take note that for subtitles to work with AVI files, you will need to have the same filename as the AVI file (but with .SRT extension obviously). For example, in the picture above, I am saving my subtitle file as avi_sample.srt, and later I will save my AVI file as avi_sample.avi.
Please also note that for subtitles to work in the first place, you will need to install software such as VobSub and play the AVI files in a DirectShow-based player such as Windows Media Player. Both files must have the same name and be in the same folder, or else it definitely will not work. Once the subtitle file(s) is saved, you will now be back at the stream list where there are only a few more small things to do.
Disable unwanted streams and set all to Direct Stream Copy
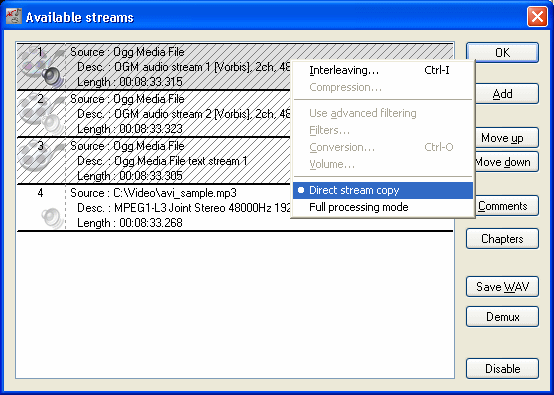
Since AVI needs either MP3 or AC3 audio and does not support OGG audio (officially) or embedded subtitles, we need to disable all of the unwanted streams. Do this by selecting a stream and clicking Disable. You will notice that when you do that, the stream will become shaded like in the picture above. Make sure to NOT disable your MP3 (or AC3) audio as well or else you will end up with no audio at all. You should only have one MP3 (or AC3) file enabled, like in the picture above.
IMPORTANT: This step is very important. Make sure to right click all streams in the Stream List one by one and set them all to Direct Stream Copy. This even applies to any stream you have disabled. If you do not do this, you will end up with a broken, bloated output file. So follow the picture above and make sure to set "ALL" streams in the list to Direct Stream Copy.
Once that is done, you can click OK to close the stream list and get back to VirtualDUBMOD. Once you do that, click File --> Save as.
Save as AVI
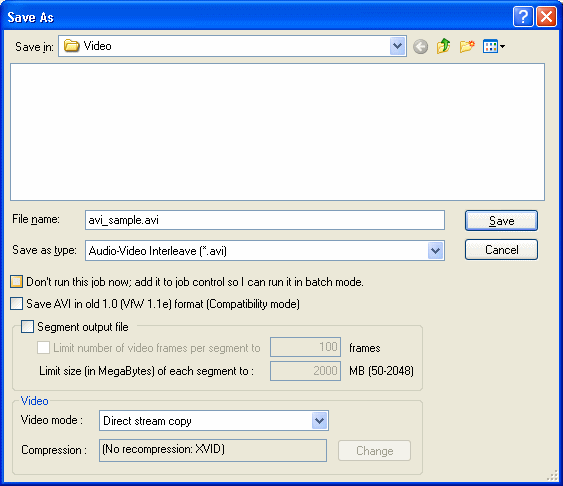
It is now time to save your AVI file. Click File - Save as. Firstly, set "Save as type" to Audio-Video Interleave (*.avi). Now at the bottom of the window, under Video, change Video Mode to Direct stream copy. This is vitally important, or you will end up with massive uncompressed video and the process will take a long time. So please do not forgot to set Video mode to Direct stream copy as shown in the picture above.
Now choose a filename for the resulting video file. In my example is avi_sample.avi. Don't forget also that if you previously saved an SRT subtitle file then you will need to name the avi file exactly the same (not the extension) as what you named the subtitle file (and you will need to install VobSub and play the AVI file in Windows Media Player or another DirectShow-based player. Alternatively, VLC Media Player should allow you to select subtitles and it will certainly play your AVI file).
When you are ready, click Save.
Output Process
 The amount of time the Output will take to be ready depends on the length of the file and the speed of your computer. Hopefully you will encounter no problems during the processing but it's not uncommon to run into issues.
Finally
Hopefully this article will have taught you how to convert OGM files to AVI and you will be able to carry out this process again without needing to read this article every time. If you have experiencing difficulty, errors or any other problems, please visit our Discussion Forums and ask for assistance.
Version History
v2.0 -- August 31st 2008 by Dela - Cleaned up, more informative, 100% new screenshots and text, removed need to save AVI file twice, formatting. Original article completely replaced.
v1.0 -- November 19th 2007 by Davedough - First version published to site
Written by: Dave Horvath
