
DVD Author Pro - Slideshow Creation - Picture Settings
 DVD Author Pro allows you to create pretty cool slideshows for your DVD and makes sure that they play back properly. The slideshows consist of images which DVD Author Pro will encode as a video stream. You can choose background audio and from a number of transition effects.
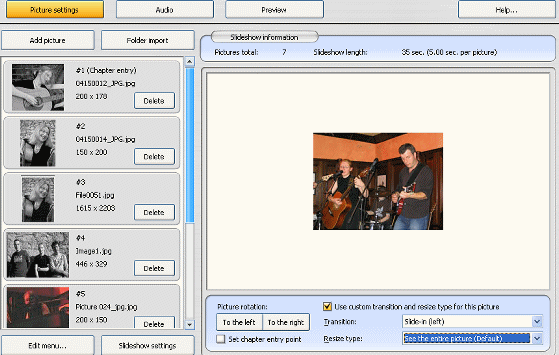
Firstly though you need to add pictures to the editor. Your two choices are the Add Picture and Folder import buttons. The folder import button is particularly good if you have hundreds of pictures stored in the same folder.
When you select a picture in the picture list, you will see a preview of it in the preview window. Under this you can select Use custom transition and resize type for this picture. This allows you to choose a transition effect (an animation that will be shown when pictures change) and a resize type (allowing you to choose whether to see the full picture or to avoid borders). Also you can rotate a picture to the left or right, which is good for pictures taken sideways, which often happens when you give someone a digital camera to take a photo. Let's take a look at the overall settings for slideshows. Click the Slideshow settings button.
DVD Author Pro - Slideshow Creation - Slideshow Settings
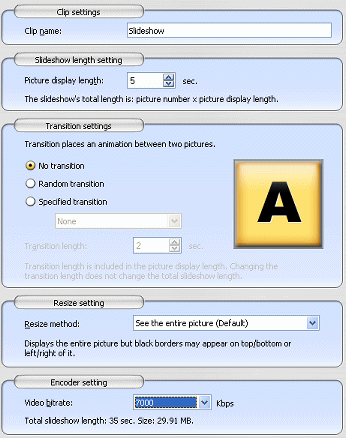 Ok here you can select general options for the slideshow display. Firstly you can change the name, but as before this really has no effect on the output, it is just for convenience. Below this are slideshow length settings, with just one option; Picture display length. This is a set number of second any picture will display on your TV for.
Transition effects are animation effects that will happen between photo changes, they are completely optional and set to No transition by default. Random transition just makes a transition at random; this is good if you have hundred of photos and would rather not select the transition for each separately. Specified transition allows you to choose from a list of effects a transition that will apply to all photos. Transition length is the amount of time that a transition effect takes between photos.
Below this is the Resize settings. You have the option to select to see the entire picture, which is default, and there is also a second option if you wish to use it, to avoid black borders being displayed on playback.
Last but certainly not least are the encoder settings. All you can do here is choose a Video bitrate. You can choose from 3000 Kbps to 9000 Kbps. A calculation of the size will then automatically be made below this. If you are done here, Click Ok, then click the Audio button on the slideshow editor.
DVD Author Pro - Slideshow Creation - Audio Settings
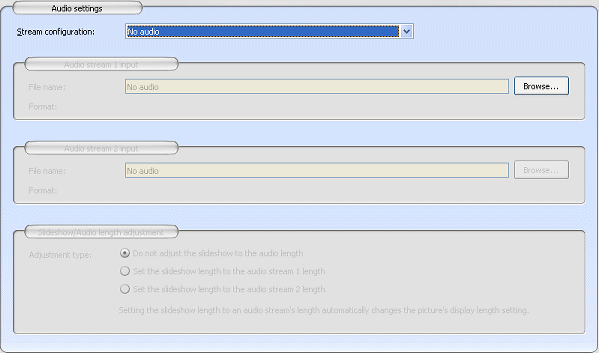 You have the option to have background audio playing during the slideshow. First you must change the stream configuration. Your options are No Audio, Audio Stream 1 and Multi-Audio.
No Audio is selected by default, but if you want to add a stream or two then select accordingly. Now under Audio Stream 1 input and Audio Stream 2 input, click the browse button and search for audio files. This editor allows the addition of more audio formats than specified in the Introduction & Requirements section, you can check them under file type when you click Browse.
After you have added audio there are a few more adjustments that can be made under Slideshow/Audio length adjustments. The first option, Do not adjust the slideshow to the audio length is selected by default and this means that the picture display settings you entered in the slideshow settings wont be affected by the length of the audio. Set the slideshow length to audio stream 1 length, changes the time the pictures will be displayed to make up exactly the length of the first audio stream. There is also the same option for the second audio stream. When you are done, click the OK button. You can now check a Preview if you click Preview if you want but I'll skip past it in the guide. When you are done, click Ok in the Slideshow editor.
DVD Author Pro - Source Screen 3
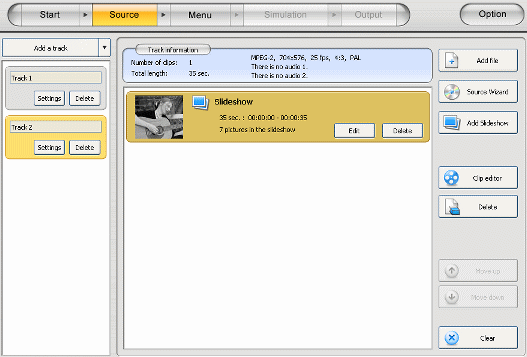 Now this is what your source screen would look like with the addition of a slideshow. Everything should be fine now. If you are ready, click the Menu button and move to the next page of this guide.
Written by: James Delahunty
