
How to burn DVD folders with ImgBurn
Introduction & Requirements
| Software you must download and install | |
| ImgBurn | |
| Required: You need to download and install ImgBurn on your computer. Download! |
The ImgBurn installer is fairly straight-forward and so requires no instructions. Remember you will need blank DVD media (possibly dual-layer if your compilation is over 4.36GB). Remember, you must have a VIDEO_TS folder (often accompanied by an AUDIO_TS folder) for this to work properly. If you need to create a DVD, then check our Guide section for help.
ImgBurn First Run
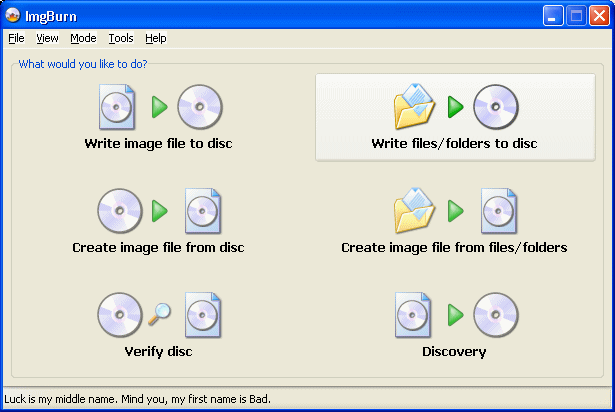
The first thing you will see when you launch ImgBurn is a start page. The including of this Welcome screen has made things much easier to understand for new users to the software. To enter Build Mode, click Write files/folders to disc.
ImgBurn Build Mode
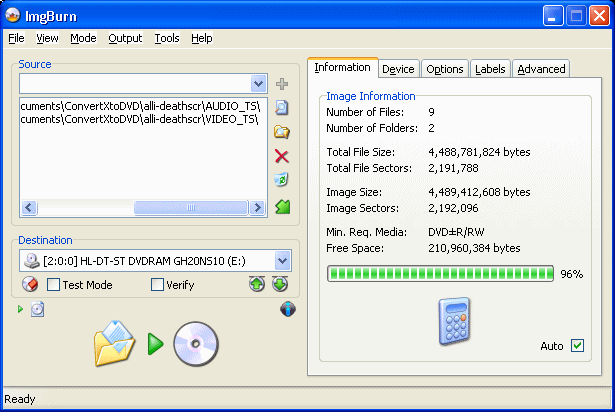
ImgBurn will now enter Build Mode, letting you add Files and Folders to the compilation. You now must add the DVD files to ImgBurn. Usually you will have a VIDEO_TS and AUDIO_TS folder. Simply drag and drop both folders into the ImgBurn Source box on the left side of the program. It should look like the picture above this text. (Note that for compatibility reasons, even if you only originally have a VIDEO_TS folder, create an AUDIO_TS folder and leave it blank, and add it to the compilation).
Also take note that the calculator on ImgBurn is set to work automatically, showing how much of your disc will be taken up by the files. If your DVD files are larger than 4.36GB, you are going to need to either use dual layer media or compress the DVD.
DVD more than 4.36GB? Need to compress?Note:If you are burning a video DVD and your files are larger than 4.36GB, you either need more expensive dual-layer blank DVDs, or you need to compress your DVDs. For the quickest and easiest method, DVD Shrink comes to mind.How to copy DVDs with DVD Shrink |
ImgBurn Device Tab Settings
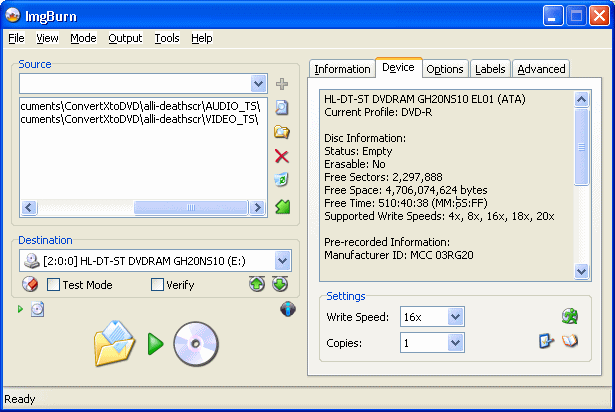
Under Device settings the noticeable changes that can be made are Write Speed and Copies, you can adjust these to whatever suits but keep the speed in line with what is reported as "Supported Write Speeds" above. If you are using DVD+R media now, you can increase compatibility with DVD hardware by changing the BookType if you have a compatible burner. If so, then click the book icon (the small icon on the lower right hand corner, across from the Copies field).
A new window will pop up.
Change BookType (Optional for DVD+R Media)
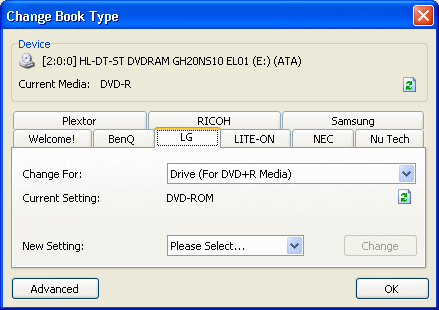
Select the manufacturer of your compatible burner. Mine is LG in the demonstration picture. As you can see, I have set "Change For" to "Drive (For DVD+R Media)" and changed new setting to DVD-ROM. This will make most DVD hardware more compatible with the disc and will almost eliminate the old problem of DVD hardware being incompatible with DVD+R media.
You will need to click Change. If the BookType setting is changed correctly, you will get a "Success!" message. Click OK. Click the Options tab now.
What is so important about Booktype?Note:If you would like to know more about what exactly "Booktype" is and why it can be extremely useful, or even vital if burning media for games console for example, you can read a full article about it at AfterDawn.How to set Booktype for blank DVD+R(W) media |
ImgBurn Options Tab
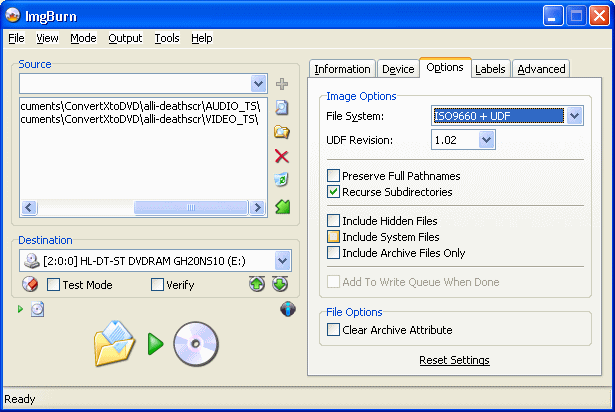
The important thing here is to make sure that File System is set to ISO9660 + UDF and tick Recurse Subdirectories. Now move on to the Labels tab.
ImgBurn Labels Settings
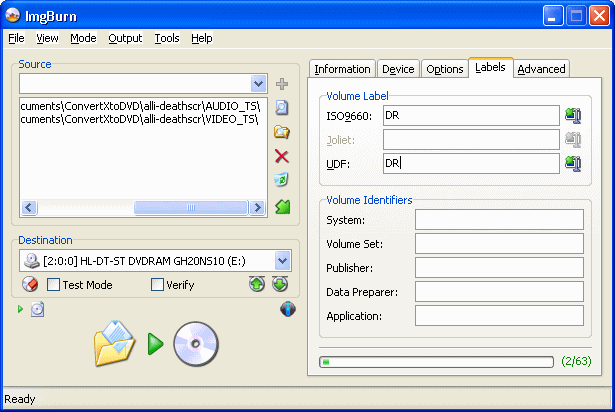
Give your DVD a name. I have set the ISO9660 setting to "DR" and UDF to "DR". You can fill in the rest of the Volume Identifier fields if you wish to do so but none of this is necessary.
ImgBurn Burning Process
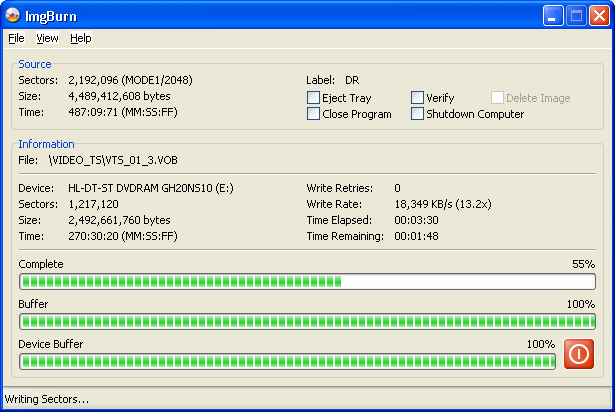
To start burning, click the Burn button (the burn button is a Folder with an arrow pointing to a Disc).
The burning process will take time depending on the speed of burning and the amount it has to burn. If you have Verify ticked, it will run a quick check when the burning is finished to make sure there was no loss of data while burning that could lead to a defective useless disc.
Burn Success?
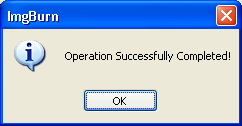
If all went well you should get a pop-up message reading, "Operating Successfully Completed!".
Finally
Hopefully this article will have shown clearly how to burn DVD-Video content with ImgBurn for free. Once you have done it once, you won't need to worry about it again. If you do encounter any problems however, please visit our Discussion Forums and ask for help there.
Written by: James Delahunty
