
How to upgrade your PlayStation 3 Hard Drive
In this in-depth guide we will teach you how to upgrade your stock PlayStation 3 hard drive (HDD) for a higher capacity one that will allow you to have more movies, demos, trailers, etc available very quickly to you off the hard drive. We will also give you some tips on how to use the old 40, 60 or 80GB drive as an external drive for your needs.
Please Note: This process will not void your warranty, I called and spoke with a Sony representative prior to upgrading and she told me it will NOT void your warranty. However, if you r PS3 ever needs repairs you will need to put the stock HDD back in before sending the console in.
Requirements
This process is actually very simple and there are only a few requirements.
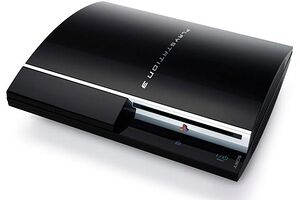
Sony PlayStation 3 console- OK, so this is the really obvious one, but thought I should add it anyways :) For this guide, my PS3 was a 40GB model, but you may have a 40GB, 60GB or 80GB depending on the model you purchased.
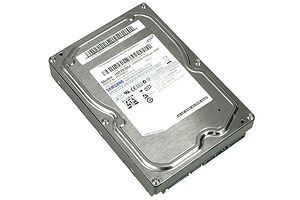
A new internal hard drive- For this upgrade you will also need a new internal hard drive and I will devote an entire section on how to pick out the correct one for you, and at the right price. For my example, I have added a 320GB new drive, thus multiplying my capacity by eight fold.

Phillips Head Screwdriver- There are 5 screws that need to be removed and replaced throughout this guide so you will need a Phillips/crosshead screwdriver. The screws look the one posted at right and are very cheap so make sure you have the proper screwdriver.
A flash drive/external hard drive- This is necessary to back up your files (save data, demos, etc) that you may currently have on your PS3 and want to replace on the fresh HDD.
That is all for the requirements and in the next section I will go over what to look for in a new hard drive. If you already have the drive purchased, feel free to skip the next section and move on to the actual installation.
Finding a new Hard Drive
This section is very important so I implore you to read carefully and even look it over twice if necessary. I will help you to pick out a suitable replacement hard drive for your current.
When looking for a new hard drive for the PS3 there are four key features you must be looking for:
1. 2.5" width- These are notebook hard drives and that size is what you are looking for. 3.5" desktop hard drives will not fit.
2. 9.5mm Height- This is normal but keep an eye out for drives that may be smaller or bigger because they will not fit.
3. 5400 RPM speed- Although the PS3 can handle the faster 7200RPM, you run the risk of overheating the system for a few milliseconds faster in loading time. The original drive that came with your console is 5400RPM so make sure the new one is as well.
4. MUST be Serial ATA (SATA)- The drive must be a SATA drive, other interfaces such as ATA or IDE will not have the correct connections to fit in the PS3.
Now that we have those guidelines down, the hard drive I purchased is this one:
Western Digital Scorpio WD3200BEVT 320GB 5400 RPM 8MB Cache SATA 3.0Gb/s Notebook Hard Drive - OEM
As you can see, it is a laptop hard drive (2.5" width), at 5400RPM and with a SATA interface. In my searches, the link I posted you was one of the best deals available, especially for the capacity I was looking for, 320 GB. Search around for the best deal for you and purchase the new drive using the guidelines I have set out.
Now that we have got all of that out of the way its time to move on to the actual backing up of your old drive and the installation of the new drive.
Written by: Andre Yoskowitz
