
Post installation processes
Formatting your new drive
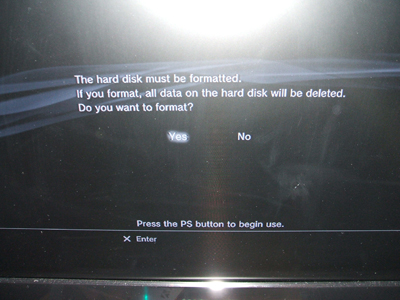
Now that the new hard drive is installed, connect the PS3 to the TV and plug in the power. Flip the switch to turn the console on and you will be greeted by the screen at right asking you to format the drive. This is necessary so please press Yes. Its a very quick process and should take under a minute. Now that your drive is formatted, the XMB will show up, and all of your settings will still be intact.
Restoring your content, game saves
If you originally did a full backup using the built-in feature of the PS3, then restoring is very easy.
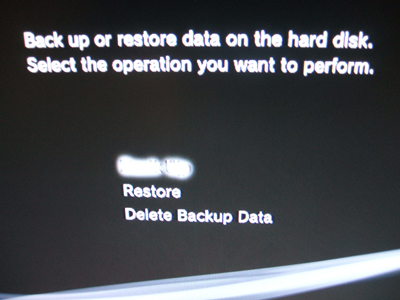
While in the XMB, head over to System Settings, then Backup Utility. Choose Restore when asked and finally select the device you backed everything up to.
To do it manually, head over to Games, then Saved Data Utility and finally to the device that has the game saves you want to restore. Hit TRIANGLE on it and select Copy. It will then copy it back to the new hard drive. Press enter and let it copy. Rinse and repeat for everything else you want backed up, including movies in the Video section, music in the Music section, etc.
When that is done, you have completed your task and upgraded the hard drive of your PlayStation 3 while saving all the content from the old hard drive. :)
Finishing Up
So you have now fully updated your PS3 hard drive and saved the old hard drive in case anything should go wrong. It is now time to get all those movies, demos, trailers and music you want :) If you have any questions or comments please post them in our PlayStation 3 Discussion Forum.
For more information on the actual console, please view here: PlayStation 3 at the Afterdawn Hardware section
As noted before, if you strip the screws you will need to get them replaced, which Sony will do for free, at least the first time. Call SCEA Consumer Services at 1-800-345-7669 and talk to a representative.
Version History
v1.0 -- First Version Published-- by DVDBack23 (17/08/2008)
previousRemoving the Current Hard Drive
Written by: Andre Yoskowitz
