
| Convert DVD to AVC with TMPGEnc 4 Xpress | You are viewing Page 3 of 3 -- Go to page 1 , 2 , 3 |
Encoding
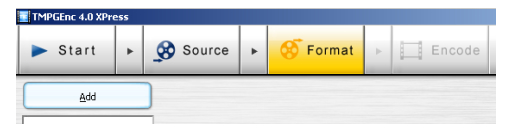
Once you return to the main TMPGEnc Xpress window you'll need to select the Format button at the top. This will allow you to begin the process of setting output options. Fortunately you can keep most default settings and just set a few options that vary from one encode to another.
Format
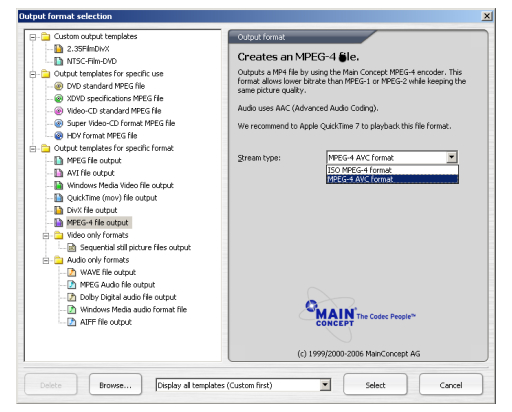
Clicking the Format button will automatically bring up the Output format selection dialog. Select MPEG-4 file output on the left side of the dialog and MPEG-4 AVC from the dropdown list on the right.
Encoder Settings
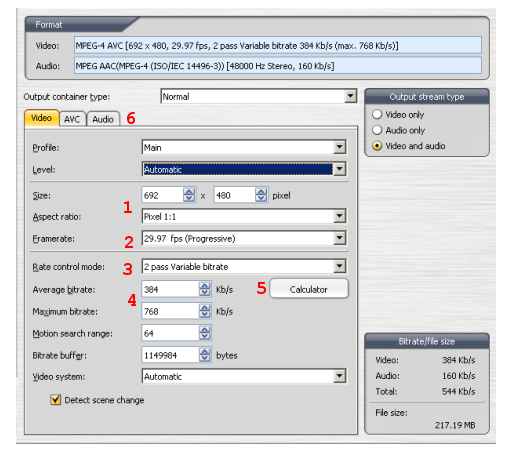 |
TMPGEnc Xpress uses a fairly simple interface to set AVC encoder settings. Although this results in fewer optiions to tweak than more complex programs like MeGUI or AutoMKV, it also means you don't have to spend hours researching a bunch of stuff you probably don't want to mess with just to figure out which settings you should set manually.
1. Size and Aspect Ratio
The settings for Size (resolution) and Aspect Ratio always need to be considered together. If you're keeping the DVD's resolution you need to make sure Aspect Ratio matches your source, meaningDisplay 4:3for fullscreen or Display 16:9 for widescreen.
If you're reducing the resolution you'll probably want to set Aspect Ratio to Pixel 1:1. When using this setting you'll need to make sure the resolution matches the video's aspect ratio. For example, while a widescreen (16:9) DVD will have a resolution of 720x480 (NTSC) or 720x576 (PAL), when resized for the 1:1 (square) pixels of a computer monitor neither would be correct. Instead you might use 712x400 (712 x 16 / 9 = 400.5) or 640x360.
2. Framerate
In reality the Framerate setting includes both the rate and structure (progressive or interlaced) of your output file. If your DVD source originated as film, as most do, this should always be set to one of the Progressive options. If it's from a true interlaced source (a video camera rather than film) and you're not deinterlacing should use a Progressive option instead.
Framerate will generally be determined by whether the source is an NTSC (generally North American) or PAL disc. For PAL you can simply use 25fps. For NTSC it's a little more complicated. NTSC DVDs from film sources should be encoded at 23.976fps, while video (whether interlaced or deinterlaced) should use 29.97fps.
3. Rate Control Mode
In most cases Rate Control Mode should be set to 2 pass Variable Bitrate. This will result in a predictable output size and better quality than 1 pass Variable Bitrate or either Constant Quality option.
4. Bitrate
For variable bitrate encoding you need to consider both the Average bitrate and Maximum bitrate. While Average bitrate determines the size of the encoded video, Maximum bitrate determines just how variable it really is. Increasing the maximum will allow more complex scenes to use a much higher bitrate, and significantly simpler scenes to be encoded with as little waste as possible. As a rule it's a good idea to set Maximum bitrate to at least 1000kbps more than Average bitrate. In many cases it's better to make it at least twice as high, and in many cases it should be several times the average.
5. The Bitrate Calculator
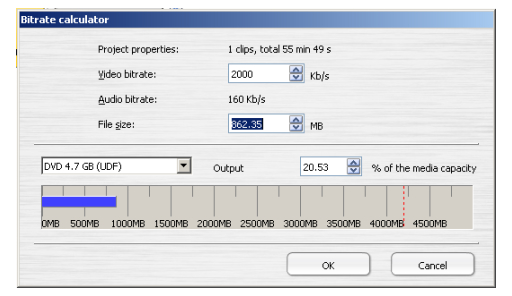
TMPGEnc Xpress can calculate the bitrate required for a particular output size (including audio) for you. Use the Calculator button to open the Bitrate Calculator
The Output dropdown list provides a range of different media sizes ranging from 128MB flash memory or memory sticks to dual layer HD DVDs. Depending on your requirements you can set Video bitrate, File size, or % of the media capacity manually. Regardless of which one you set, the others will be automatically calculated. For example, setting the bitrate will tell you how large the output file will be and what percentage of the selected media will be filled. If you set the Flie size instead the bitrate required bitrate and percentage of the selected media will be calculated instead. Remember that size and percentage both include audio, while bitrate is specific to the video.
Once you click the OK button the Average bitrate will be transferred to your video settings. Maximum bitrate will be unaffected, except to ensure it's no lower than the average. Make sure to adjust Maximum bitrate as necessary.
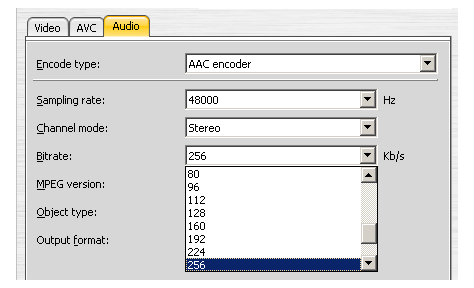
6. Audio Bitrate
TMPGEnc Xpress has its own AAC audio encoder, which will automatically be used for AVC encoding. Although it doesn't have a lot of settings that you're likely to change, you may want to visit the adjust the Audio tab to adujst the Bitrate. Since you'll only be getting 2 channel output, regardless of the number of channels in the original audio track, you shouldn't need to set the Bitrate any higher than 256. For more efficient (ie lower bitrate) encoding you may want to go as low as 96.
Encoding
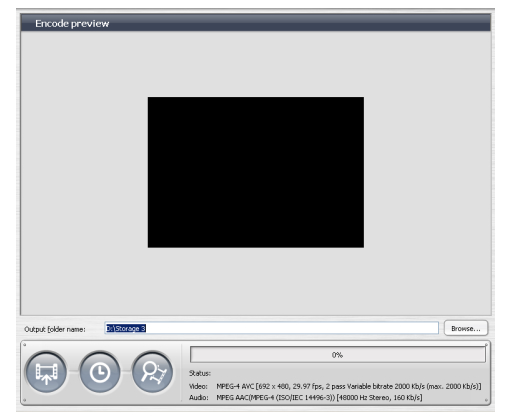 |
With your video options set you're ready to encode. Click the Encode button at the top of the TMPGEnc Xpress window. Near the bottom and on the right is a Browse button that allows you to select the folder to create your AVC file in. The filename will be determined by the name of your source as set earlier. If you didn't change the default value it will be called something like Title 1, with the number taken from the original DVD.
Click the button at the bottom left, which has a picture of a film clip on it, to begin encoding. In most cases encoding requires several hours to complete. When you're done you'll have a MP4 file that can be played on any number of devices, such as a computer or standalone DVD player with AVC support.
Where To Go From HereIf you need help playing your newly created MP4 file you should take a look at our guide for Playing MP4 Files. If you'd like to read about converting from DVD to AVC with other programs you can check out the instructions for Encoding from DVD to AVC with Nero Recode 3. | |
| Convert DVD to AVC with TMPGEnc 4 Xpress | You are viewing Page 3 of 3 -- Go to page 1 , 2 , 3 |
Version History
v1.0 Original version by Rich Fiscus
previousLoading Your Source
Written by: Rich Fiscus
