
| Convert MPEG-2 Captures to AVC with AutoMKV | You are viewing Page 2 of 3 -- Go to page 1 , 2 , 3 |
Basic Settings
AutoMKV's Basic Settings tab includes everything that's absolutely required to encode your video and audio. Although there are additional (advanced) options, which we'll discuss later on, if you're the type of person who wants to simply load a source and select the basic video and audio settings this tab should provide you with everything you need. If you prefer to have more control over the details you'll want to continue to the next page, where the Advanced Settings tab will be discussed.
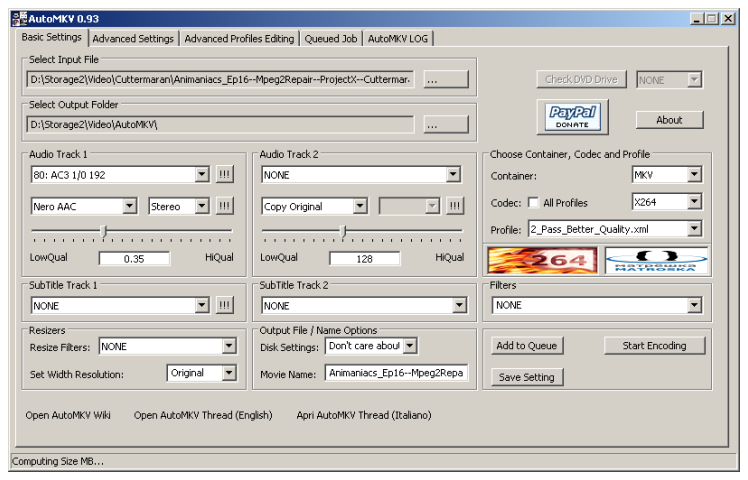
Container Codec, and Profile
You'll need to select either MP4 or MKV for the Container. Of the two, MP4 is supported across a wide range of devices from mobile phones and portable media players to standalone DVD players. MKV, on the other hand, is primarily a computer-oriented format right now. Despite this apparent standardization, the type of audio allowed in MP4 files by different devices varies widely. The only constant is support for AAC (advanced audio coding). If you plan to have AC-3 (Dolby Digital) audio along with your AVC video you'll want to use MKV.
Source Files
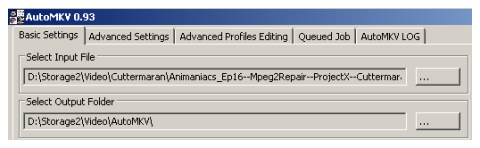
Depending on what tools you've used to process your captured video to this point, you may have a single TS or MPEG file, or separate (elementary) video and audio files. If your video and audio are in different files you'll need to select the M2V or MPV (video) file as the Input File. DGIndex will be run automatically to analyze your video for future processing.
Elementary Streams
If your video and audio are in separate files, generally referred to as elementary streams, you'll automatically be prompted for the location of the audio file(s) to use. If you click the Cancel button for the second audio stream your project will only use a single audio track. If you cancel the first one your project will have no audio, and the output file from AutoMKV will be a MP4 or MKV file with just video.Encoding From TS Files
If your TV capture is still in a TS (transport stream) file you'll be prompted to verify the PID (Program ID) for your video. Unless there's something wrong with your TS file or it has more than one program muxed together it should be correct.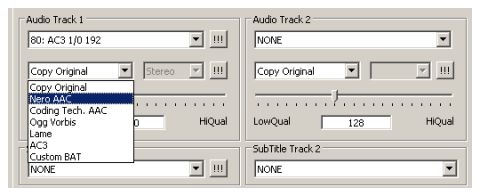
Audio Sources
If you selected a muxed video / audio file for your input, you'll see a list of available audio streams. You can select two different streams. If your video will be encoded to a MP4 file you'll want to make sure to use one of the AAC audio encoding options. For MKV you can use any of the options. The slider below each audio selection allows you to adjust the quality or bitrate setting of the selected encoder.
Loading An Audio File
If your audio is in a separate file from your video you can use the button marked !!! to the right of the list of audio tracks. This will open a dialog to select a supported audio file, such as AC3 (Dolby Digital) or MPA (MPEG Audio).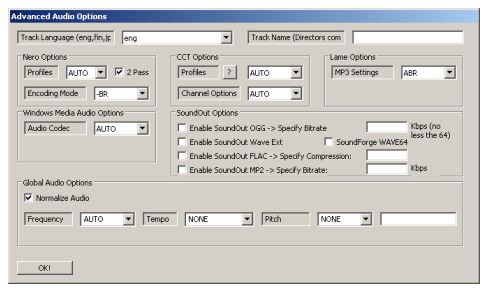
Advanced Audio Options
The Advanced Audio Options, accessible with the second button marked !!! (to the right of the list of audio codecs), allows you to set both encoder settings and container properties. Track Language and Track Name are stored in the container, rather than being part of the audio itself.
Nero Options
The Nero AAC encoder can be set to use the older low complexity (LC) format or the newer High Effieciency (HE or HEv2) AAC versions. When set to encode to a specific bitrate rather than a quality setting it can also encode in 2 passes.Coding Tech AAC Encoder
The middle options are for the Coding Tech AAC encoder. You can select either LC for low complexity AAC or High for high efficiency AAC.
Subtitles
If your capture includes subtitles you may keep them with your AVC video as well if you wish.
Resizers
At one time MPEG-4 encoding (DivX and XviD) generally involved reducing the original video's resolution in order to make it fit on either 1 or 2 blank CDs. With AVC video generally stored on either a computer hard drive or DVD media its become fairly trivial to retain the original resolution for standard definition TV signals. For HD captures it may be preferable to resize from extremely high resolutions like 1920x1080 to lower ones like 1440x1080 or 1280x720. If you're going to be viewing your video on a TV of some kind its best to stick with at least a standard horizontal resolution of 480 or 576 for standard definition resolutions and 720 or 1080 for HD video.
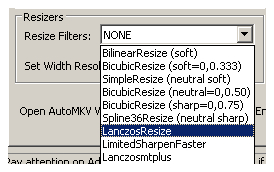
Selecting a Resize Method
From BilinearResize at the top of the list through Lanczosmtplus, the resize filters (used in the auto-generated AviSynth script) are listed by how smooth or sharp the resulting image will be. BilinearResize, for example, will smooth the image a great deal, while LanczosResize or Spline36Resize will result in a much sharper picture. Although sharp pictures tend to look better, they're harder to compress, and generally require a higher bitrate (final file size) than smoother pictures. You may need to experiment with different settings to see what meets your needs the best.AutoResizing
If you want to manually set the resolution to use for resizing you can either set Width Resolution to Original or to a specific value. Alternatively you can visit the Advanced Settings tab for more options. If you set Width Resolution to Automatic AutoMKV will do some additional encoding to determine the "best" resolution to encode at for the target size or bitrate you've set. If you intend to use the AutoResize feature you may want to adjust the quality setting, which can also be found in the Advanced Settings.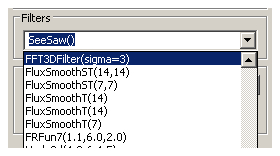
Filters
In addition to all the other things it's used for by AutoMKV, AviSynth can be used to reduce the amount of noise in your video. Noise ranges from scratches on film to random dots that may appear from time to time. Depending on the nature and strength of your denoising filter you may also notice other changes in the image. Typically it will be either smoother or sharper than before filtering. Use these filters in moderation. If your not applying a lot of compression and the source is relatively noise free you're probably better off not using any of these filters.
Although noise can be annoying in some cases, it can also be used as an intentional effect, such as the grain that's visible in movies like 'Saving Private Ryan' or '300', will be treated like any other noise, and while some people prefer to do this in order to decrease the final size, be aware that you can completely change the look of some films this way.
Output File
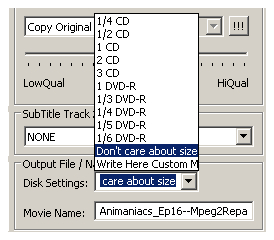 The name will be used to name the output MKV or MP4 file. You can select a size from the list, or even enter your own custom size in MB (MegaBytes). The bitrate for ABR (average bitrate) encoding will be calculated based on this target size. If you'd like to specify the bitrate directly you'll need to do that on the Advanced Settings tab. It will be discussed on the next page.
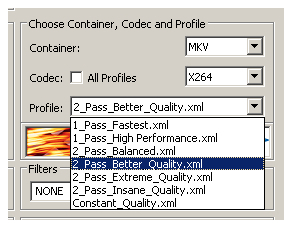
Constant Quality and Target Size
If you're using a constant quality profile and have this set to anything besides "Don't care about size" AutoMKV will attempt to predict the quality setting to use in order to reach the desired output size. This will add an additional encoding step to the final job in order to for AutoMKV to get a sample to set your s before video is encoded, but allows you to encode in a single pass without the quality loss inherent in single pass ABR encoding.Setting Bitrate or Quality Manually
If you prefer to set the bitrate or quality setting (quantizer or CRF) manually you'll need to do that on the Advanced Settings tab unless you select the Constant_Quality.xml profile.
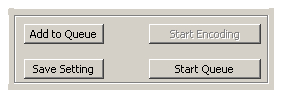
Queue Management
When you have all the settings for your source and output files set you can use the Add to Queue button to create a job and add it to the queue. Clicking the Start Queue button will begin processing jobs in the queue.
Other Settings
If you'd like to look at additional settings for encoding, editing, resizing, and more you can wait to create the job until after visiting the Advanced Settings tab, covered on the next page.
Continued On Page 3Next we'll look at some of AutoMKV's advanced settings, which can be used to get even better video quality than the basic settings alone. Page 3 - Advanced Settings | |
| Convert MPEG-2 Captures to AVC with AutoMKV | You are viewing Page 2 of 3 -- Go to page 1 , 2 , 3 |
Written by: Rich Fiscus
