
| Convert MPEG-2 Captures to AVC with AutoMKV | You are viewing Page 3 of 3 -- Go to page 1 , 2 , 3 |
Advanced Settings
The advanced settings can be particularly important for encoding TV captures. Broadcast television, regardless of the medium (terrestrial, cable, satellite, or IPTV), may have been processed many times, and in many ways in both analog and digital form. It may start out as film, analog videotape, or one of the numerous digital videotape formats, all the way up to those used in Hollywood productions. Between its creation and your capture there may be a lot of chances for poor processing. For reasons of ignorance, incompetence, expedience, or simple transmission issues your video may need some additional processing to get the best encode possible.
Don't be concerned if this sounds too complicated for you. The program is called AutoMKV for a reason. Even more complex operations like resizing and deinterlacing can be automated.
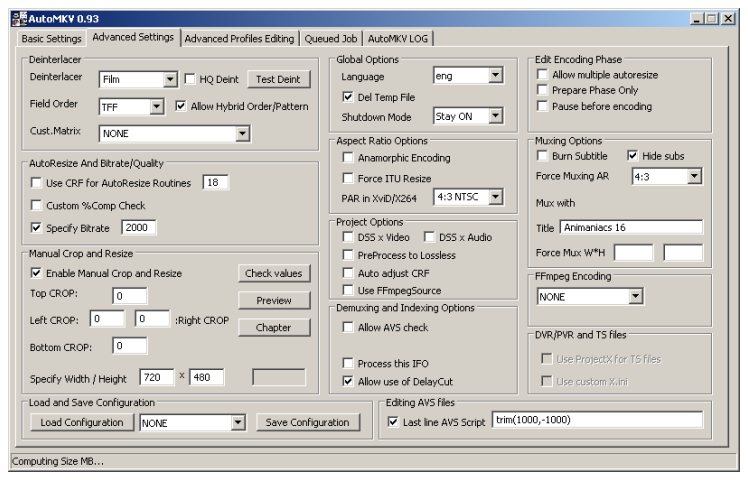
Global Options
If you want AutoMKV to delete the numerous temporary files created during the encoding and authoring process you should check Del Temp File. You can also set AutoMKV to log off from Windows or shut down or reboot your computer when all queued jobs are completed by selecting the appropriate option from the dropdown list. To do nothing leave Stay On selected.
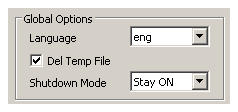
Load and Save Configuration
You may find that captures from particular channels or of particular types of content require the same settings every time you encode them with AutoMKV. If so, you can save them using the Save Configuration button, and load them all at once by selecting the correct INI (configuration) file from the list provided and using the Load Configuration button.
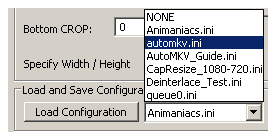
Manual Bitrate and Quality Settings
Rather than setting a target size on the Basic Setting tab you can select a specific bitrate for ABR encoding or Quality (CRF) for Constant Quality encodes.
Deinterlacing
There is no single approach to deinterlacing that works for all sources. The key to getting the best quality possible is knowing as much as possible about your captured video so you can give AutoMKV the best chance to make the right decisions. The biggest benefit to deinterlacing is that progressive video compresses better than interlaced. Additionally, if your source comes from a progressive source originally, such as film that's been telecined for NTSC television viewing, you may also improve overall quality.
Deinterlacing Options
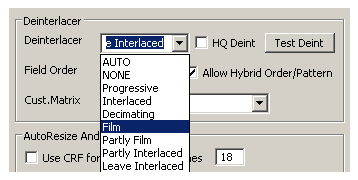
The most important setting to ensure proper deinterlacing is the Deinterlacer dropdown list. If you have interlaced video you wish to leave that way select the Leave Interlaced option. If your video is already progressive and doesn't need deinterlaced you can select NONE. If you're not sure about your captured video you can let AutoMKV try to figure it out for you using AUTO. For other sources see the following list:
| AutoMKV Selection | Type of Source |
| Interlaced | This setting is for true interlaced video. Interlaced video is particularly common in older TV shows and consumer videotape, such as VHS, 8mm, or even DV. |
Film | Film refers specifically to sources that have a telecine pattern, used to convert 24fps film to NTSC's 29.97fps. This involves duplicating half of every other frame. The original film frames can be recovered using a process known as IVTC1. IVTC involves re-creating the original frames from the interlaced fields, and decimating (dropping) 1 out of every 5. The Film setting will output video at 23.976fps. |
Decimating | Some film content may be encoded progressive, but with 1 entire frame out of 5 duplicated, once again to reach 29.97fps. Rather than encoding these duplicates you can select Decimating, which functions exactly like the second step of the IVTC process. Like Film, this setting outputs 23.976fps video. |
Partly Film | If you have video consisting primarily of film, but with some true interlaced video use this option. The same frame matching routine is used as with IVTC (Film), but instead of decimating, progressive (film) frames will be left untouched, while interlaced frames will be blended. The resulting video will remain at the original framerate. |
Partly Interlaced | This setting is for video that's mostly interlaced, but also includes some video taken from a film source with fields duplicated. A regular deinterlacer will be used instead of an IVTC tool. This will result in higher quality for the interlaced portions, and do nearly as good a job at matching up the original film frames as the IVTC filter. As with the Partly Film setting the framerate will remain the same as the original. |
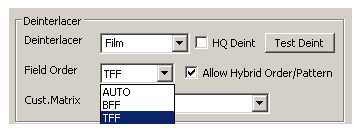
Field Order
If you know the field order you should set it manually to TFF or BFF (Top Field First or Bottom Field First). The correct field order will improve the results from both IVTC and true deinterlacing. If you're not sure you can set it to AUTO. Allowing a hybrid field order or pattern is intended to improve results for sources that either have a field order that changes somewhere in the video or a non-standard pattern for duplicating fields or frames.
HQ Deint
Checking this option adds more complex deinterlacing for hybrid film/video sources, resulting in higher quality. It also requires a significantly longer time to run.Pre-Processing To Lossless
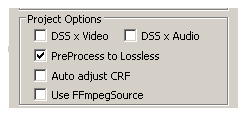
If you're using a 2 pass encoding profile and have a slow AviSynth script such as those created using HQ Deint with hybrid video you might benefit from turning on Pre-Proccesing To Lossless. Before encoding an AVI file will be created with the output from AviSynth losslessy compressed using HuffYUV. This requirs close to 40GB of hard drive space per hour of video, but will prevent AviSynth from slowing down x264 twice (once for each pass of a 2 pass encode). If you're encoding in a single pass this option should be turned off.
Visually Checking AutoMKV's Deinterlacing
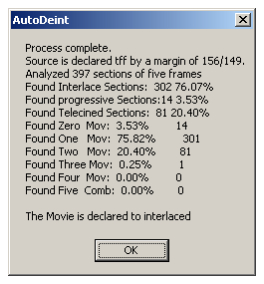
If you're not confident that your deinterlacing settings are correct there are a couple of easy steps to help you out. The first is using the Test Deint button next to the Deinterlacer selection list. AutoMKV will attempt to determine if there are film frames, interlaced frames, or both in your source. You'll get a fairly detailed report of AutoMKV's findings, including a conclusion on the type of video and field order. While this is a helpful guideline, it can also make incorrect decisions due to the way your source has been processed before it even got to you.
The image on the right, showing the results for my source, doesn't see a telecine pattern despite the original source being from film. That means AutoMKV would choose deinterlace rather than performing IVTC. Although the quality of individual frames is actually quite similar, there would be a slight stutter from duplicate frames. Since I know the original source was film that's what I'll select for Deinterlacer.
If you want to make sure your Deinterlacing settings are set optimally you can check out AutoMKV's work before encoding. When AutoMKV disagrees with your own eyes, believe your eyes and adjust the settings accordingly. It's a relatively quick process to test multiple deinterlacing methods.
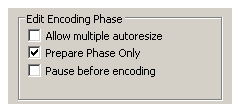
Prepare Phase Only
Since the deinterlacing is all done prior to encoding the video, we only need to generate the AVS file (AviSynth script) that will be used for encoding. In addition to video encoders, AviSynth is supported in almost all media player software. Instead of waiting for the encoding job to finish we can tell AutoMKV to run the Prepare Phase Only. This will create a file called movie.avs. This is the video file x264 will be encoding from. This file is located in a temp folder located inside the Output Folder selected on the Basic Settings tab.
If your software allows you to step through the video one frame at a time you should look closely at each frame. Pay particular attention to the edges of objects, where deinterlacing can often leave jagged lines due to each field in a single frame being in a slightly different position when there's movement in between fields. Since the Preparation requires very little time it's generally not too time consuming to run it multiple times so you can visually inspect the results of different deinterlacer settings.
After you've selected the best settings make sure to turn off the Prepare Phase Only option so your actual encoding job doesn't stop prematurely.
Crop and Resize Settings
In a standard widescreen format designed around HDTVs the video is always assumed to have an aspect ratio of 1.78:1 (16:9). Unless you're encoding your video for authoring in such a format your options are a little more varied. Since most films actually have a wider AR than 1.78 your encodes may benefit from removing black borders around the video to avoid wasting bits encoding them. Most hardware and software capable of AVC playback should add the required borders on-the-fly, although in some cases the image may be stretched to the full height and width of your display.
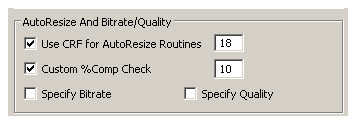
CRF and Autoresizing
AutoResizing encodes a small sample of your movie in CRF (constant rate factor) mode, which gives you guaranteed quality, but unpredictable file size. The size of the entire video when encoded is calculated based on this sample, and a resolution is selected based on on obtaining that same quality at your selected output size or bitrate. Lower CRF values equate to higher quality and possibly lower resolution. You can also change the sample size. Increasing the sample will take more video into account in the test encode, but can significantly increase the time required to AutoResize.
Manual Crop vs. AutoCrop
AutoMKV will crop any black borders off automatically. In order to avoid this you need to check Enable Manual Crop and Resize2. The Preview button will give you a preview window and editor to select the number of pixels to crop from each side and a resolution wil be suggested. You can accept these values or cancel. You can also directly edit these values in the Advanced Settings window, although you won't see the preview.
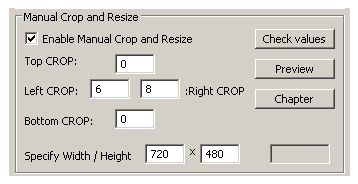
Width and Height
If you've selected Manual Crop and Resize make sure you also enter the resolution you want to end up with. If resizing is necessary to reach your target resolution your selection from the Basic Settings tab will be used.
Aspect Ratio Options3
Both the AVC video stream and the container its muxed into (MP4 or MKV) store AR information used by a player to ensure its displayed in the right shape.
Anamorphic encoding
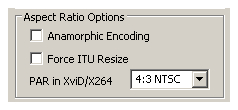
Anamorphic encoding instructs the player to stretch the video on playback. This is how widescreen (anamorphic) DVDs are encoded at full height to avoid loss of detail while still staying within the 720x480/576 frame size. The PAR setting forces the video to have an AR of either 1.33:1 (fullscreen) or 1.78:1 (widescreen). If you use the SAR 1:1 setting instead the video's aspect ratio will be set to match the resolution (width:height).
Use the AUTO setting if you're not sure which option is correct.
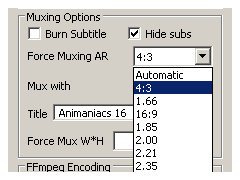
Muxing Options
The containers themselves (MP4 and MKV) also store resolution and AR information. However, you can set it independently for the container. Since most widescreeen movies actually have a wider AR than the 1.78:1 used for widescreen TVs. Common theatrical aspect ratios are 1.66:1 (in Europe), 1.85:1, 2.21:1, and 2.35:1. If you encode a widescreen capture which you've left the extra black borders on (to make the total image 1.78:1) you should always select 16:9 or Automatic. If you decide to crop off these black borders and keep only the portion of the image that consists of the actual movie frame you should set it to the actual AR of the movie. If you're not sure how to set this leave it on Automatic to use the information in the video stream.
Once you've finished setting all the options you can return to the Basic Settings tab to queue your new job and start encoding.
| Convert MPEG-2 Captures to AVC with AutoMKV | You are viewing Page 3 of 3 -- Go to page 1 , 2 , 3 |
1Learn More About IVTCYou can find detailed information about telecine, pulldown, and IVTC in our Digital Video Fundamentals guide on IVTC.(Return) 2Resizing To Square PixelsMany people prefer to resize standard definition NTSC video to square pixels, reducing the resolution, but keeping the same aspect ratio. You may be surprised to find out that this isn't necessarily as simple as using a resolution of 640x480. Our guide on Resizing DVD-Video to Square Pixels has more details.(Return) 3More About Aspect RatiosIf you're confused about resolution and aspect ratio you can learn more about what they are and how they relate to each other in our. (Return) Playing Your AVC FilesNow that you have either a MKV or MP4 file with AVC video you'll need some way to play it back. If you're planning to play it on your computer you'll need to make sure you have the necessary supporting software installed. Fortunately you shouldn't need anything but free tools to do the job. Haali Media SplitterIn our Introduction to Haali Media Splitter we show you how to install and configure support for both MKV and MP4 files for the Windows DirectShow (DirectX) multimedia framework.ffdshowIn ffdshow Installation and Configuration you learn how to install and configure the free ffdshow DirectShow filter to play a number of video and audio formats, including AVC.AC3FilterIn AC3Filter Installation and Configuration you'll get an overview of an excellent free surround sound playback and processing tool for Windows. |
Version History
v1.0 2008.04.04 Original version by Rich Fiscus
previousBasic Settings
Written by: Rich Fiscus
