
| Stream multimedia to Nintendo Wii with TVersity | Viewing Page 1 -- Go To |
Stream Multimedia to Nintendo Wii with TVersity
 The Nintendo Wii console doesn't support much multimedia functionality at all. In fact, it can't even play DVDs, it is dedicated almost solely to gaming. You can play files form a flash memory card in the MJPEG format, but that format is very bulky and simply inefficient. If you have a wireless home network however, then you are in luck. TVersity can use the console's Internet channel to stream content from almost any kind of file (AVI, DivX, XviD, MKV, MP4, MP3, FLAC, AVC, etc.) directly to the Wii over the network in very decent quality.
Introduction & Requirements
| Software you must download and install | |
| TVersity Media Server | |
| Required: Obviously you will need to download and install TVersity for this guide. Download! | |
| FFDShow DirectShow Filters | |
| Required: FFDShow is used with TVersity during media transcoding processes. Download! | |
| Windows Media Player 11 | |
| Optional: Technically option for this guide but still recommended for other TVersity functionality.Download! |
You obviously need a Nintendo Wii console. You need to setup your Wii console on your wireless network in order for this process to work. Please consult the documents you got with the Wii to find out how to do this. The last thing you will need is the Wii Internet Channel, which is a web browser. Read Appendix A: Get the Wii Internet Channel to see how you can get this (you can find Appendix A in the Navigational Bar at the top and bottom of this page, or the table of content at the bottom later too.)
Installing TVersity on Windows
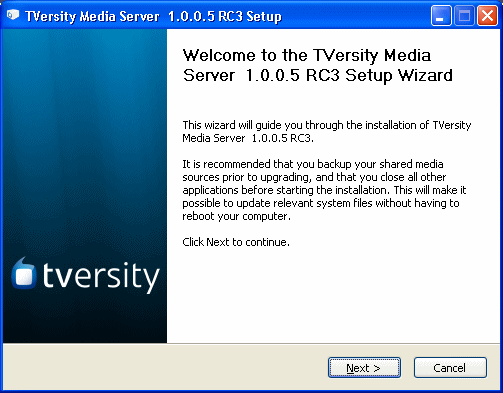
The first thing we will do is look at installing TVersity on Windows. Windows 2000, Windows XP or Windows Vista will do. The first thing you will see is the Welcome message above. Please remember that version updates will come out after this guide has been published and some of the setup pages may be ordered differently. If you find it is too different then you can download the exact version used in this guide (1.0.0.5 RC3) to download on AfterDawn at this link.
- TVersity Installation Steps
- 1. On the Welcome Screen, click Next.
- 2. On the License Agreement, tick the box to accept and click Next.
- 3. On the Toolbar Screen, you will be asked if you want to install the Ask.com Toolbar and/or change your homepage, choose and click Next.
- 4. On the Destination Folder Screen, either leave it at default (C:\Program Files\TVersity\Media Server) or choose your own and click Next.
- 5. File copying commences. Wait until this is complete.
- 6. Make sure the box is ticked to "Run the TVersity Configuration Wizard" and click Next.
TVersity Configuration Wizard
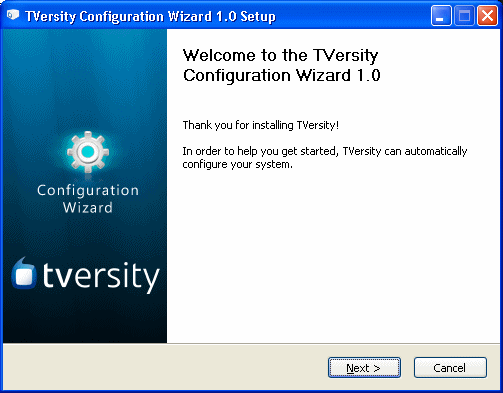
The TVersity Configuration Wizard was introduced when the program moved to v1.0. It makes things a lot easier for new users as it will configure the Windows firewall and let you choose other important Options. When it pops up, you will first see the Welcome message (as above). Click Next to move along.
Configuration Choices
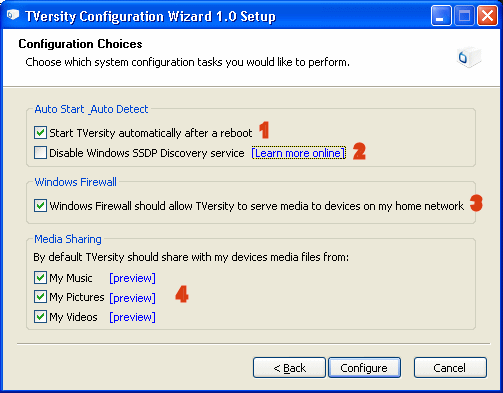
You will now see the Configuration Choices offered by the TVersity Configuration Wizard. I have numbered the options with red text, here is an explanation of each.
- 1. "Start TVersity automatically after a reboot". This means the Media Server will run every time Windows start's up.
- 2. "Disable Windows SSDP Discovery Service". If you have Windows Vista you should select this, but if you do, other Media Center devices won't work anymore.
- 3. "Windows Firewall should allow TVersity to serve media to devices on my home network." Always select this option.
- 4. "Media Sharing". By default TVersity can share whatever you have in your My Music, My Pictures or My Videos folder (slightly different naming under Vista). This is totally your decision.
When you have selected your settings. click the Configure button.
Additional Support
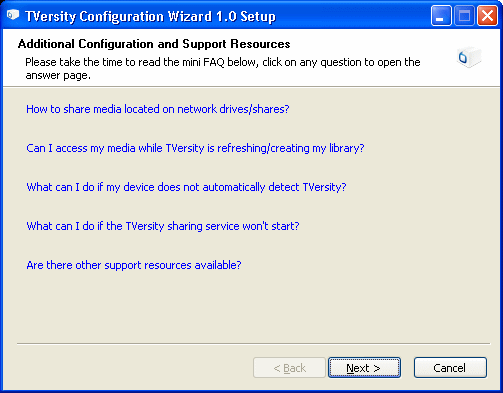
Additional information is now offered. If you click any of these options you will be taken to the official TVersity FAQ. However, everything you will need is already covered in this article with pictures. Click the Next button now and you will reach the final page of the Configuration Wizard. At this point, just click the Finish button to complete the Configuration Wizard. You will now be back at the Setup where you will be asked to install codecs.
TVersity Codec Pack
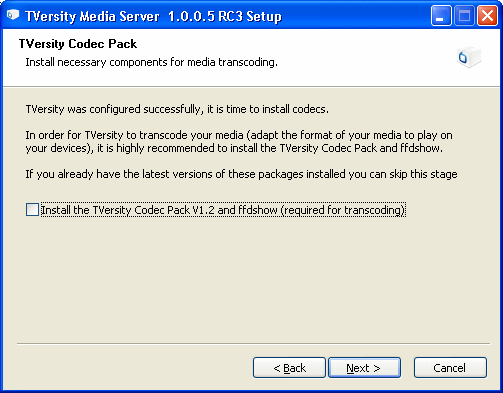
Codecs are needed in order to decode video and audio data on a computer. For this reason, you should have at least ffdshow installed. However, in this guide you will have already downloaded ffdshow from AfterDawn and I recommend that you unselect "Install the TVersity Codec Pack V1.2 and ffdshow". My logic is simple; ffdshow updates all the time and the version you download from AfterDawn will probably be newer than the version distributed with TVersity. Click Next.
Installation Complete
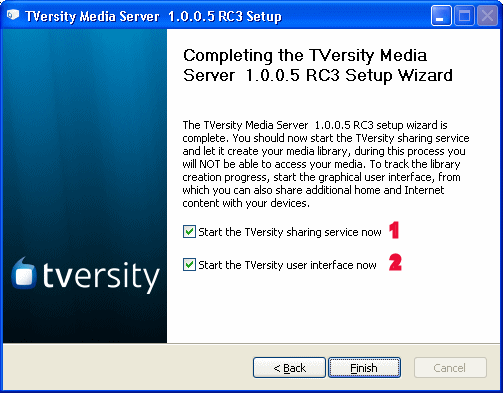
The installation is now complete and there are only two things you have left to choose.
- 1. "Start the TVersity sharing service now". The sharing service is vital and runs in the background, you should select this.
- 2. "Start the TVersity user interface now ". This will open up the TVersity client program where you can choose files and links etc. to share with the Wii console. You can keep this option selected if you wish and TVersity will open when you click Finish, or you can just unselect it and open it from the Desktop or Start Menu later.
- Click Finish
TVersity will now open up a link (http://tversity.com/about/donate/?afterinstall) asking you to donate. This is voluntary, but if you can donate, then please give some money to this project.
Install ffdshow and Windows Media Player
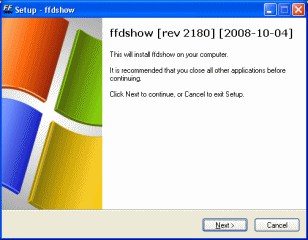 | 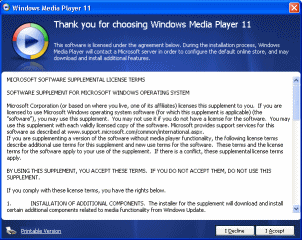 |
You technically do not need to install a newer Windows Media Player version for use with this guide, but it is useful to have for other functionality of the TVersity client. That being said, feel free to skip it's installation but make sure to install the latest version of ffdshow as it is vital to this article.
Both the installations are pretty straightforward. Be aware the the Windows Media Player installation (may require a reboot) will perform a check to make sure your copy of Windows is genuine. If it is not genuine, it will not install. If you did not know your copy of Windows is not genuine (or have gotten a false positive) then check Google for instructions on installing Windows Media Player 11 on a pirated operating system.
What Next?
We have completed the installation part of this guide. You now have to choose what you want / need to do next. You can take a look at TVersity's settings (recommended) or go straight to adding content to TVersity that you would like to watch on the Nintendo Wii. Since the Wii console will definitely need content prepared (transcoded) for it on-the-fly, you should check the TVersity settings on page 2 but it technically should now work to skip right to page 3.
Page 2: Configure TVersity Settings --> I highly recommend you take a run through TVersity's settings to personalize it, but it is possible to skip this part.
Page 3.: Add multimedia to the TVersity Library --> This page covers adding your files, folders and links to TVersity's library, making it possible to share with the Nintendo Wii.
Page 4: Play Shared Multimedia on Nintendo Wii --> When you add content to the TVersity Library, then play it on the Nintendo Wii with these instructions.
Appendix A: Get the Wii Internet Channel --> This is an optional part of the guide for those that need to get the Internet Channel / Web Browser for the Wii console.
| Stream multimedia to Nintendo Wii with TVersity | Viewing Page 1 -- Go To |
Written by: James Delahunty
